
Using the Generate event API resource, you can send events from your website and store them in our system. These events can be used for triggering a workflow or for segmentation purposes.
The method has the following body parameters explained in the table below.
ImportantThe maximum size of content for events sent in the request body is 20 kilobytes. Please contact Support if you need to adjust the maximum size.
| Parameter | Type | Description |
|---|---|---|
| eventTypeKey | string, required | Event type ID key. If no such event type exists with such a key, a new one is created. All characters are allowed except < ; ’ \ / | " ` ' ^ ? ! , > Max length: 100 symbols |
| keyValue | string | Event key. Determines event uniqueness. The key must contain a unique value for each contact (for example, email, phone number, external contact id, etc.) If this parameter is not set, params must contain one of the following contact identifiers:
|
| params | array of objects | List of event parameters represented as an array of "key" - "value" pairs. The parameter keys are arbitrary. Used in campaigns and for creating dynamic content in messages. |
ImportantWhen passing events using the Generate event v3 method, externalCustomerId in params is ignored if it contains the empty or null value. For example, "", " ", " ", "null", null.
You can use this API resource for sending the following requests, as described below.
Using Product Arrays on the Example of an Abandoned Cart Event
Request example:
{
"eventTypeKey": "AbandonedCart",
"keyValue": "2424925572",
"params": {
"emailAddress": "[email protected]",
"cartItems": [
{
"name": "Conditioner for dry hair",
"price": "341",
"url": "https://site.com/conditioner-dry-hair",
"imageurl": "https://site.com/uploads/product/big/20161122/20161122_7zvb.jpg",
"brand": "Le Petit Olivier",
"tags_weight": "200",
"tags_oldprice": "467"
},
{
"name": "Magnolia Nobile Perfumed water",
"price": "2341",
"url": "https://site.com/catalog/perfumed-water-2-750-g",
"imageurl": "https://site.com/uploads/product/big/20161122/20161122_7zvb.jpg",
"brand": "Acqua Di Parma",
"tags_weight": "100",
"tags_oldprice": "4467"
}
],
"recommendedItems": [
{
"name": "Shampoo for dry hair",
"price": "441",
"url": "https://site.com/shampoo-dry-hair",
"imageurl": "https://site.com/uploads/product/big/20161122/20161122_7zvb.jpg",
"brand": "Le Petit Olivier",
"tags_weight": "200",
"tags_oldprice": "467"
},
{
"name": "Magnolia Nobile Face cream",
"price": "1341",
"url": "https://site.com/catalog/face-cream-2-750-g",
"imageurl": "https://site.com/uploads/product/big/20161122/20161122_7zvb.jpg",
"brand": "Acqua Di Parma",
"tags_weight": "100",
"tags_oldprice": "4467"
}
]
}
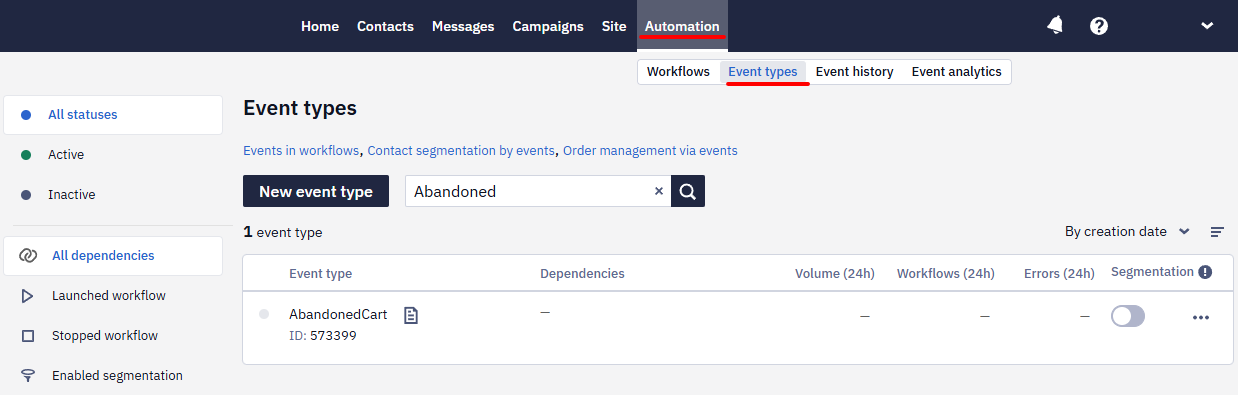
}eventTypeKey is a string identifier for the event type. If it did not exist before, after the first request it appears in the account, and you can see it in the Automation → Event types section.
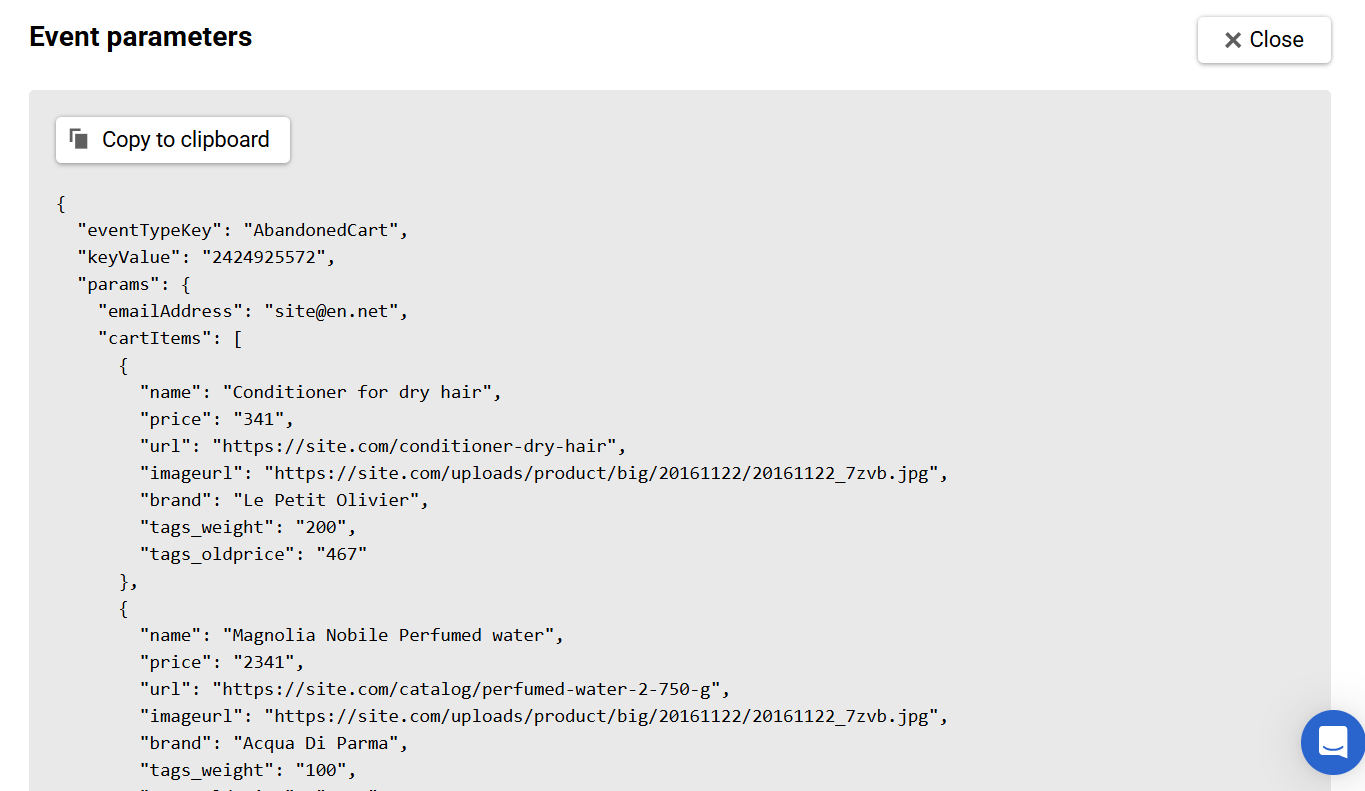
To view the event body, go to Automation → Event history and click the event.
- keyValue is the event key.
- params are event parameters that can be used in a workflow. Their number is unlimited.
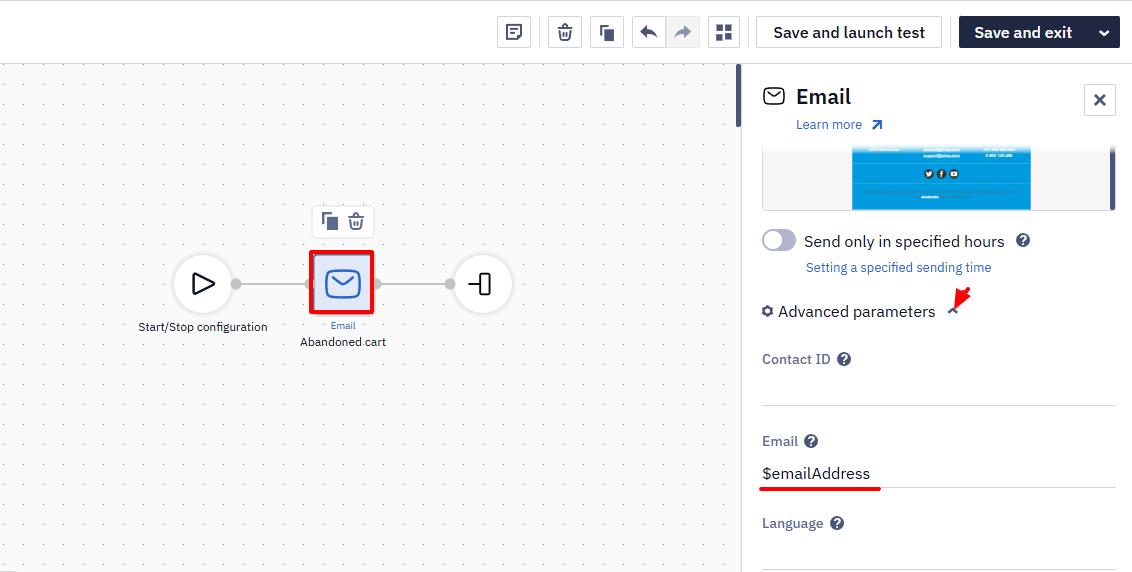
The event must contain a contact identifier, such as email, phone number, or External ID.
In our example, this is the email [email protected]. In the future, you need to refer to it in the workflow by writing $emailAddress in the message sending block to successfully send to the email [email protected]:
The request may contain several arrays. In our example, these are two arrays — cartItems and recommendedItems — containing two products each with a set of variables name, price, url, imageUrl, brand, tags_weight, tags_oldprice. The names of variables are arbitrary.
Event data can be substituted into messages using velocity constructs.
To access the data, you can use a loop specifying the name of the desired array:
#foreach($!item in $!cartItems)
$!item.name
$!item.price
$!item.url
$!item.imageurl
$!item.brand
$!item.tags_weight
$!item.tags_oldprice
#end
You can refer to the array elements straight with the index (order starts at 0). This method can cause errors in content substitution if an element is missing.
First element:
$!cartItems[0].name
$!cartItems[0].price
$!cartItems[0].url
$!cartItems[0].imageurl
$!cartItems[0].brand
$!cartItems[0].tags_weight
$!cartItems[0].tags_oldprice
Second element:
$!cartItems[1].name
$!cartItems[1].price
$!cartItems[1].url
$!cartItems[1].imageurl
$!cartItems[1].brand
$!cartItems[1].tags_weight
$!cartItems[1].tags_oldprice
The number of elements is unlimited.
ImportantVariables are case-sensitive. If an email contains
$!item.imageUrland the request transfersimageurl, the variable will not be inserted.
To view and check dynamic data in an email, click Additional settings → Configuring dynamic content.
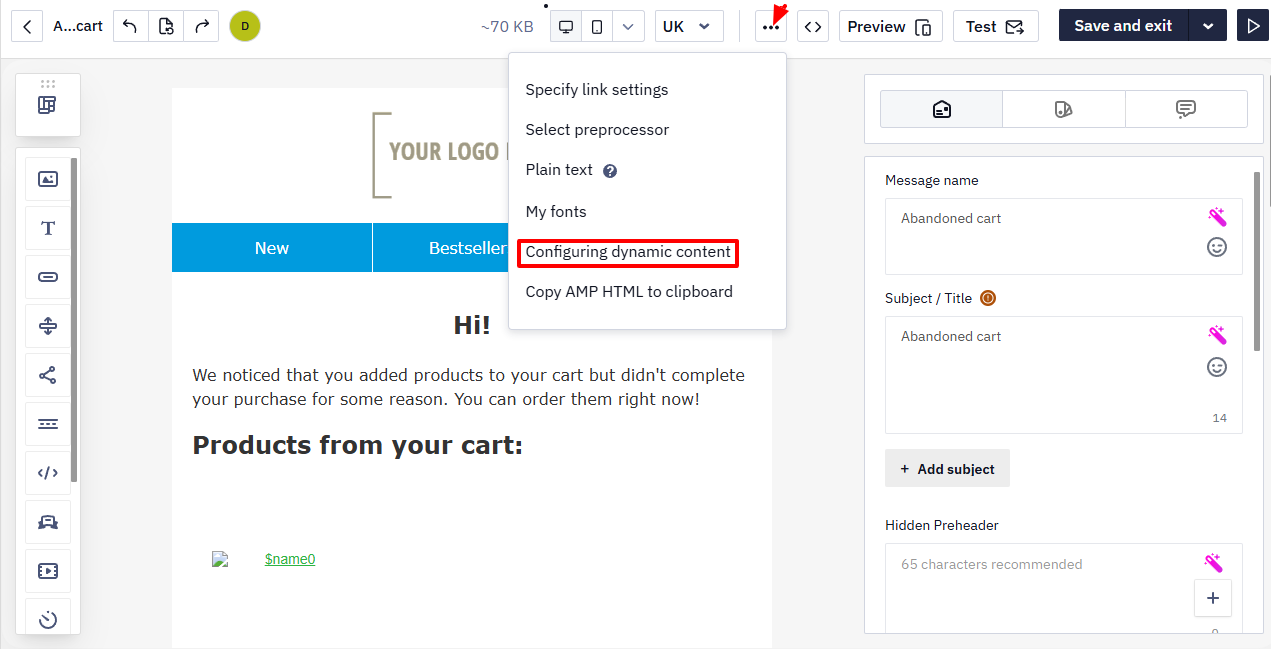
Insert an array with dynamic data and click View message.
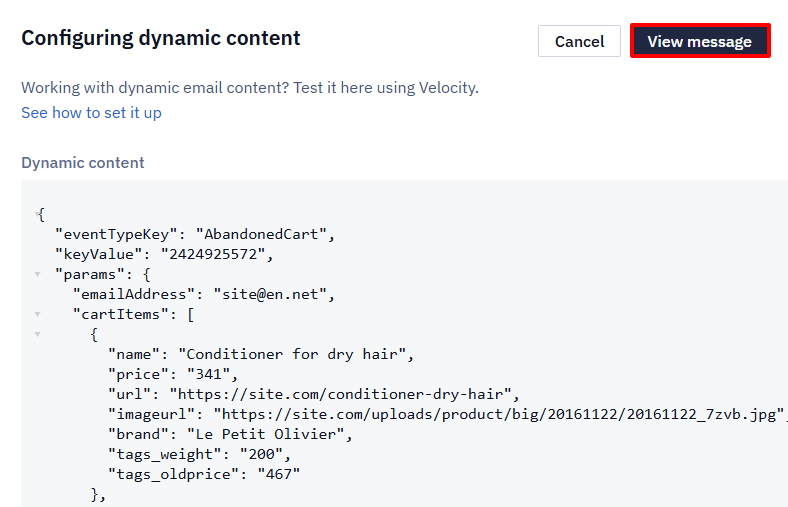
- In case of an error in the dynamic content substitution, check the Velocity syntax in the message.
- If you see the Wrong Format error, check the JSON request body.
- If there are no errors, but the data is not inserted in the preview, check whether the variables in the request and variables in the email correspond and whether variables are referred to correctly.
- If there are no errors and the data is substituted correctly, run a test by sending an API request to the account.
Create or Update a Contact
Request sample:
{
  "eventTypeKey": "create_contact",
  "keyValue": "[email protected]",
  "params": {
    "emailAddress": "[email protected]",
    "phone": "380501234567",
    "externalCustomerId": "AV13760",
    "json": {
      "profileInputs": [
        {
          "profileInputId": 10001,
          "value": "2020-11-23"
        }
      ]
    }
  }
}
where,
- 10001 is the ID of the additional field.
- 2020-11-23 is the value of the additional field.
You can retrieve additional field IDs using the Get additional fields method.
Check that the transferred data comply with the following requirements:
- The name and surname length is up to 60 characters.
- The phone number is in the international format. For example,
+1-541-754-3010. - The value of an additional contact field is in the required format.
If the transferred data contains errors, the system ignores the entire array and does not add or update data in the contact card.
For a workflow to run correctly, in the block Task (Create contact/Update contact), specify a variable $emailAddress in the Email field and a variable $json in the JSON field.
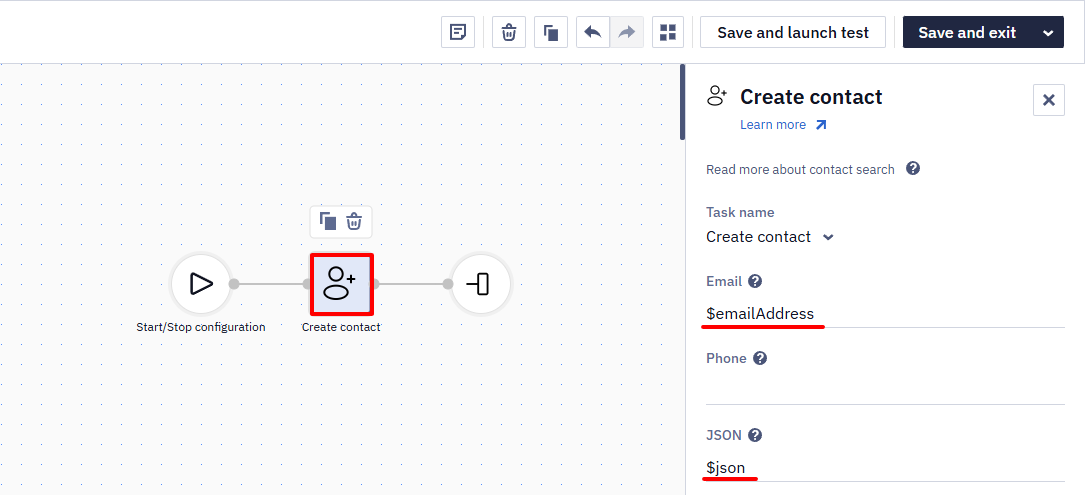
Learn more about the Task block
In addition to that, the Generate event resource can be used to create or update a contact and to trigger a workflow that sends messages with the dynamic content.
Send Transactional Letters
Let's consider the example of launching a password recovery letter.
Request example:
{
  "eventTypeKey": "password_recovery",
  "keyValue": "[email protected]",
  "params": {
    "EmailAddress": "[email protected]",
    "password": "12345678"
  }
}
In the workflow, it is necessary to use the Task - Send obligatory (transactional) email block. Enter the $!password variable in the letter you want to send.
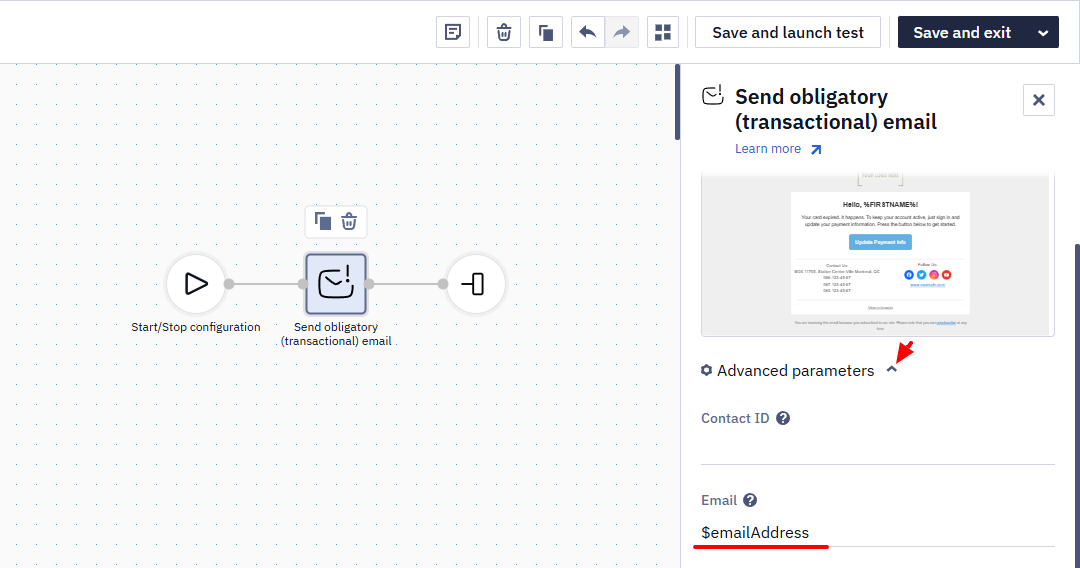
To learn more about the Task block, read this manual.
Validate Contact Data in Events
You can validate the contact data in events using the Generate event v3 API method.
To validate contact data in events, you have to set contactJson in params as a parameter name.
{
  "params": {
    "contactJson": "..."
  }
}
Indicate the data you want to validate in the value field.
Example:
{
  "firstname": "...",
  "lastname": "...",
  "sms": "...",
  "town": "...",
  "timeZone": "Etc/GMT+03",
  "languageCode": "uk",
  "profileInputs": [
    {
      "profileInputId": 10001,
      "value": "..."
    }
  ],
  "confirmed": false
}
When you send this request using the Generate event v3 API method, REST API understands it as receiving a new contact and performs data validation.
If the data is not valid, the method returns the 400 Bad Request response. The response contains the non-valid fields and the error details.
Read Validating event parameters to learn more.
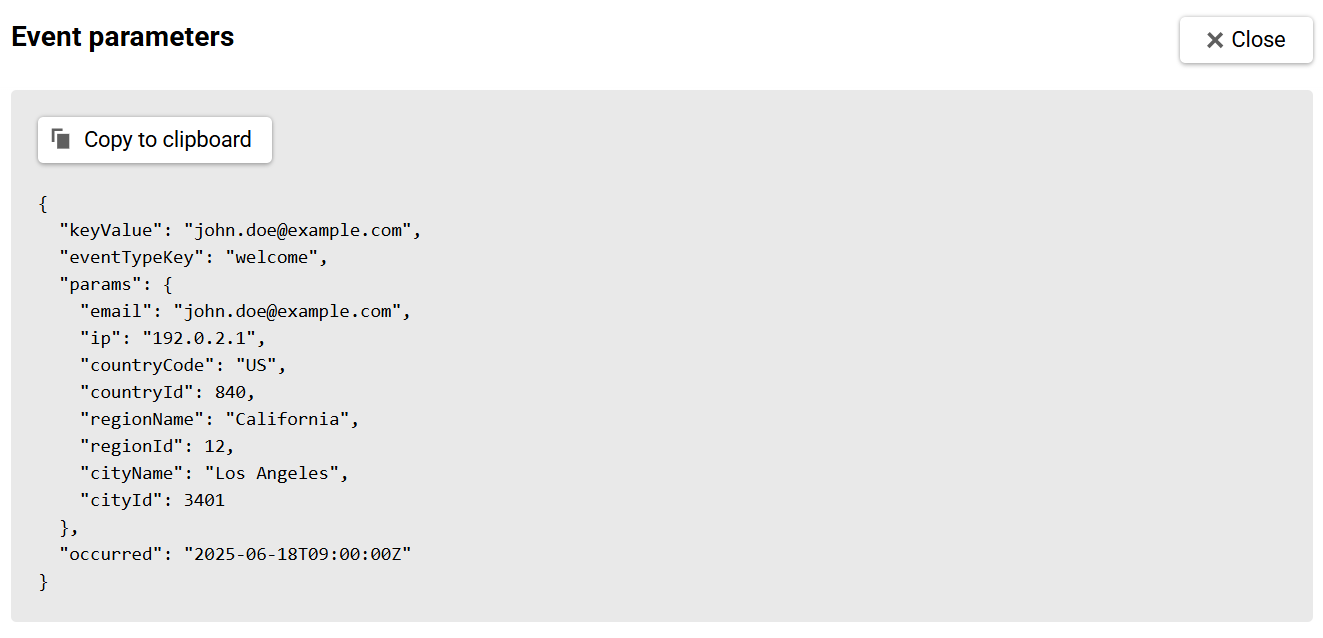
Enriching Contact Profile with Location by IP in Event
Using the Generate event v3 method, you can enrich the event parameters by passing the contact’s IP in params. IP must be in the IPv4 or IPv6 format.
Request example:
{
  "keyValue": "[email protected]",
  "eventTypeKey": "welcome",
  "params": {
    "email": "[email protected]",
    "ip": "192.0.2.1"
  }
}
The event will be enriched with the parameters explained in the following table.
| Parameter | Description |
|---|---|
| countryCode | Country 2-letter code |
| countryId | Country ID in the geographical database |
| regionName | Region name in English |
| regionId | Region ID in the geographical database |
| cityName | City name in English |
| cityId | City ID in the geographical database |
NoteIf the system cannot define region and city by the IP, it defines the country by countryCode event parameter.
The enriched event uses the contact’s location in a workflow.
Also, these values in the event parameters are used for setting or updating the contact's location data.
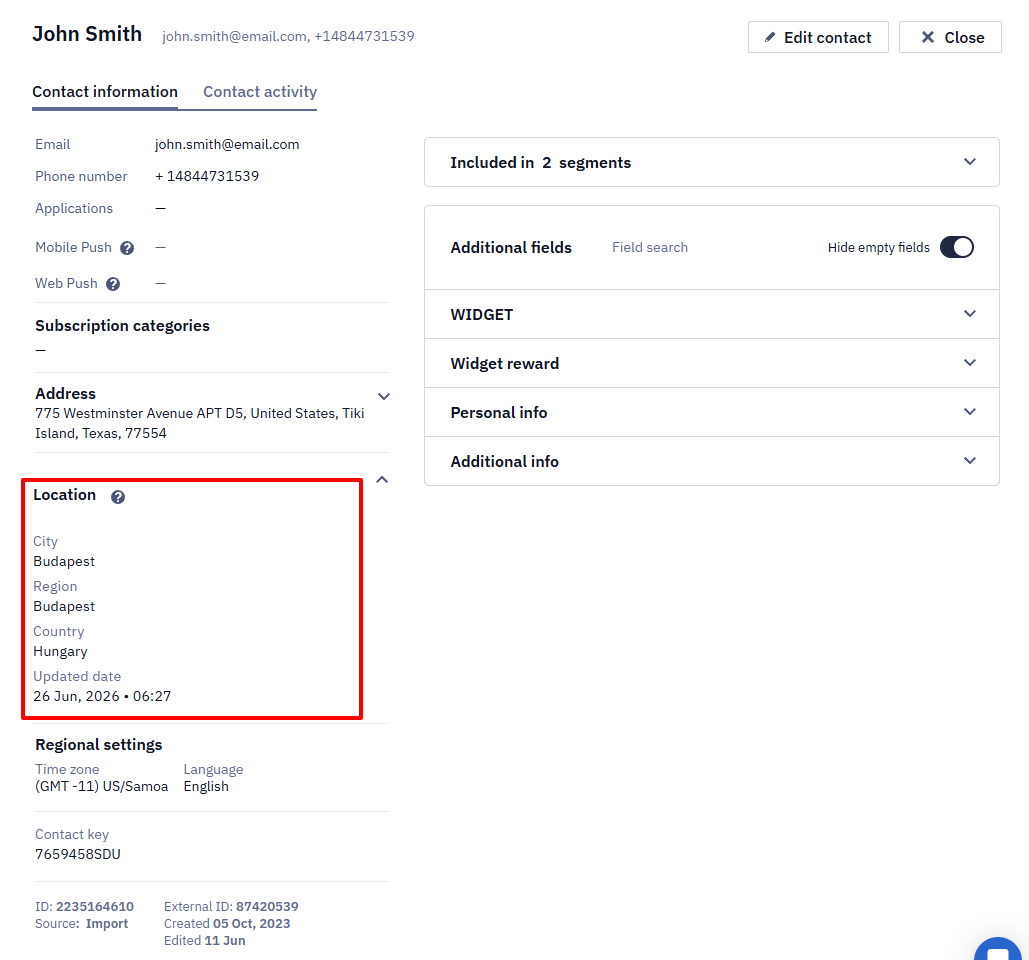
NoteIf the event already contains one of the following parameters, additional fields are not created and the location remains unchanged:
- countryCode,
- countryId,
- regionName,
- regionId,
- cityName,
- cityId.