The UNNotificationContentExtension protocol provides the entry point for a notification content app extension, which displays a custom interface for your app’s notifications.
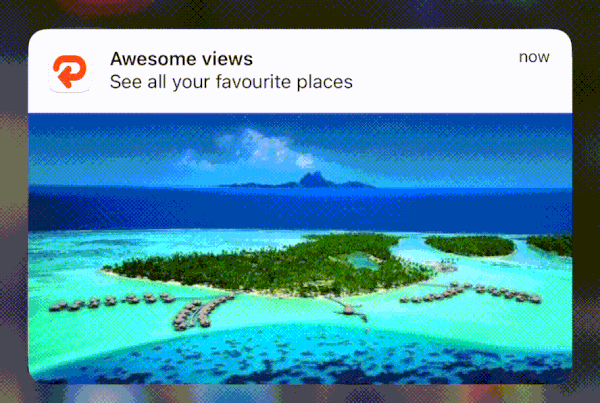
Follow this guide to add an Images carousel to your push notification.
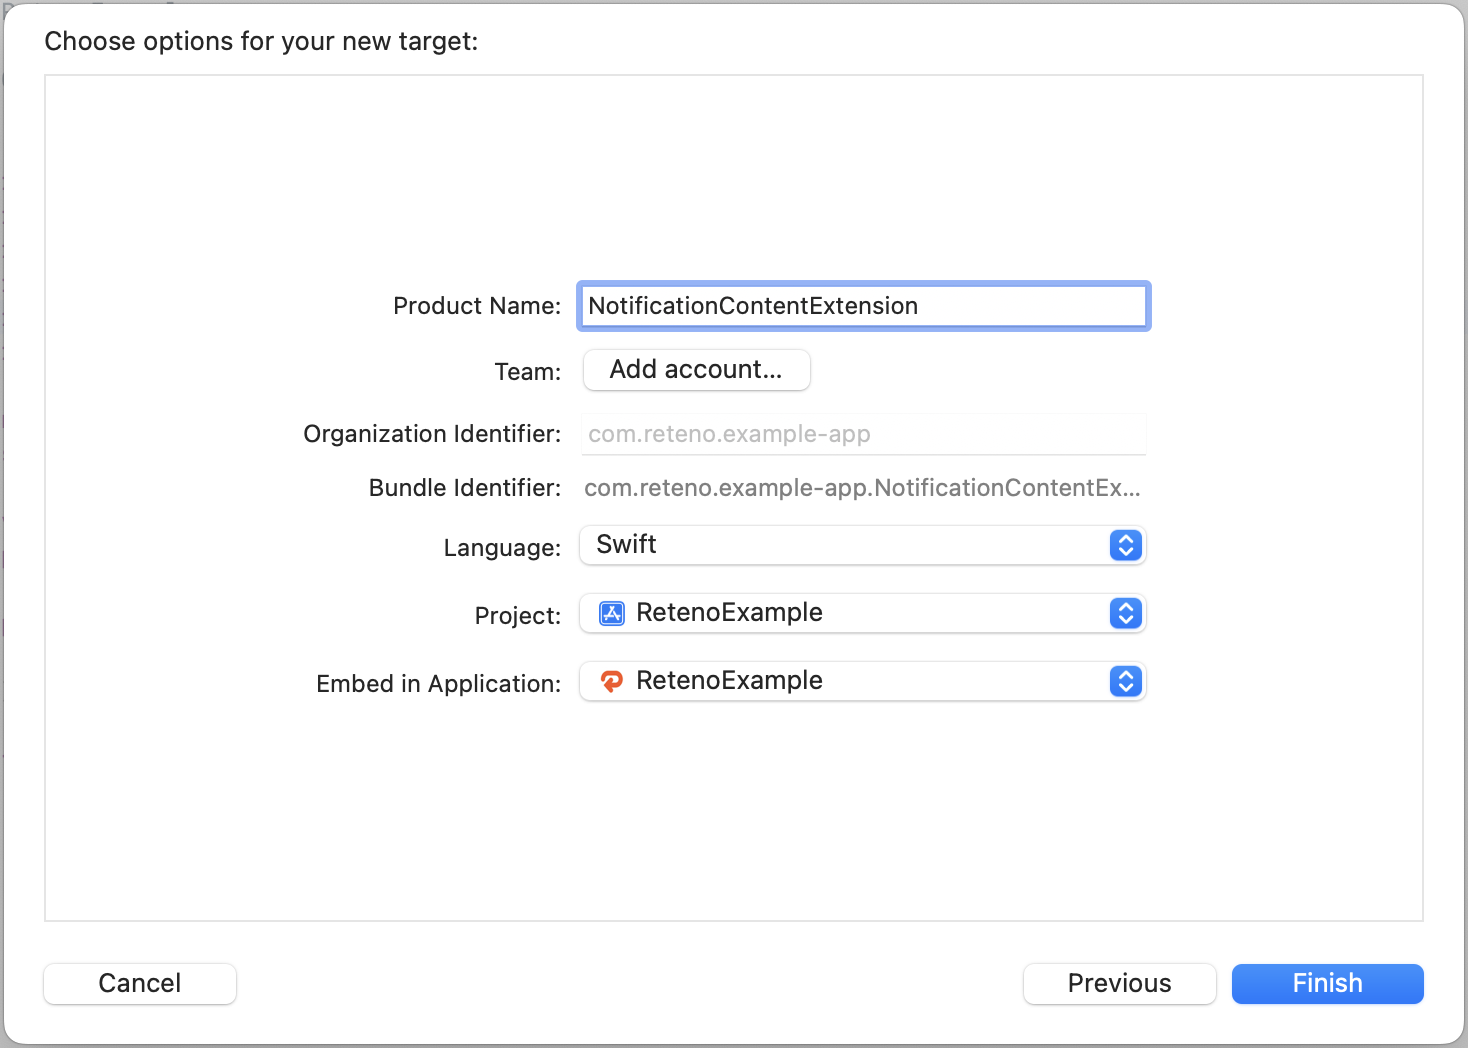
Step 1. Add a Notification Content Extension
In Xcode, select File → New → Target...
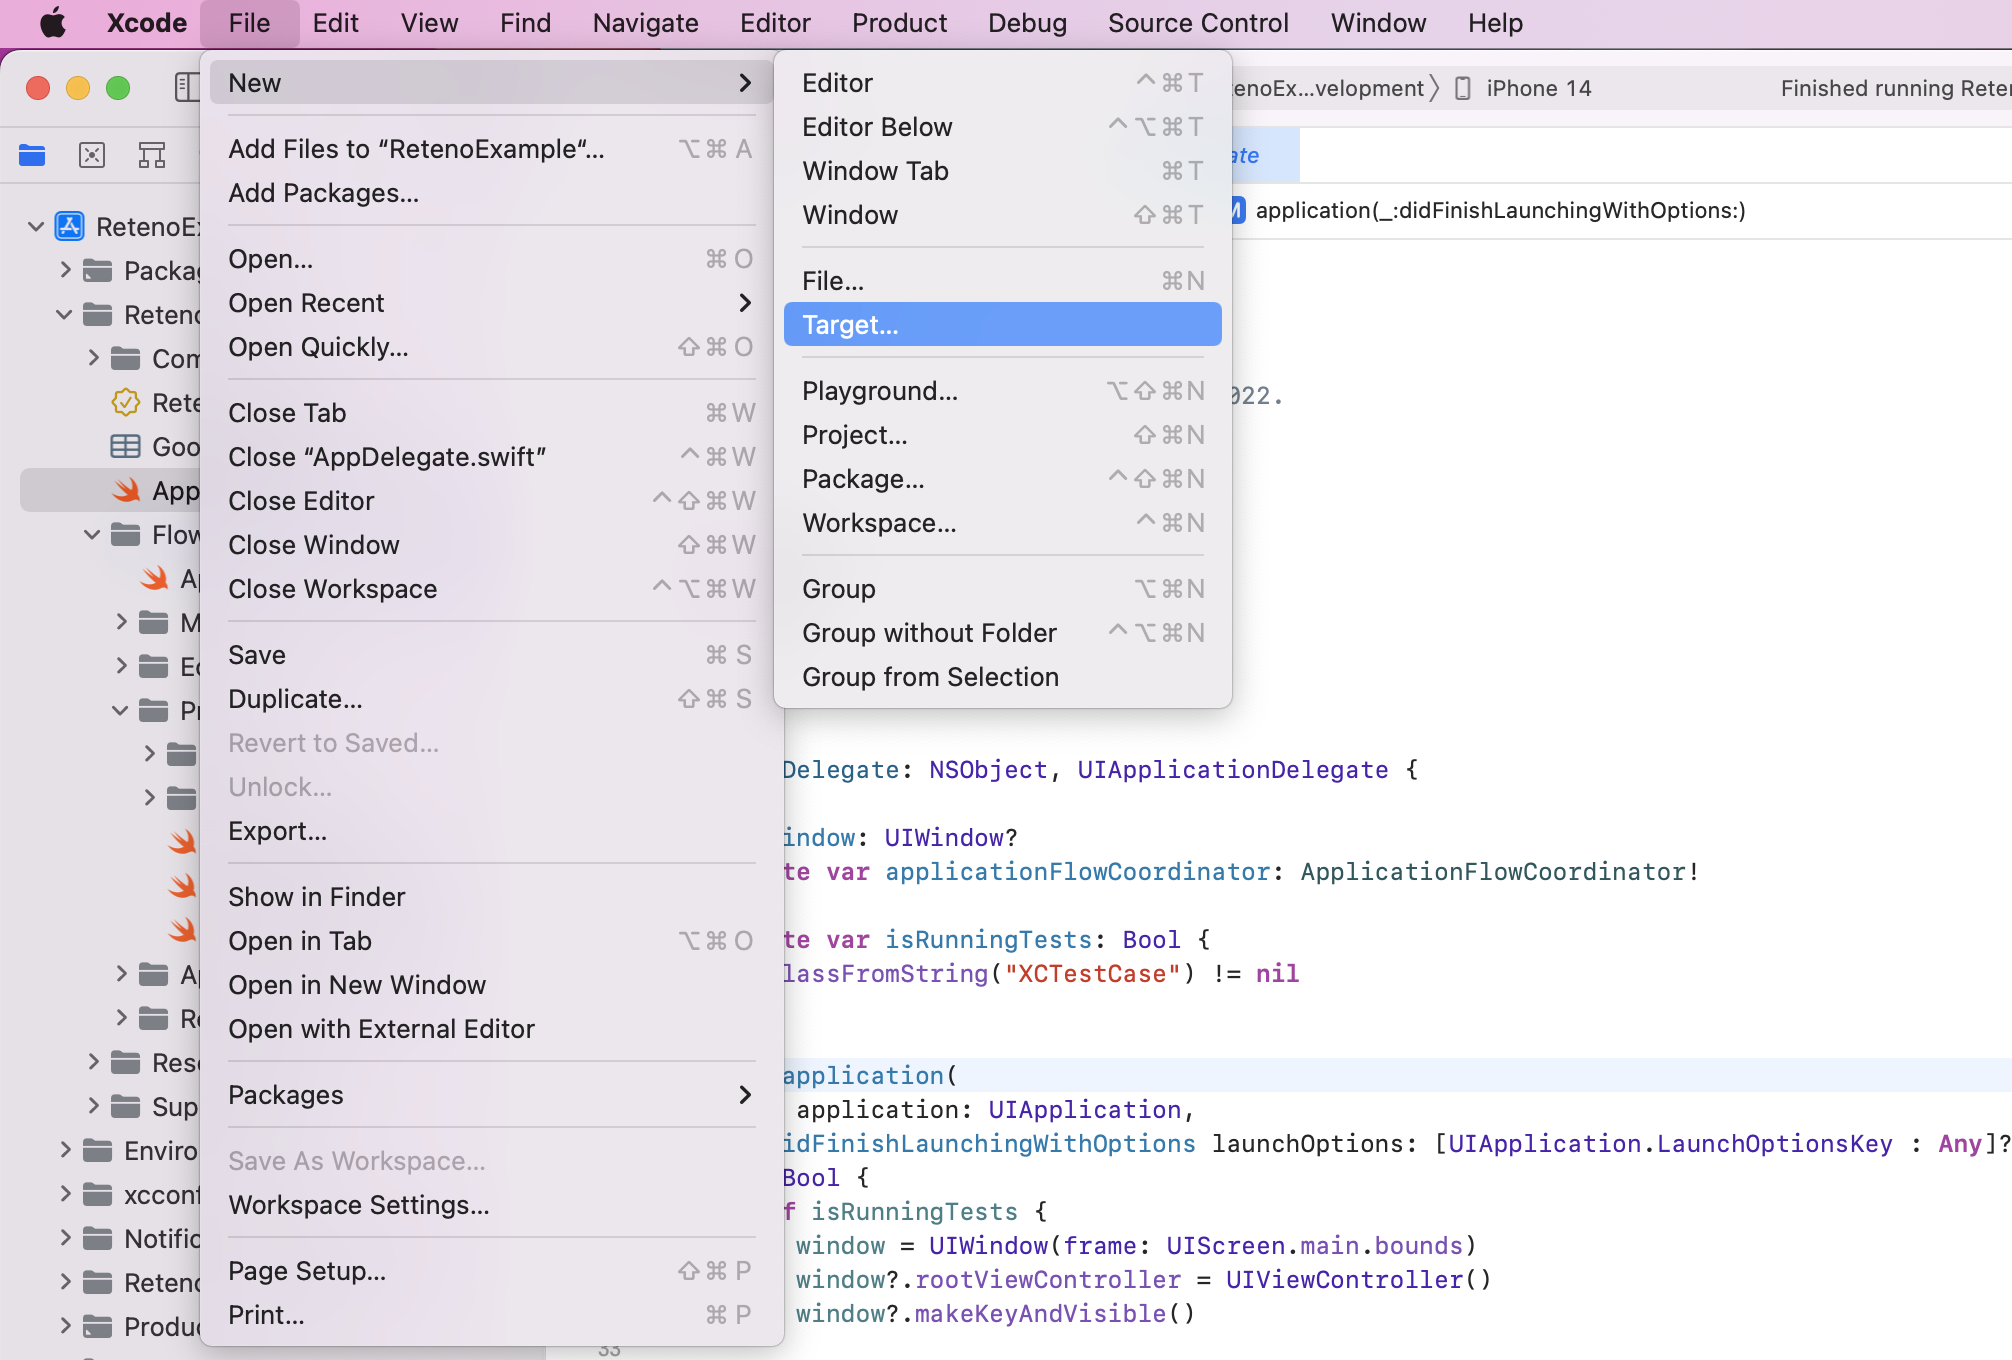
Select the Notification Content Extension
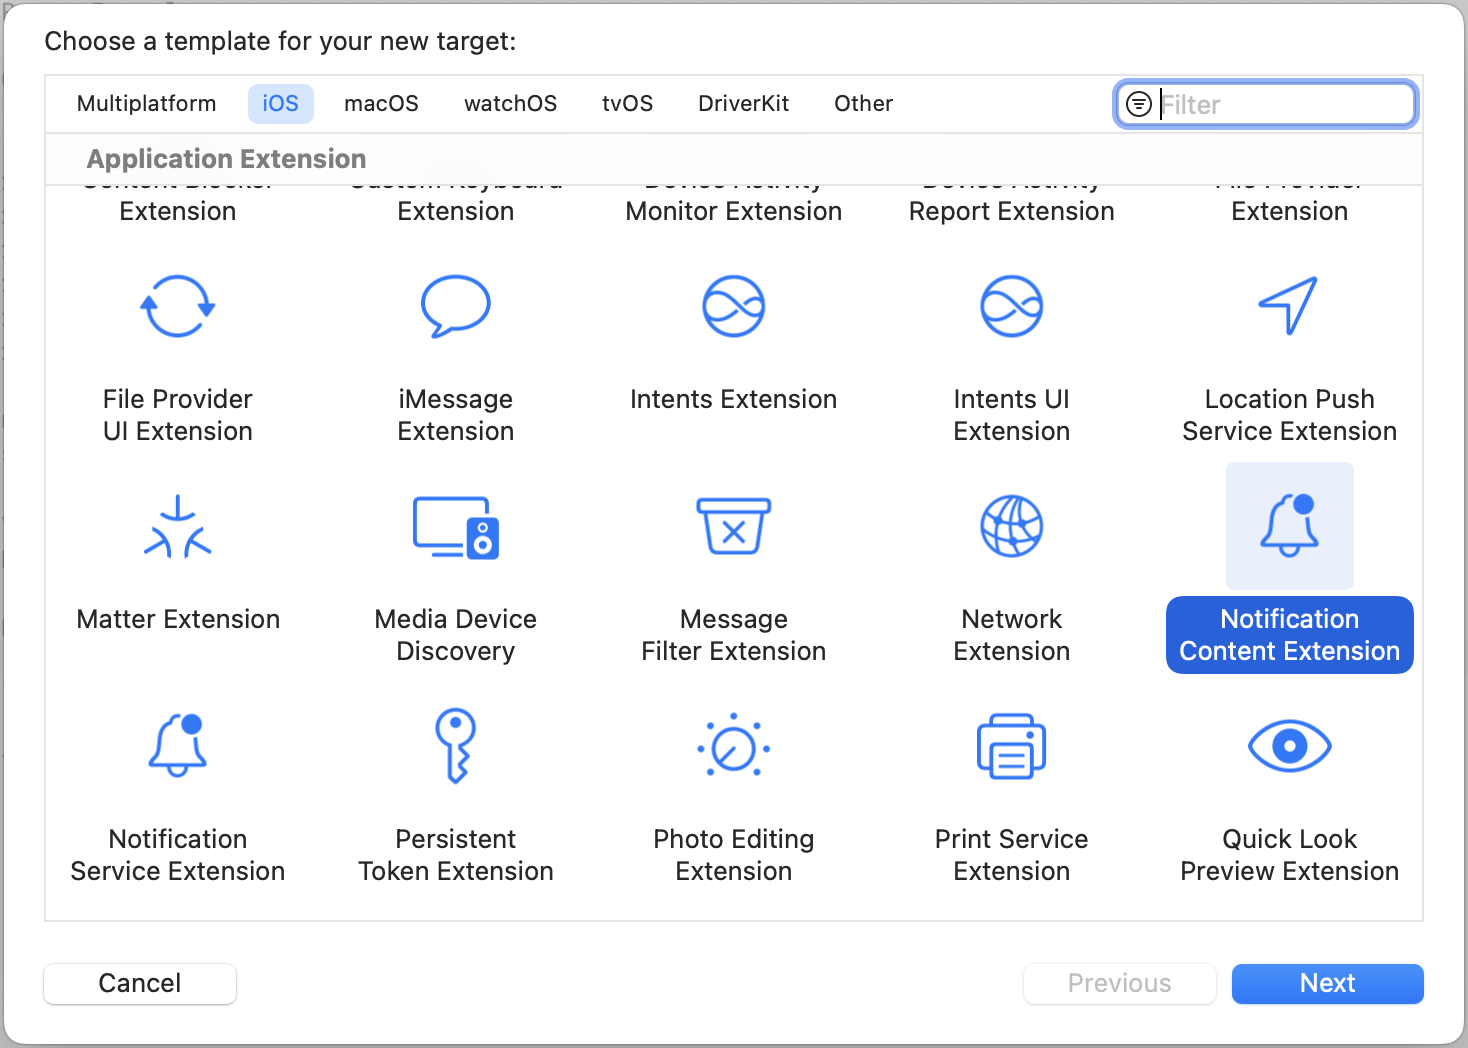
Name it, for example NotificationContentExtension
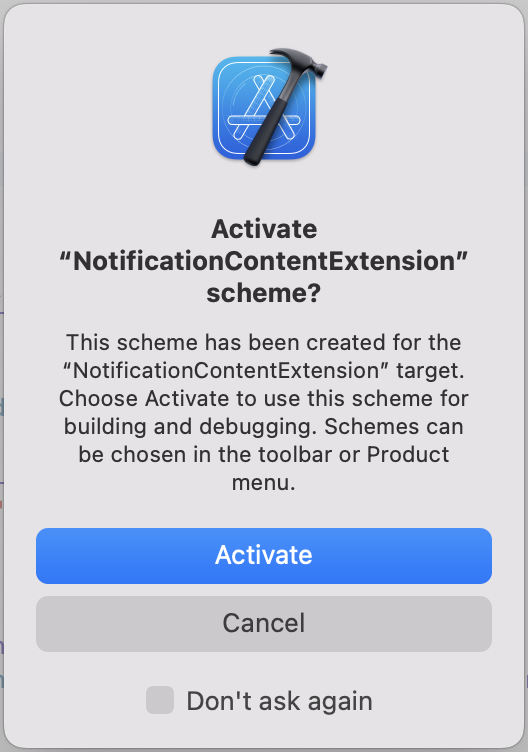
Select Activate to debug the new scheme.
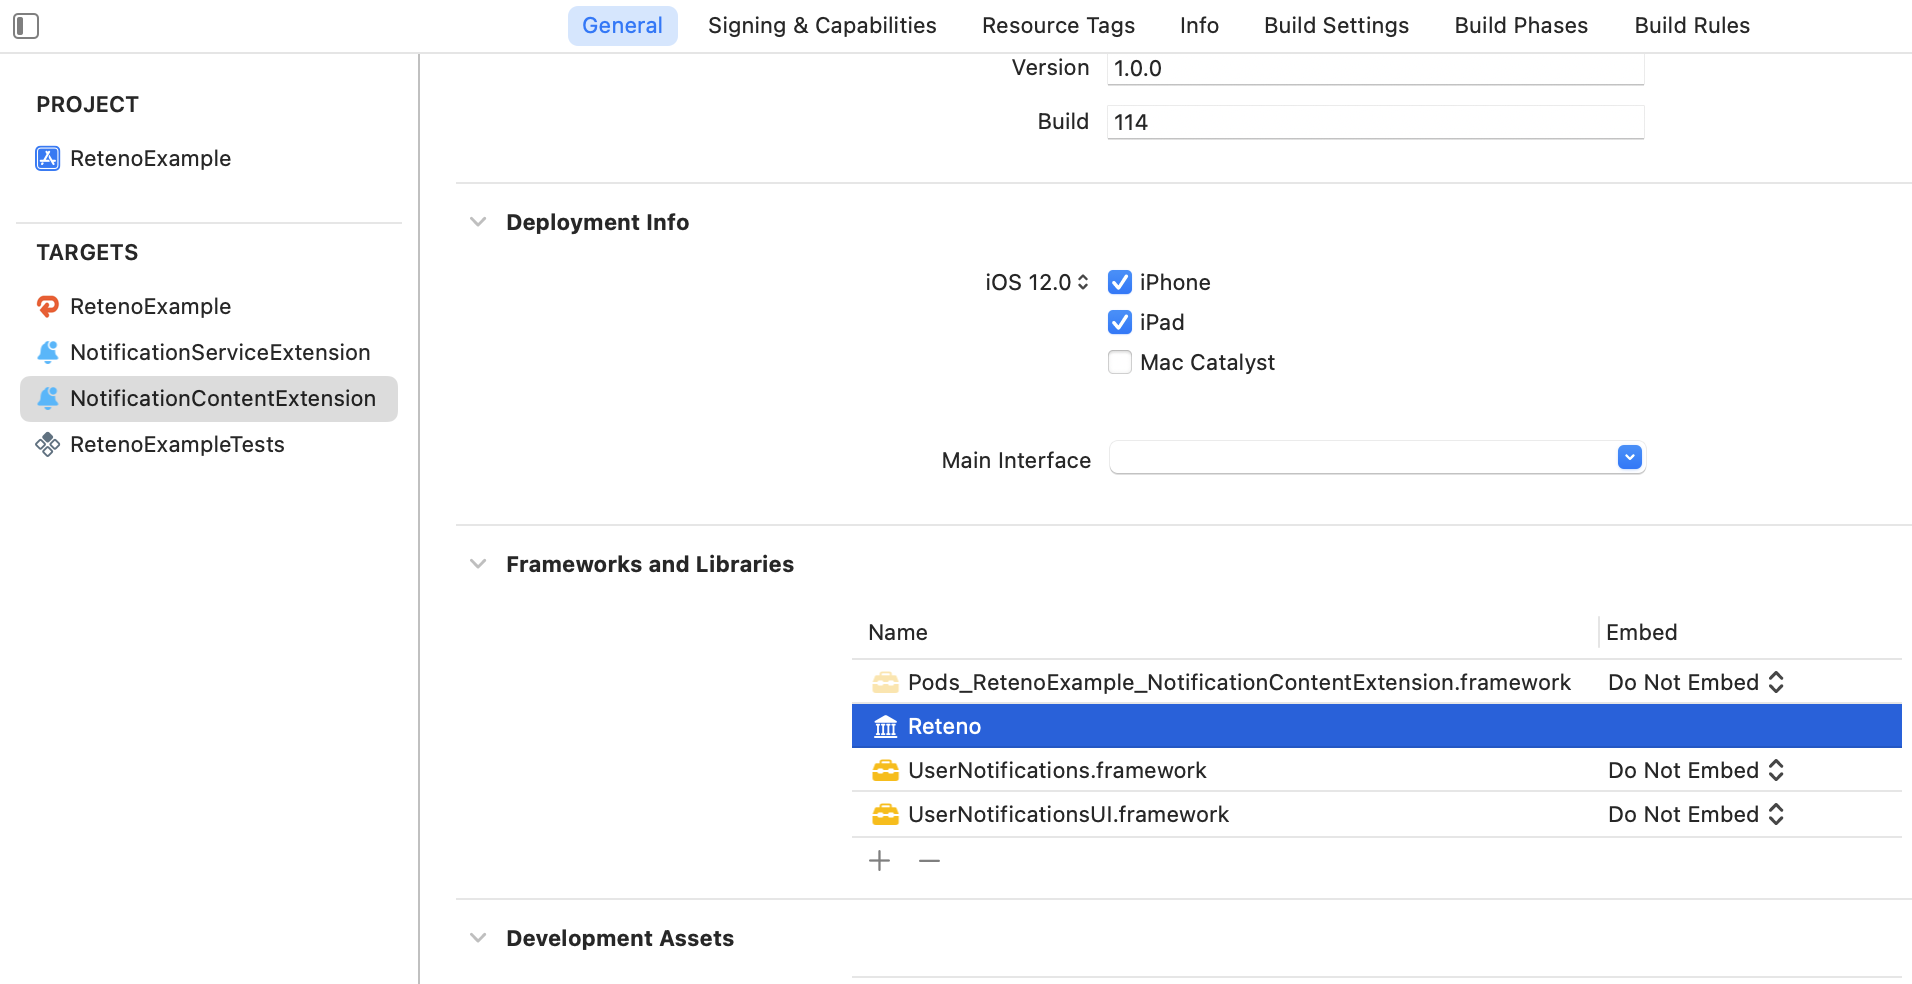
Step 2. Import Reteno SDK to the Content Extension
If you are using Cocoapods, update project Podfile
platform :ios, '14.0'
target 'RetenoExample' do
  use_frameworks!
  pod 'Reteno'

  target 'NotificationServiceExtension' do
    use_frameworks!
    pod 'Reteno'
  end

  target 'NotificationContentExtension' do
    use_frameworks!
    pod 'Reteno'
  end
end
Otherwise import Reteno package in the project settings.
Step 3. Update Extension Files
Remove created MainInterface.storyboard
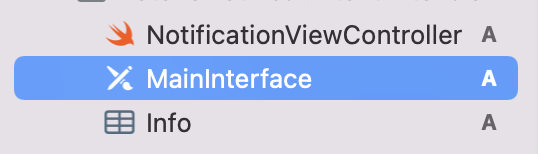
Import Reteno SDK in the NotificationViewController and inherit it from the
RetenoCarouselNotificationViewController
import Reteno
final class NotificationViewController: RetenoCarouselNotificationViewController {}
Step 4. Configure Extension Info.plist File
Go to NotificationContentExtension → Info.plist → Open as > → Source Code and update it's content to the following view
<key>NSExtension</key>
<dict>
    <key>NSExtensionAttributes</key>
    <dict>
        <key>UNNotificationExtensionCategory</key>
        <string>ImageCarousel</string>
        <key>UNNotificationExtensionInitialContentSizeRatio</key>
        <real>0.5</real>
        <key>UNNotificationExtensionUserInteractionEnabled</key>
        <true/>
    </dict>
    <key>NSExtensionPointIdentifier</key>
    <string>com.apple.usernotifications.content-extension</string>
    <key>NSExtensionPrincipalClass</key>
    <string>$(PRODUCT_MODULE_NAME).NotificationViewController</string>
</dict>
For more about keys visit UNNotificationContentExtension
Step 5. Send Your Push Notification
In Reteno account go to the Messages → Mobile Push and configure notification:

Send the Push
Once you receive the push, you will need to long press or swipe left and click View to expand the notification depending on the iOS version.
Troubleshooting
If notification is shown but media attachments are not displayed or a single attachment is shown instead of an images carousel please follow steps below.
Step 1. Double Check Setup Guide
Return to the step 1 of the Setting up the SDK guide and make sure you have correctly added the NotificationServiceExtension. Pay attention to the notes.
Step 2. Use the Latest Reteno SDK
Make sure you are running version 1.5.1 or newer of the Reteno SDK. We recommend upgrading to the major release version of the Reteno SDK.
Step 3. Check Links to the Images
Make sure your attachment URL is a direct link to the image, it can't be part of an HTML page. Also redirects are not supported.
Make sure your URL is HTTPS. HTTP urls will not work unless you set NSAppTransportSecurity to NSAllowsArbitraryLoads in your Xcode .plist.
Make sure your url ends with the correct file extension. If the URL doesn't contain a file extension you can add it as a parameter by adding ?filetype=file.jpg for example to the end of your URL.
Step 4. Check Deployment Targets
If you correctly added the Notification Service Extension and the Notification Content Extension from this guide but images still don't appear, make sure that the Deployment Target in the Extensions matches the deployment target of your application (main target).
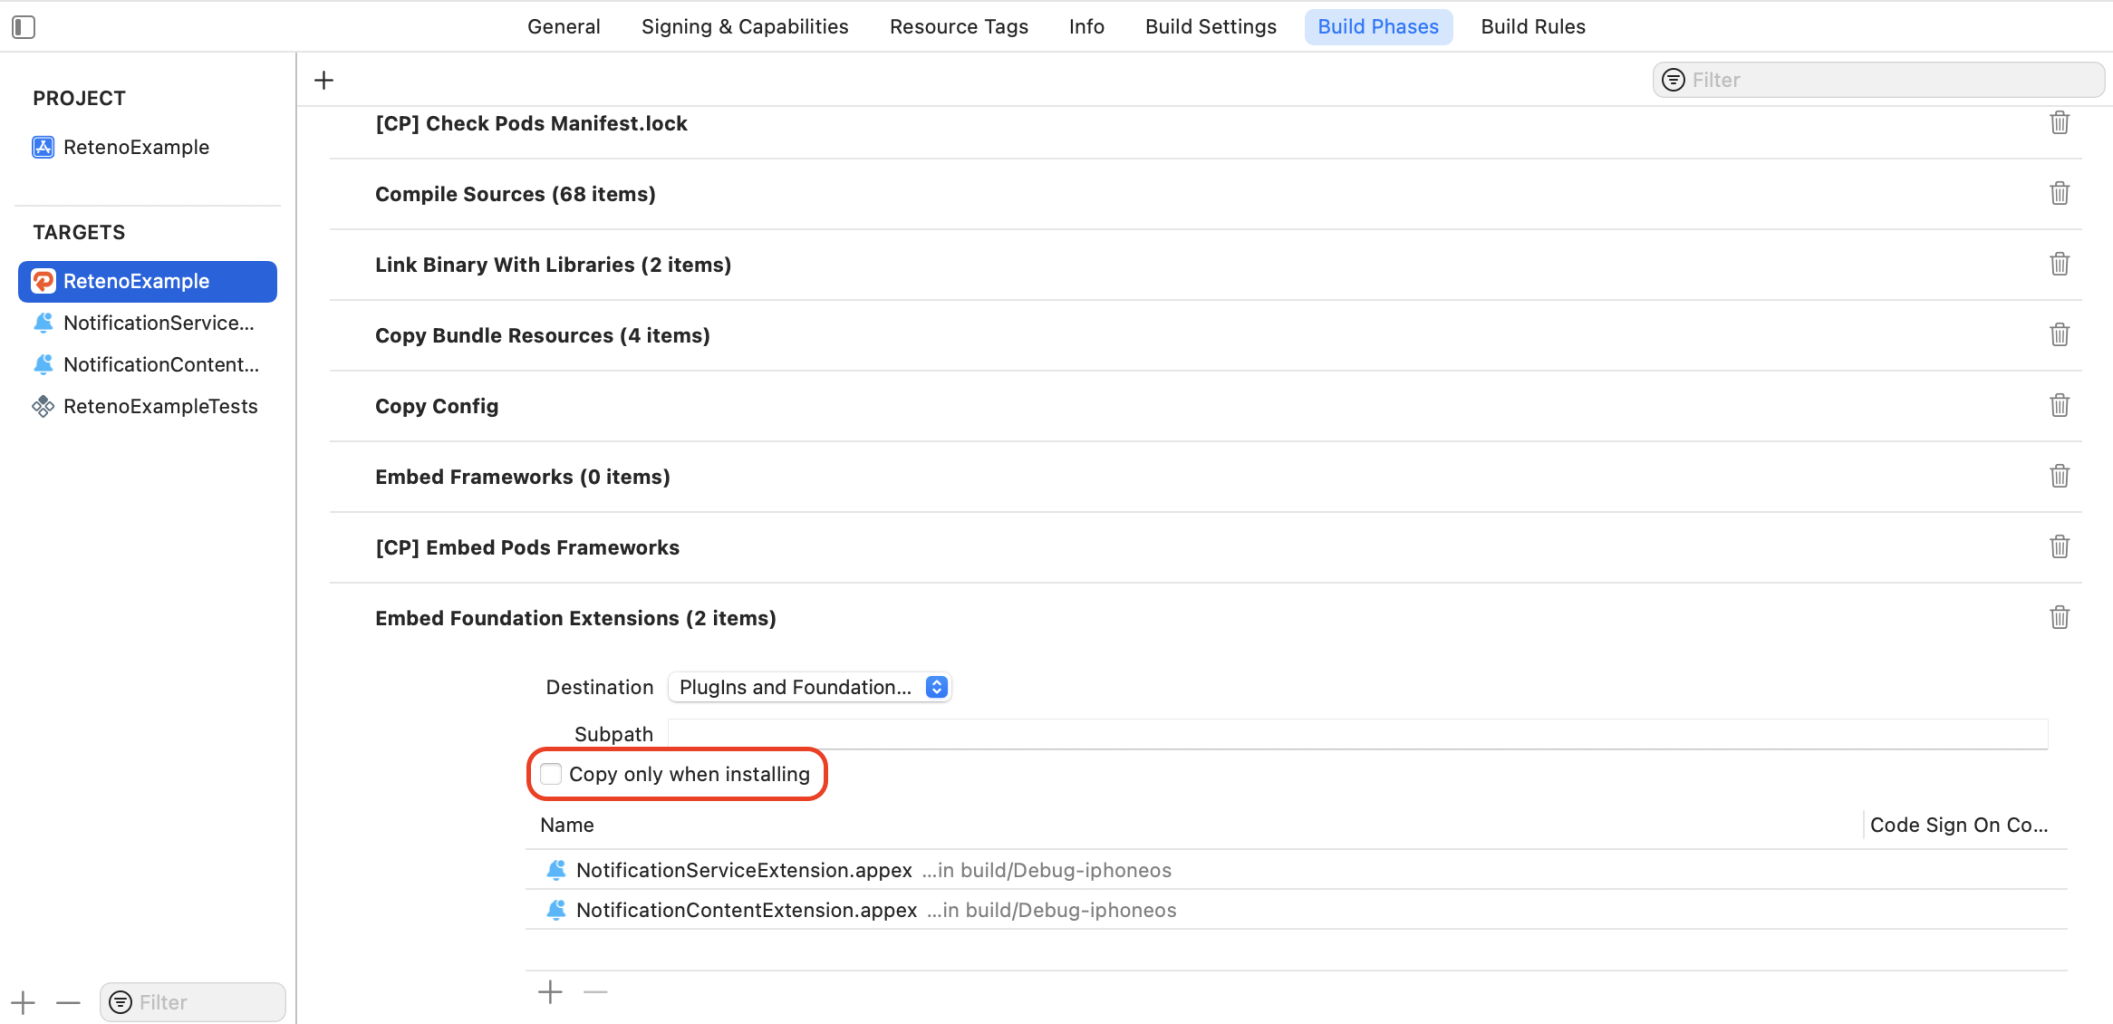
Step 5. Turn off Copy Only when Installing
Select your main target → Build Phases → Embed App Extensions. Ensure Copy only when installing is NOT checked: