
Getting Started with Reteno SDK for Android
- Install
reteno-react-native-sdk:
npm install reteno-react-native-sdk- Add mavenCentral repository in your project level
build.gradle:
buildscript {
    repositories {
    mavenCentral()
    }
...
}- Add
retenoandfirebasedependencies in application levelbuild.gradle:
dependencies {
    implementation 'com.reteno:fcm:(latest_version_here)'
    ...
    implementation "com.google.firebase:firebase-messaging:(latest_version_here)"
    implementation "com.google.firebase:firebase-messaging-ktx:(latest_version_here)"
}| Library | Description |
|---|---|
| com.reteno:fcm | FCM enables push notifications through SDK and all core functionality |
| firebase:firebase-messaging | Firebase cloud messaging |
| firebase:firebase-messaging-ktx | Firebase cloud messaging Kotlin extensions |
Setting up SDK
Follow our setup guide to integrate the Reteno SDK with your app.
Step 1: Enable androidx in your gradle.properties file
android.useAndroidX=true
android.enableJetifier=true
Step 2: Add com.reteno:fcm and firebase dependencies in build.gradle
com.reteno:fcm and firebase dependencies in build.gradle
NoteJava 1.8 compiler is required. In app level
build.gradle:
android {
    compileOptions {
        sourceCompatibility JavaVersion.VERSION_1_8
        targetCompatibility JavaVersion.VERSION_1_8
    }
}
Step3: Initialize SDK in React Native code
Starting from reteno-react-native-sdk v2.0.0, Android SDK initialization is done from JavaScript via initialize(...).
No custom MainApplication integration is required for the basic setup.
Call initialization once in your root component:
import { useEffect } from "react";
import {
  initialize,
  initializeEventHandler,
  registerForRemoteNotifications,
} from "reteno-react-native-sdk";

useEffect(() => {
  const bootstrap = async () => {
    await initialize({
      apiKey: "YOUR_SDK_ACCESS_KEY",
      isDebugMode: false,
      pauseInAppMessages: false,
      sessionDurationSeconds: 900,
      lifecycleTrackingOptions: {
        appLifecycleEnabled: true,
        foregroundLifecycleEnabled: false,
        pushSubscriptionEnabled: true,
        sessionStartEventsEnabled: true,
        sessionEndEventsEnabled: false,
      },
    });

    initializeEventHandler();
    await registerForRemoteNotifications();
  };

  bootstrap();
}, []);
Step 4: Set up your Firebase application for Firebase Cloud Messaging:
-
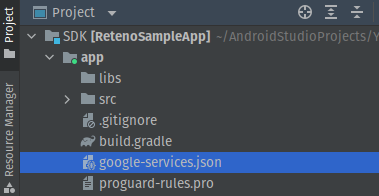
Download your
google-services.jsonconfig file (see how here). -
Add the above file to your root
app/folder.
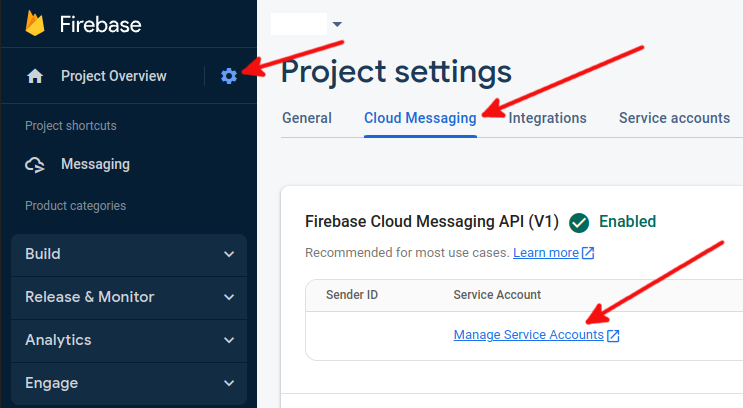
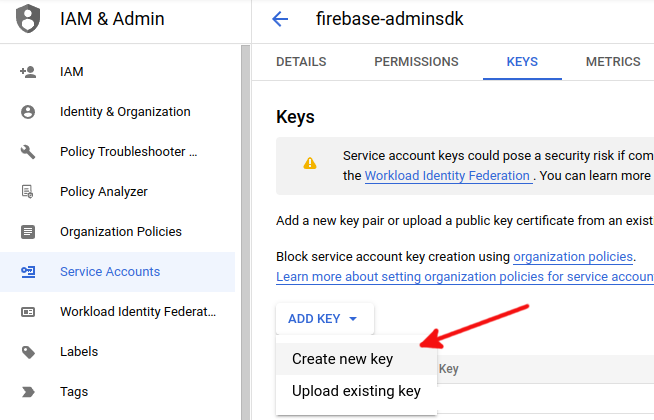
- Copy your FCM Server Key. In the Firebase console, click the gear icon next to Overview, then click Project Settings->Cloud Messaging -> Manage Service Accounts. Go to Service accounts to download
FirebaseAdminSdkaccount's JSON key.

- Follow this manual to set up Reteno admin panel with your Firebase key.
Now you are ready to run your app and send a marketing push notification to your application.
Run your app on a physical Android device to make sure it builds correctly.
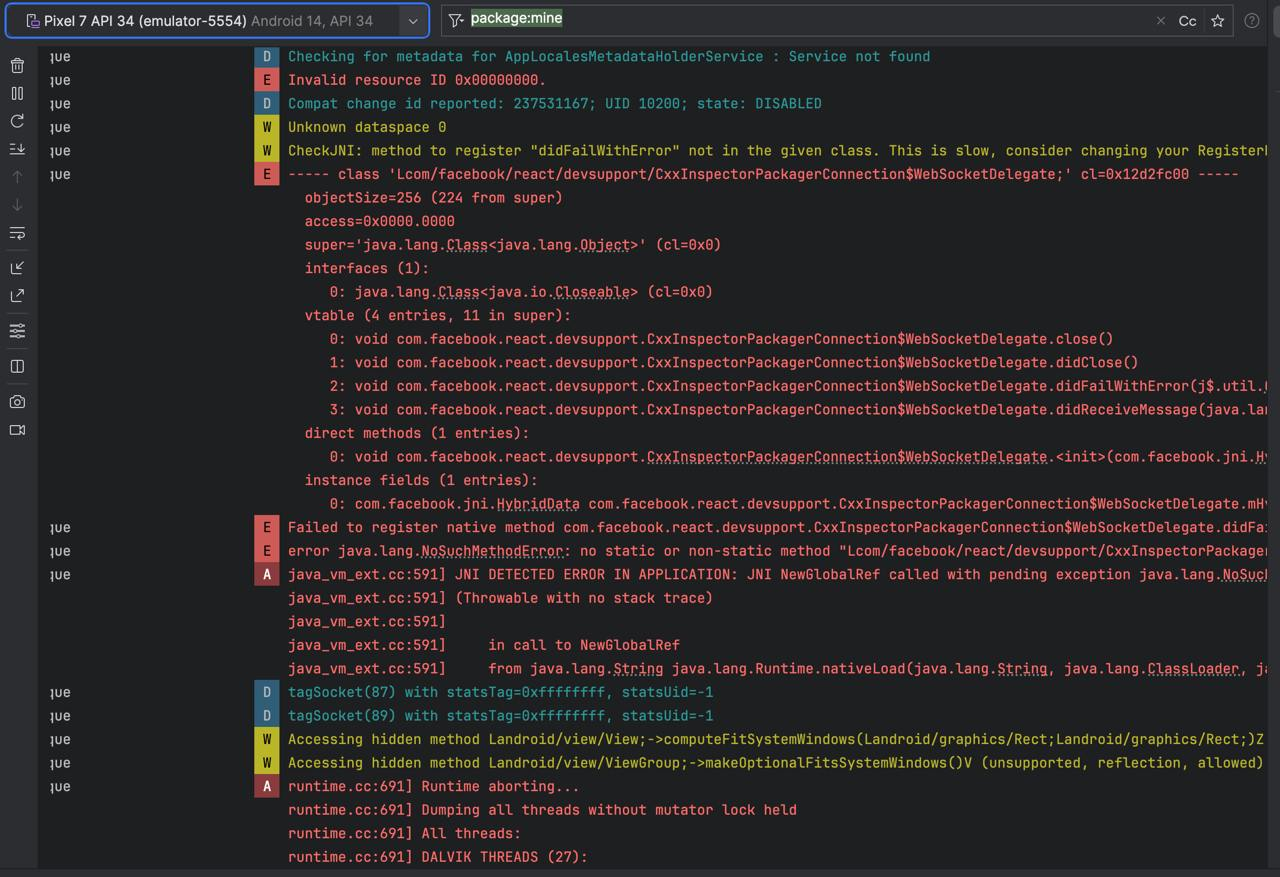
If you get an error like below:
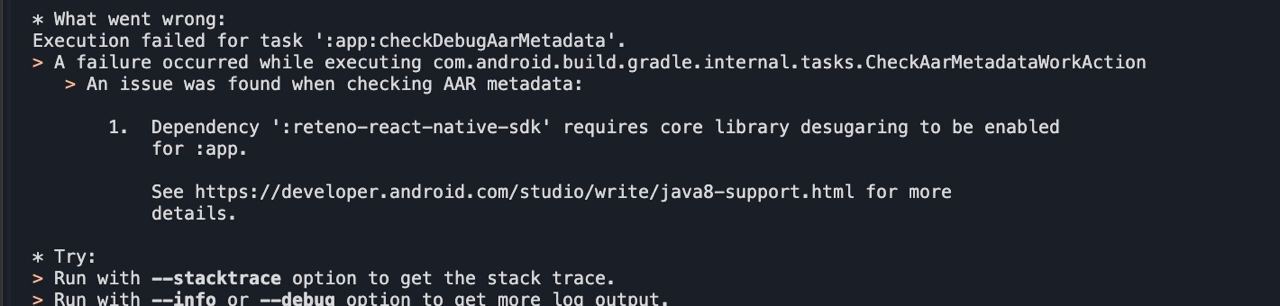
You can fix it by adding coreLibraryDesugaring to your android/app/build.gradle:
android {
    compileOptions {
        sourceCompatibility JavaVersion.VERSION_1_8
        targetCompatibility JavaVersion.VERSION_1_8
        coreLibraryDesugaringEnabled true
    }
}
...
dependencies {
  coreLibraryDesugaring 'com.android.tools:desugar_jdk_libs:(latest_version_here)'
}
If you get an error like below:
It can be fixed by updating react native version in your project to 0.75.4 or higher.
Step5 OPTIONAL If you already use a custom Firebase Messaging service:
If you already use Firebase for Remote notifications and would like to use Reteno as well, you need to Create a custom Messaging Service Class:
In your project folder, create a new Java Class file. You can choose any name for it, we'll use CustomMessagingService.java for the convenience.
And put those contents in this Class. Basically, we override the MessagingService that is provided by firebase, by a custom one, that's extended from RetenoFirebaseMessagingService.
package com.reteno.sample; // <-- make sure to replace it with your package name

import androidx.annotation.NonNull;

import com.google.firebase.messaging.RemoteMessage;
import com.reteno.fcm.RetenoFirebaseMessagingService;

public class CustomMessagingService extends RetenoFirebaseMessagingService {
  @Override
  public void onCreate() {
    super.onCreate();
    // Your code here
  }

  @Override
  public void onNewToken(@NonNull String token) {
    super.onNewToken(token);
    // Your code here
  }

  @Override
  public void onMessageReceived(@NonNull RemoteMessage message) {
    super.onMessageReceived(message);
    // Your code here
  }
}
Then add the above service in your AndroidManifest.xml (.../android/app/src/main/AndroidManifest.xml) inside the application tag:
<service android:name=".CustomMessagingService" android:exported="false">
    <intent-filter>
        <action android:name="com.google.firebase.MESSAGING_EVENT"/>
    </intent-filter>
</service>
So your AndroidManifest.xml will look something like this:
<manifest xmlns:android="http://schemas.android.com/apk/res/android"
  package="com.reteno.sample">

    <uses-permission android:name="android.permission.INTERNET" />
    <uses-permission android:name="android.permission.POST_NOTIFICATIONS" />

    <application
      android:name=".MainApplication"
      android:label="@string/app_name"
      android:icon="@mipmap/ic_launcher"
      android:roundIcon="@mipmap/ic_launcher_round"
      android:allowBackup="false"
      android:networkSecurityConfig="@xml/network_security_config"
      android:usesCleartextTraffic="true"
      android:theme="@style/AppTheme">
      <service android:name=".CustomMessagingService" android:exported="false">
        <intent-filter>
          <action android:name="com.google.firebase.MESSAGING_EVENT"/>
        </intent-filter>
      </service>
      <activity
        android:name=".MainActivity"
        android:label="@string/app_name"
        android:configChanges="keyboard|keyboardHidden|orientation|screenLayout|screenSize|smallestScreenSize|uiMode"
        android:launchMode="singleTask"
        android:windowSoftInputMode="adjustPan"
        android:exported="true">
        <intent-filter>
            <action android:name="android.intent.action.MAIN" />
            <category android:name="android.intent.category.LAUNCHER" />
        </intent-filter>
      </activity>
    </application>
</manifest>
Optional. You may add your default icon and color for all Reteno notifications via AndroidManifest.xml. @drawable/ic_notification is the icon to be displayed, and @color/red_dark is the color of the icon. The only thing is that since Android 12, Material You has appeared - the user can change the color scheme of the entire device as they want. Therefore, the icon color may differ on the latest Android devices.
<meta-data
            android:name="@string/notification_icon"
            android:resource="@drawable/ic_notification" />
<meta-data
            android:name="@string/notification_icon_color"
            android:resource="@color/red_dark" />
NoteAndroid Debug Mode enables you to ensure that all events and user properties are logged correctly.