
Setting Up SDK
Follow this guide to integrate Reteno into an Expo app.
Step 1: Install package
Using yarn:
yarn add expo-reteno-sdkor npm:
npm i expo-reteno-sdkStep 2: Configure plugin in app.json
app.jsonChoose one initialization path.
Path A: Automatic initialization
Set android.sdkAccessToken in the plugin config. The plugin writes it to AndroidManifest.xml, and the SDK initializes automatically with default options.
{
  "expo": {
    "plugins": [
      [
        "expo-reteno-sdk",
        {
          "android": {
            "sdkAccessToken": "YOUR_SDK_ACCESS_KEY",
            "config": {
              "isDebugMode": false
            }
          }
        }
      ]
    ],
    "android": {
      "minSdkVersion": 26
    }
  }
}
If
sdkAccessTokenis set, a laterReteno.initialize()call is a no-op. Use Path B when you need runtime initialization options.
Path B: JavaScript-controlled initialization
Omit android.sdkAccessToken:
{
  "expo": {
    "plugins": [
      [
        "expo-reteno-sdk",
        {
          "android": {}
        }
      ]
    ],
    "android": {
      "minSdkVersion": 26
    }
  }
}
Then initialize Reteno once at app startup:
import Reteno from 'expo-reteno-sdk';

await Reteno.initialize({
  apiKey: 'YOUR_SDK_ACCESS_KEY',
  isDebugMode: false,
  lifecycleTrackingOptions: 'ALL',
});
Step 3: Add Firebase config
Download your google-services.json from Firebase Console and place it to:
android/app/google-services.json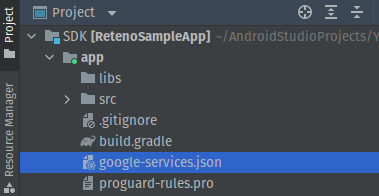
Step 4: Run Expo prebuild
npx expo prebuild --platform androidThe plugin configures Gradle dependencies, Reteno initialization, and Android broadcast receivers in AndroidManifest.xml automatically.
The plugin configures Gradle dependencies, the Reteno FCM service, and Android broadcast receivers automatically. With Path A, it also adds the SDK access key to AndroidManifest.xml.
Step 5: Build and run a development build
npx expo run:androidexpo-reteno-sdk uses native modules and does not work in Expo Go.
Step 6: Configure Firebase server key in Reteno panel
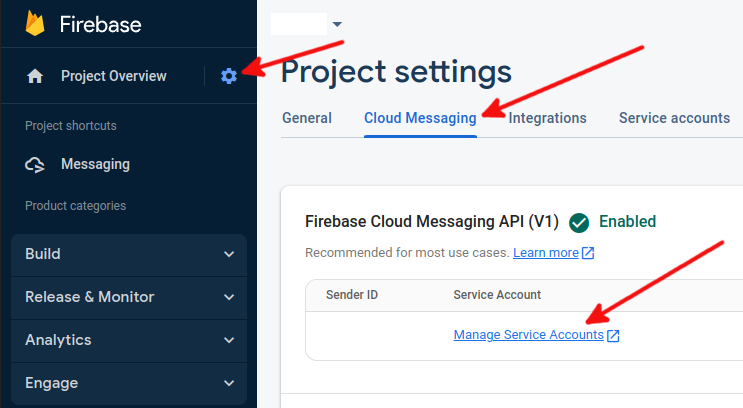
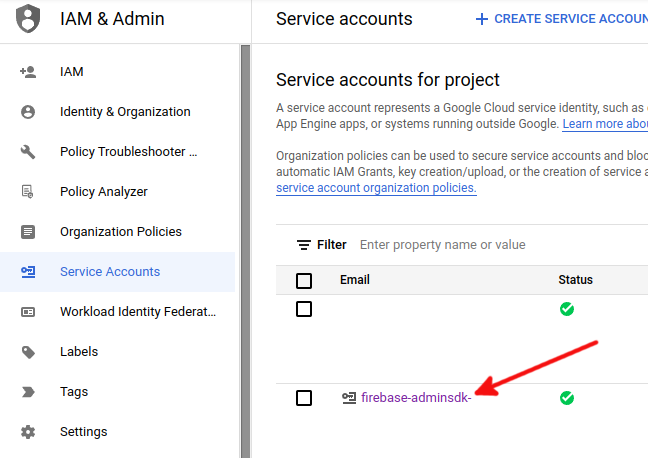
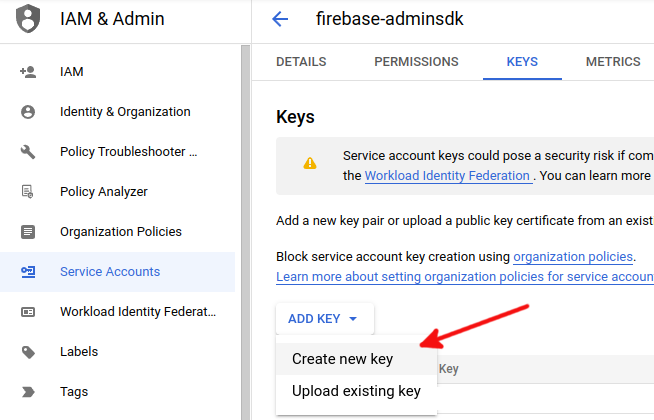
In Firebase console, open Project Settings -> Cloud Messaging -> Manage Service Accounts. Then download Firebase Admin SDK service account JSON and add it in Reteno admin panel.
Follow Reteno manual to complete setup in admin panel.
After that you can run your app on a physical Android device and test push notifications.
Plugin Props
| Prop | Type | Required | Description |
|---|---|---|---|
sdkAccessToken | string | No | SDK access key for automatic initialization. Omit it to initialize from JavaScript. |
config.isDebugMode | boolean | No | Enable SDK debug logging. Only applies when sdkAccessToken is set (Path A). Writes com.reteno.IS_DEBUG_MODE to AndroidManifest.xml. |
notificationIcon | string | No | Since v2.4.0. Drawable resource for the small icon of Reteno push notifications, e.g. @drawable/notification_icon. Writes com.reteno.notification_icon to AndroidManifest.xml. When omitted, the SDK shows its bundled default icon. |
notificationIconColor | string | No | Since v2.4.0. Color resource for the notification icon accent, e.g. @color/notification_icon_color. Writes com.reteno.notification_icon_color to AndroidManifest.xml. |
Notification icon
The Reteno SDK renders its push notifications itself and reads the icon only from its own meta-data keys. It does not use the icon configured for Firebase or expo-notifications. If your app already uses the expo-notifications plugin with icon and color, point Reteno at the resources that plugin generates:
{
  "expo": {
    "plugins": [
      ["expo-notifications", { "icon": "./assets/notification-icon.png", "color": "#ffffff" }],
      [
        "expo-reteno-sdk",
        {
          "android": {
            "notificationIcon": "@drawable/notification_icon",
            "notificationIconColor": "@color/notification_icon_color"
          }
        }
      ]
    ]
  }
}
Otherwise, reference any drawable and color resource that exists in your Android project. Run npx expo prebuild --clean after changing these props.
Values must be Android resource references (@drawable/... or @mipmap/... for the icon, @color/... for the color), and the resources must exist in the project. The plugin writes the values as-is without validating them, so a missing resource or a plain name such as notification_icon makes the Android build fail.
Notes
- Required Android
minSdkVersionis26. - If you use Kotlin DSL (
build.gradle.kts), some plugin patches may require manual Gradle setup. - After upgrading to v2.0.0, run
npx expo prebuild --cleanto apply the updated manifest and FCM service configuration.