
File Uploading
Upload information about your customers or subscribers and use this data for targeting and segmentation.
File Uploading
-
Prepare a contact list in one of the following formats:
XLS,XLSX,CSV, orTXT. The file must include phone numbers or emails — identifier fields by which the system recognizes unique contacts. -
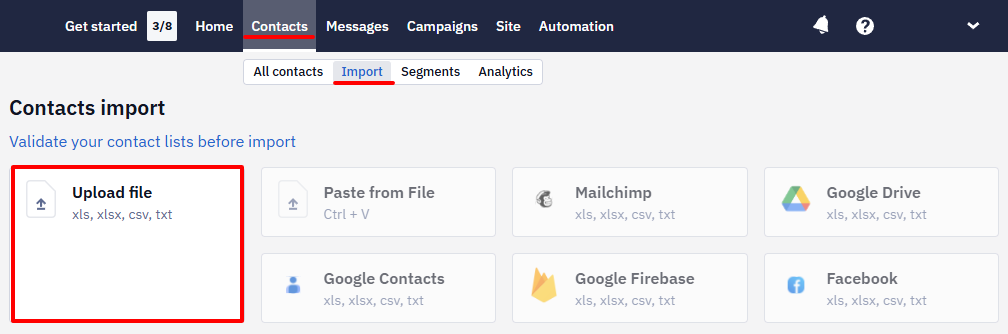
Go to the Contacts → Import tab and click Upload file.
- Drag the file to the upload area or click on it to upload the contact information file.
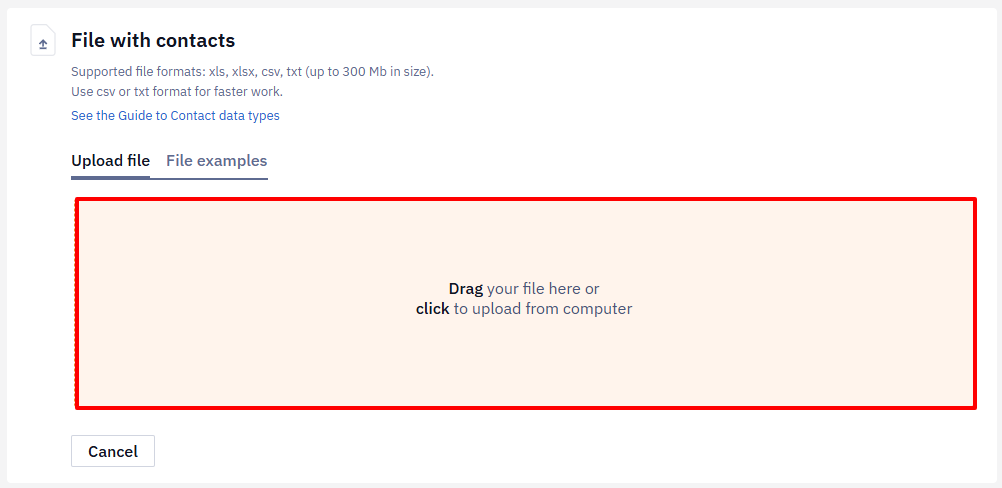
You will move on to contact field mapping after downloading the file.
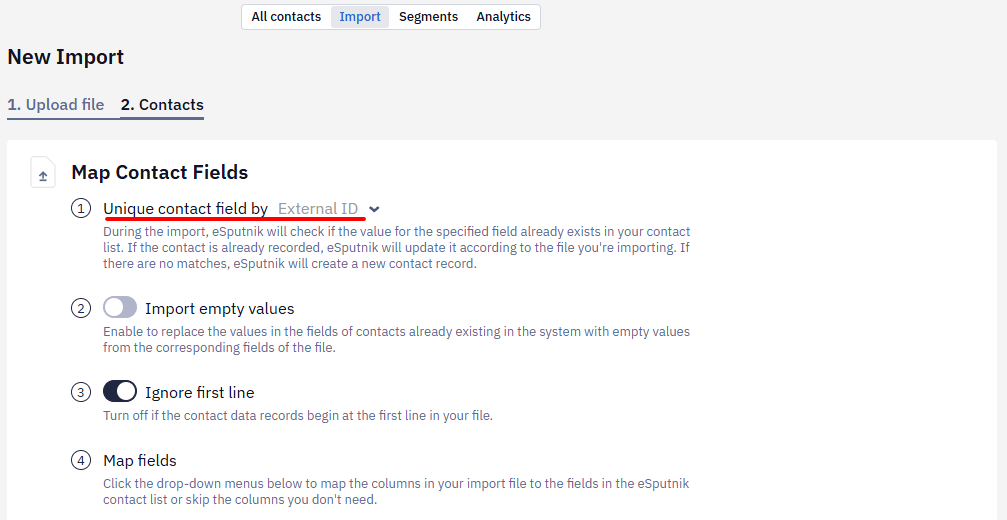
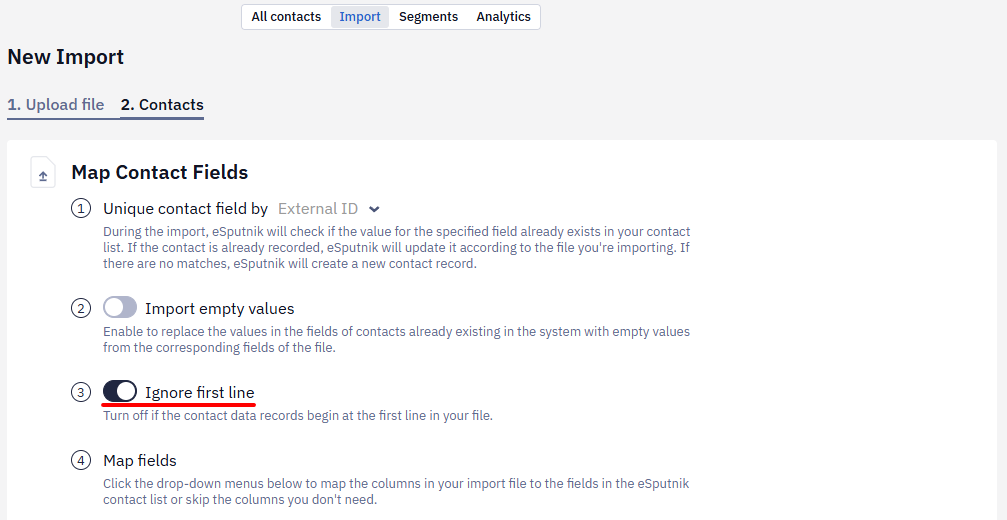
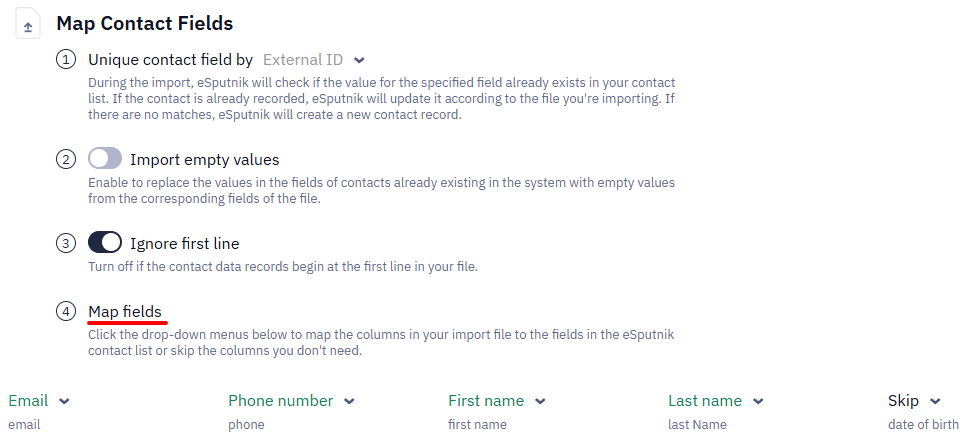
Mapping Contact Fields
- Select the field by which the uniqueness of contacts will be established. When importing, a contact will be searched for in this field. If the contact is found in the Reteno database, it will be updated according to the uploaded file. It will be created if the contact is not found (more about contact IDs and field matching).
Important
- We recommend setting the uniqueness of contacts using an external ID, which allows you to avoid duplicating contact profiles, collect all available data into a single profile, and obtain complete information about the contact’s interaction with your company. More details >
- When your file contains External ID and User ID, External ID maps to system externalCustomerId field and becomes the unique contact identifier. User ID is stored like any other additional custom field.
- When your file contains User ID only, it maps to system externalCustomerId field and becomes the unique contact identifier.
- If the imported file column assigned as External ID contains empty values, the Reteno system runs a check and reports the number of errors before and after importing the file.
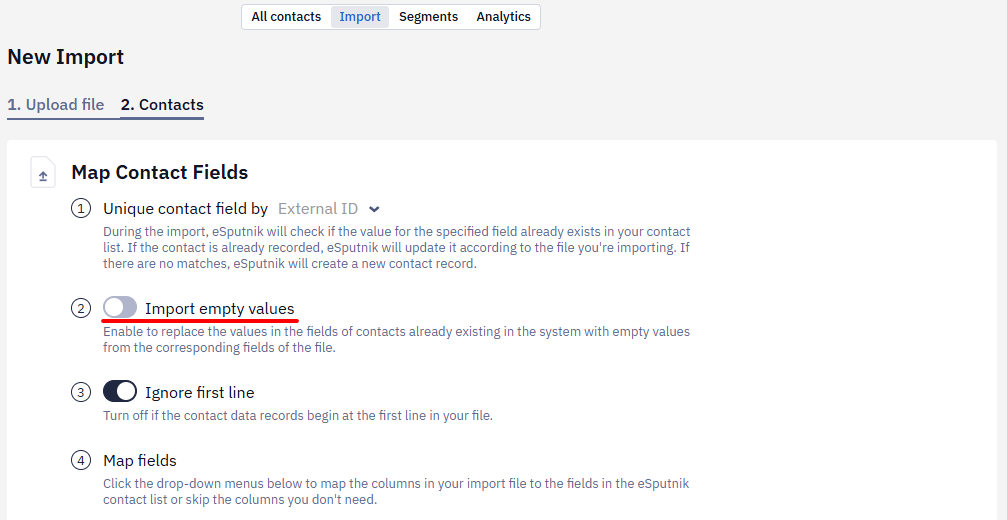
- Select whether to import empty values. If this option is enabled, filled contact fields will be replaced by empty values from the file when updated as a result of import.
- Select whether to ignore the first line in the file: turn off the option if the contact information begins with the first line or enable it if the information in the file starts with a technical line with column names.
- Set the correspondence between the fields from the file and additional fields in the contact card in Reteno. If you don't need information from a column, set it to Ignore.
Data Checking
The value will have a red or orange marker if it does not match the field format.
- Errors in the field identifying the contact (email or SMS) are highlighted in red.
- Warnings about inconsistencies in all other fields are highlighted in orange.
Contacts with errors are not saved or updated in the system, and fields with warnings are not updated.
Read more about contact field values and formats >
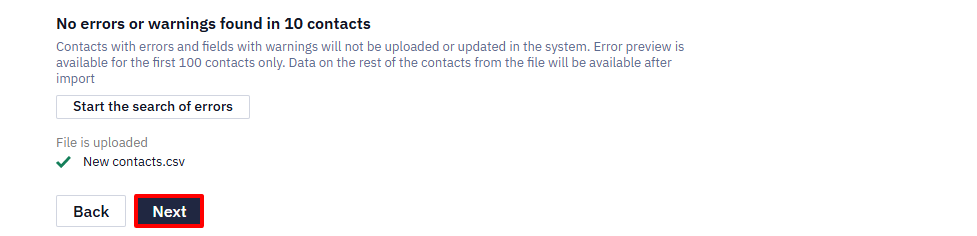
The first 100 contacts from the file are available for viewing in the download window. The system automatically calculates the number of errors and warnings in the first hundred. This is done to ensure that the data in the import file is valid and can be loaded correctly into the selected fields.
You can manually correct errors in the preview window (the Start the search of errors button) or immediately proceed to the next import stage (the Next button).
Import Parameters
- Determine which segments your contacts should fall into after import. This can be a new list segment or existing list segments. For a new segment, you can add tags to help with filtering and set a name instead of the automatically generated one.
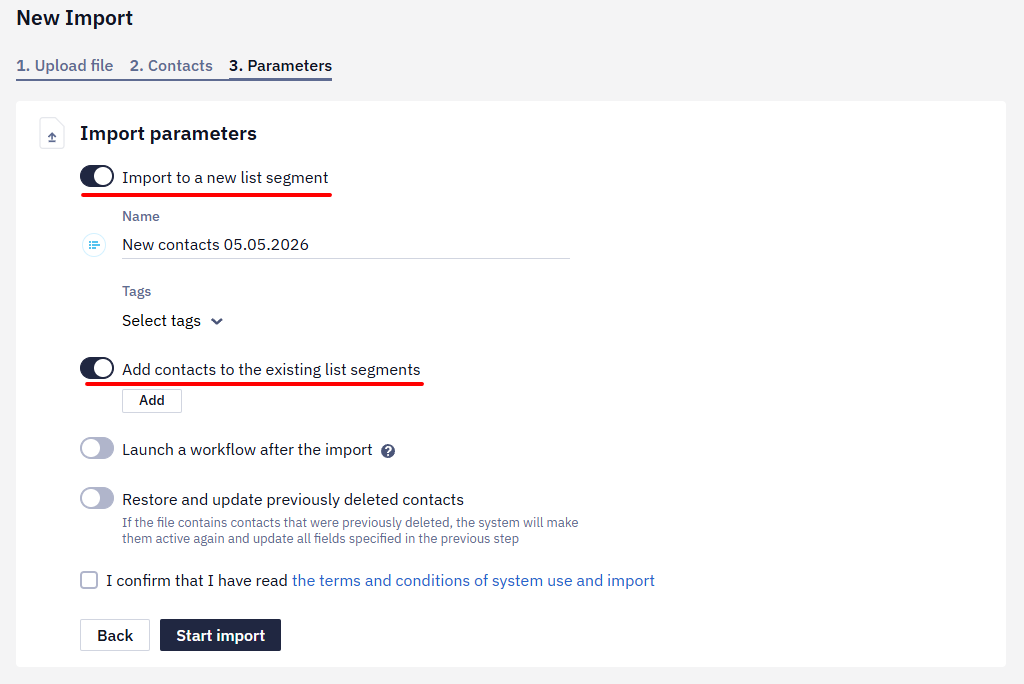
- By importing contacts, you can restore and update the contacts contained in the file. To do this, make the corresponding switcher active.
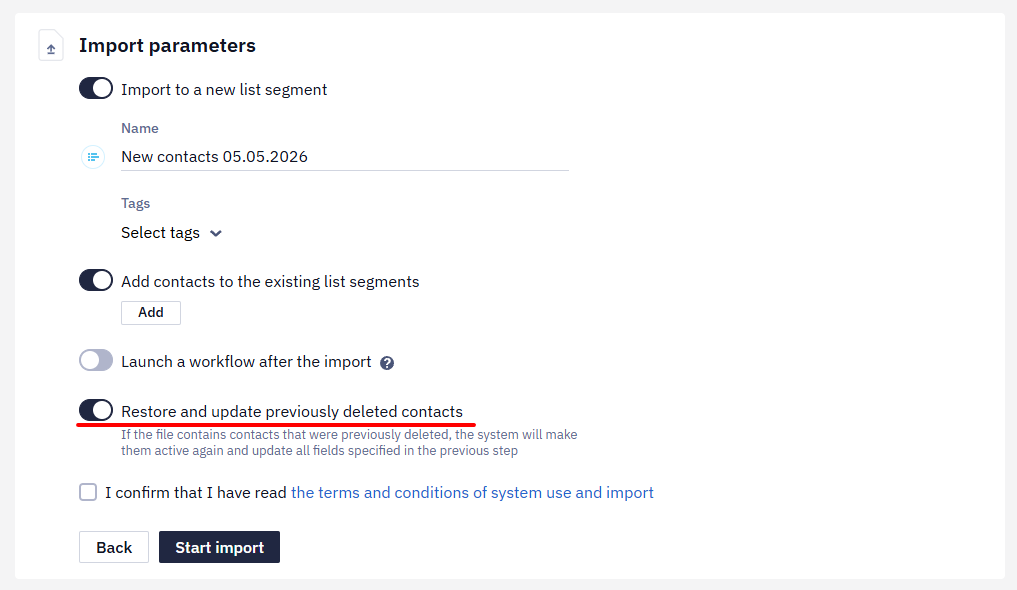
- Confirm that you know the terms and conditions of system use and import.
- Click Start Import.
Once completed, the file will appear in the history, showing the segments the contacts were added to, the user who uploaded the file, and details about the contacts (number of new, updated, duplicates, etc.)

Updated 12 days ago