
Linking Workflow to the Button
The algorithm for linking a workflow to the button is universal. We will illustrate it with the example of a campaign for segmenting contacts.
Let us suppose that you have a quite large contact database but you don’t know anything but email addresses about your subscribers. If you don’t want to annoy them with trifles but send only the relevant content you need to know their interests and expectations. For this purpose, we send subscriber a trigger email that contains request to tell more about himself/herself and a special workflow attached to it.
Basic segmentation
The simplest example is an email with the question: What kind of clothes are you interested in? A contact could click on one of three buttons: Men's, Women's, or All. Your goal is to build a workflow to add contacts to segments when they click the buttons in the email.
Each workflow must be linked to a certain event. You can pass events via API or create them in our system manually.
1. Creating an Event Type
-
Go to Automation → Event types and click New event type.

-
In the New event type window add an event name and select a category.
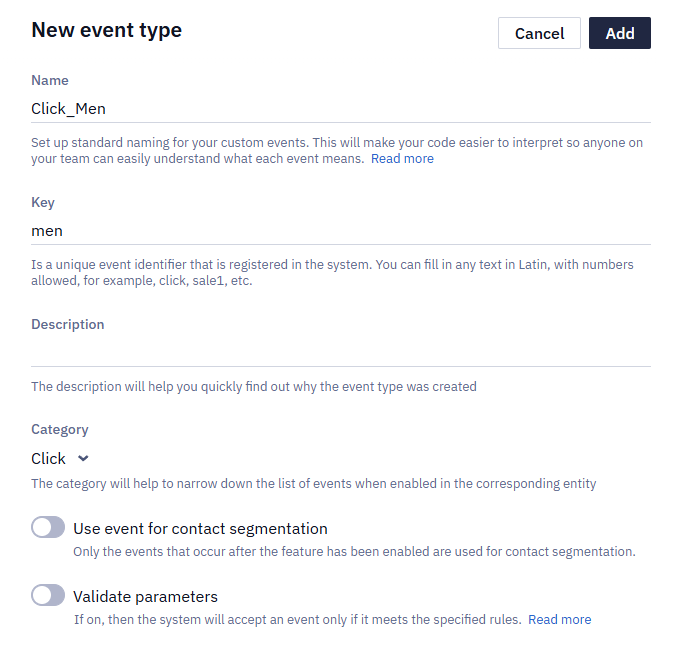
NoteFor the Click category be sure to specify the key in the corresponding field. The key is any value/word, preferably written without using numbers. For example: action, click, etc.
- Click Add.
2. Linking Event to the Button
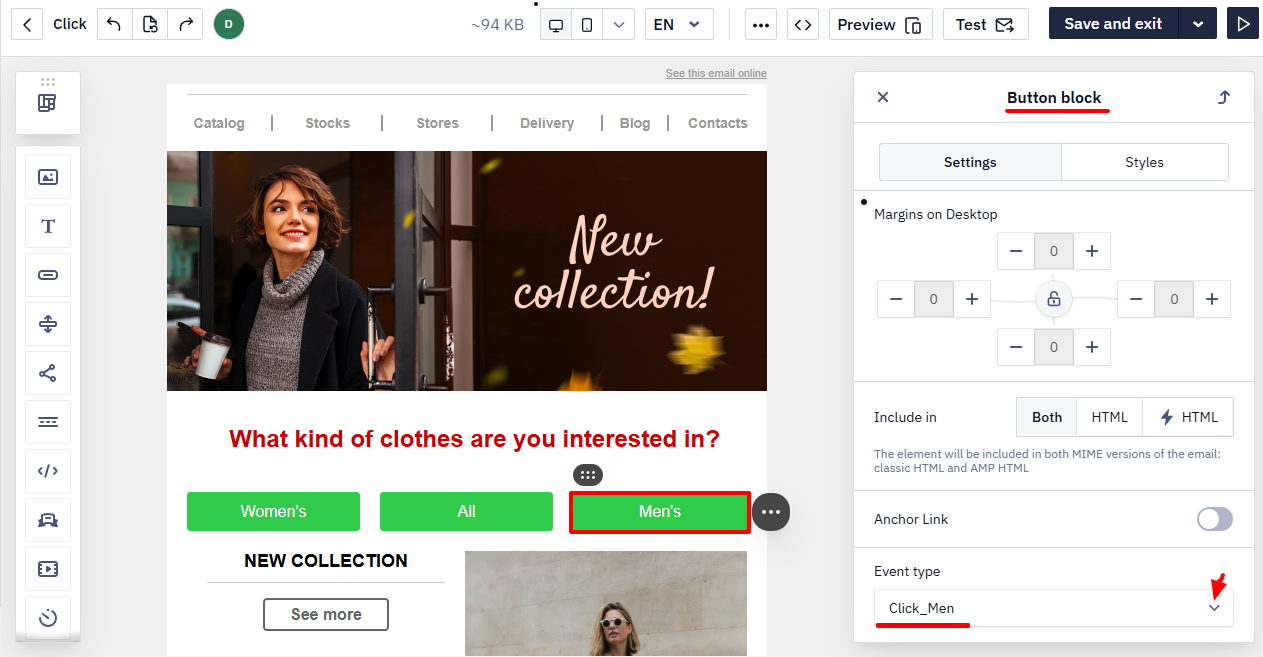
- Open the email with a questionnaire in the editor.
- Click on each button with the answer option and link an event to it. Select the corresponding one from the dropdown list.
3. Setting Up Workflow
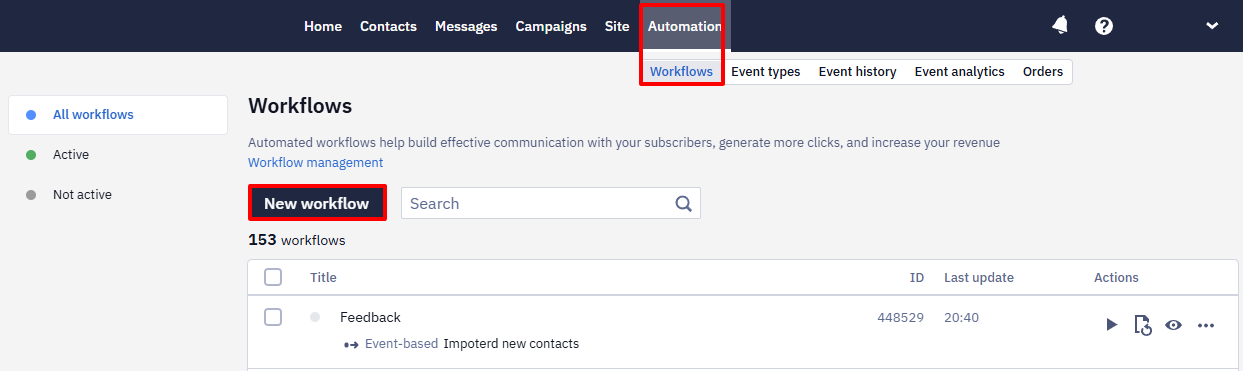
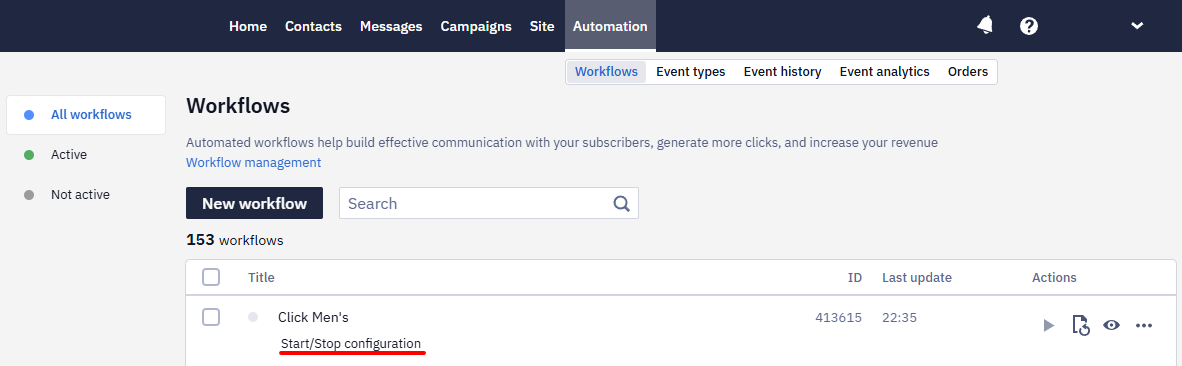
- Go to Automation → Workflows and click New workflow.
- Enter the title and add tags (optionally) of the workflow.
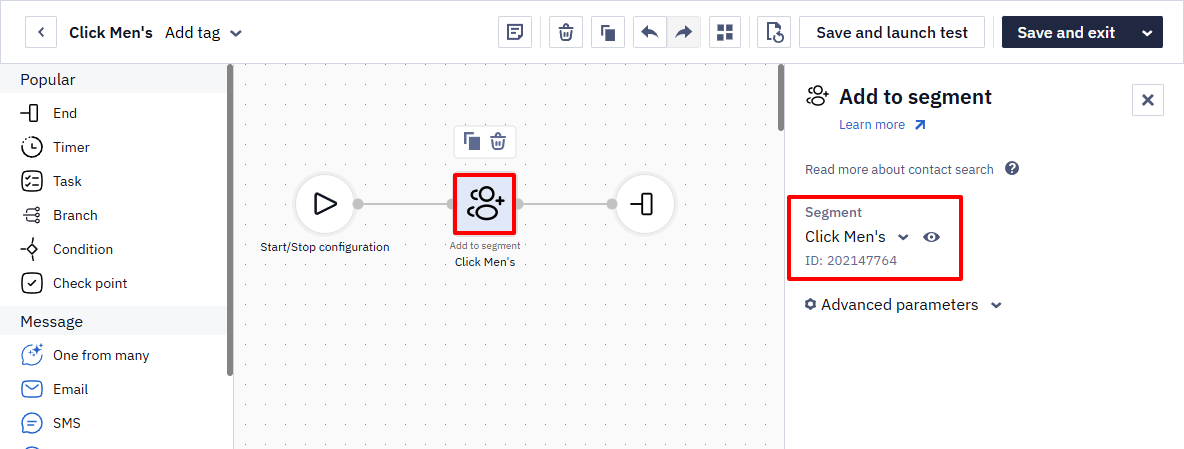
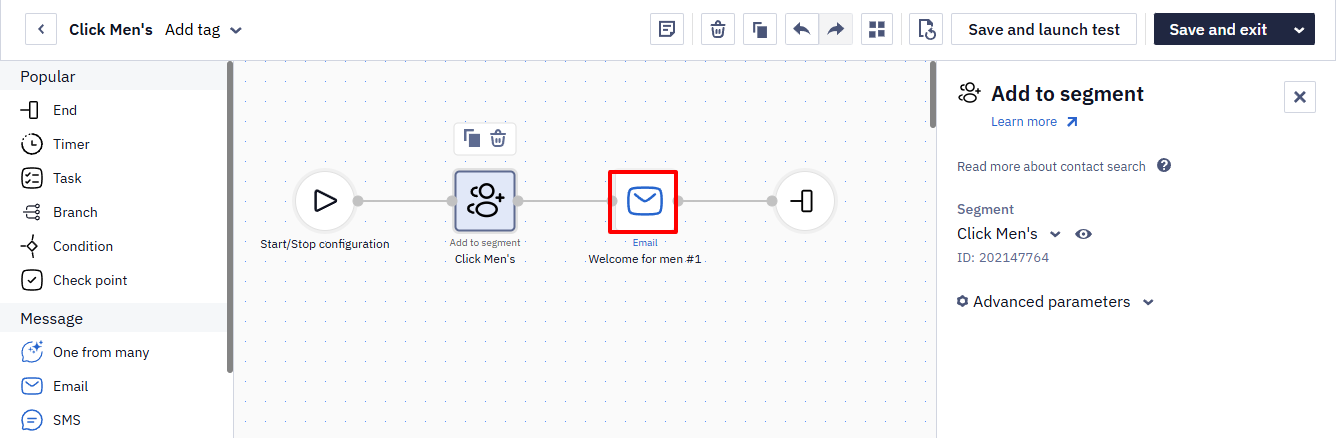
- Build a chain of actions:
- Start
- Add to segment
- End
In the Add to segment block, select the group to add contacts to.
You can add more actions to such a workflow, for example — send a message after adding to the segment.
- Click Save and exit.
- Go to Start/Stop configuration.
- In Start configuration, select Event-based and select the event in Event field. Set up processing unique events (in this case, we recommend you the once option).
- Click Apply.
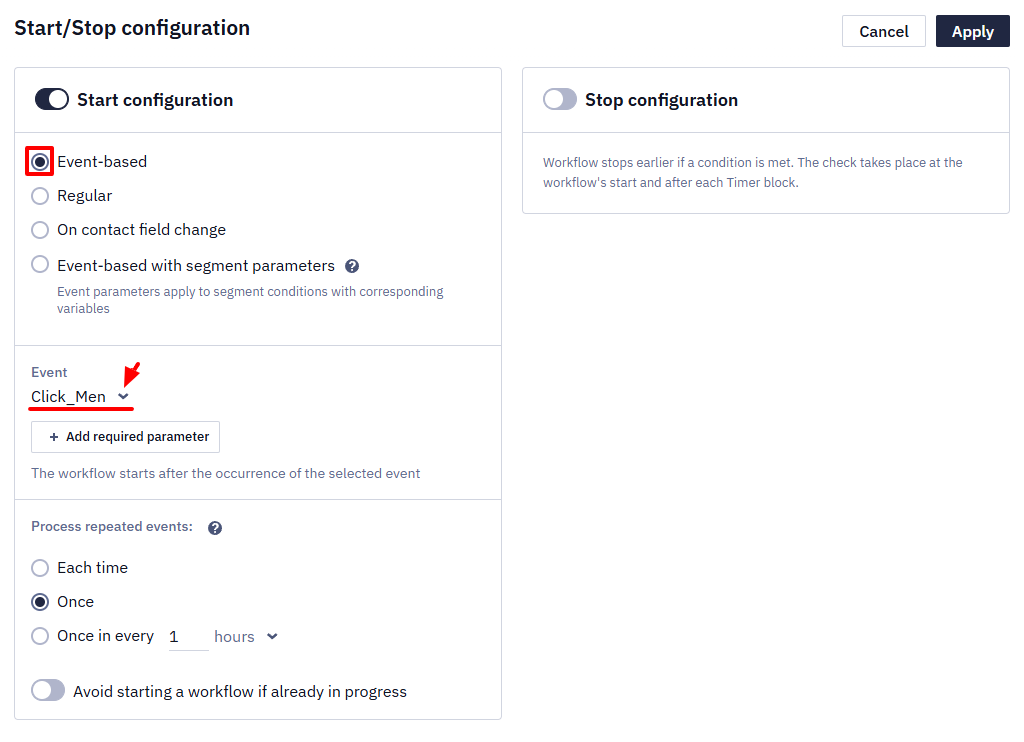
ImportantIf you want the contact to receive an email with recommendations immediately after the workflow is executed, set the Once in every__ parameter in the Process unique events field. If this parameter is not specified, and a subscriber accidentally clicks the button several times, the scenario will run anyway, sending several identical messages to one person.
- Click the Activate button.
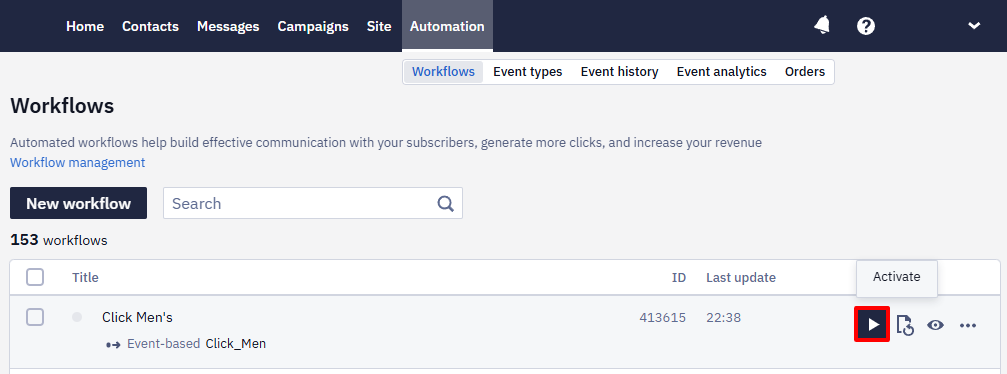
Each contact who clicks on the button will be added to the segment specified in the workflow. This way, you will get the target audience segments for emailing campaigns with relevant content. Using the same principles you can generate new events arranging much more complex workflows and adding them to buttons, pics, and even text links in your messages.
Updated 12 days ago