
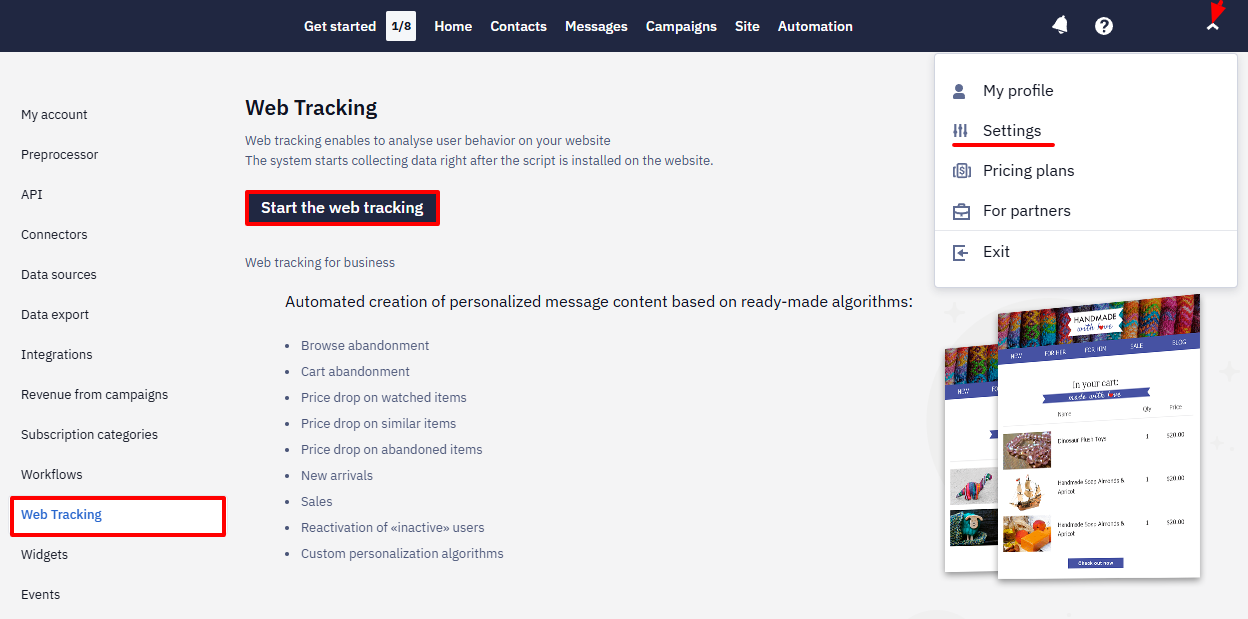
Setting Up Web Tracking for Website
To get the web tracking script, go to your account settings → Web tracking tab, and click Start the web tracking.
Getting and Installing Script
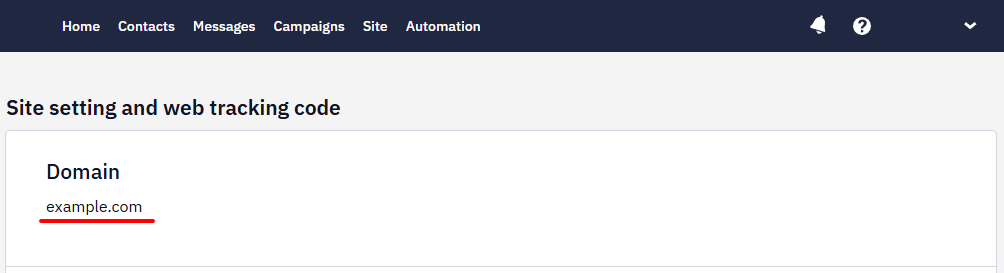
- Enter your domain name and click Get script.
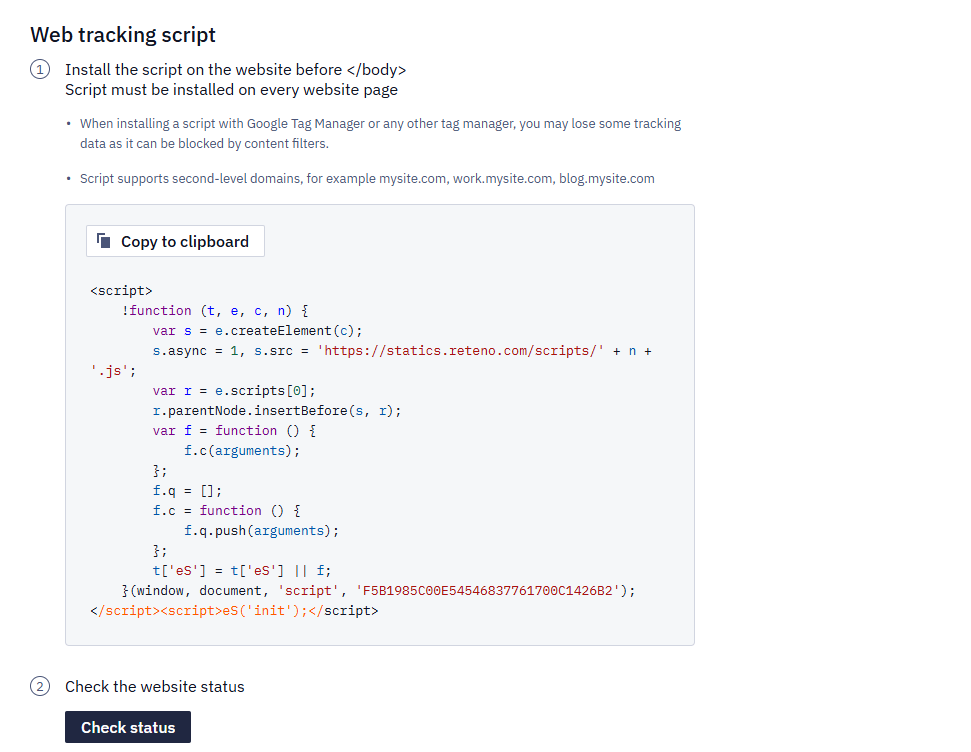
NoteThe script works for second-level domains and subdomains (
mysite.com,blog.mysite.com)
- Copy the script and add it to the page code before the closing
</body>tag on every website page.
Important
- Install the script on both desktop and mobile versions of your website.
- If you install a script via Google Tag Manager or any other tag manager, you may lose tracked data as it may be blocked by content filters.
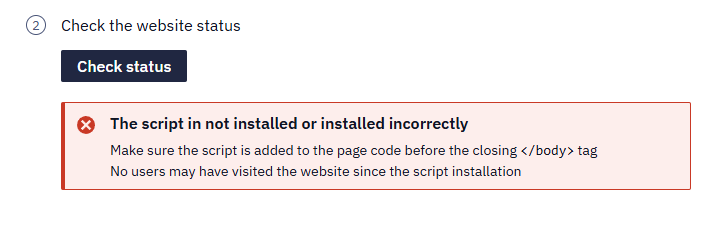
Checking Script Status
After installing the script, click the Check status button.
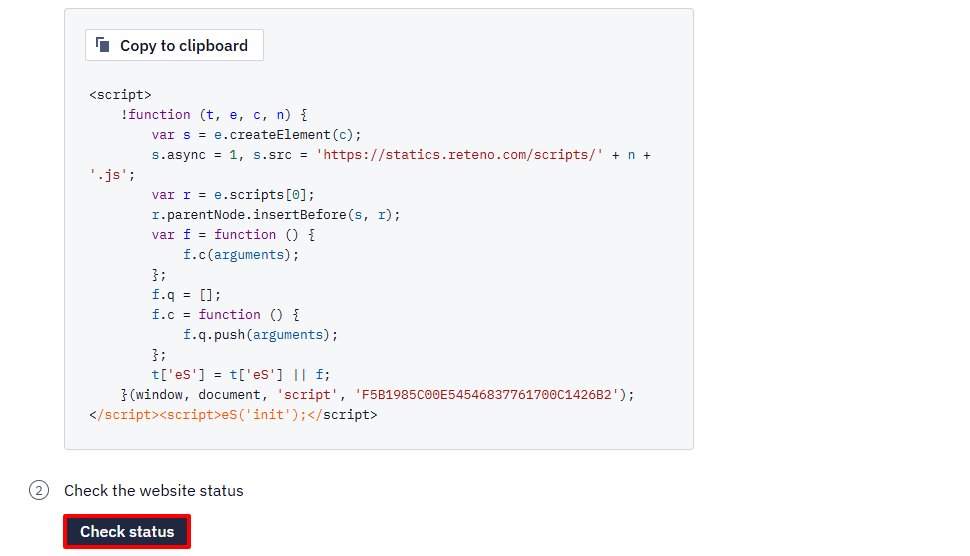
If there are any problems, you will see a warning message with a hint.
When the installation is completed successfully, the status will change.
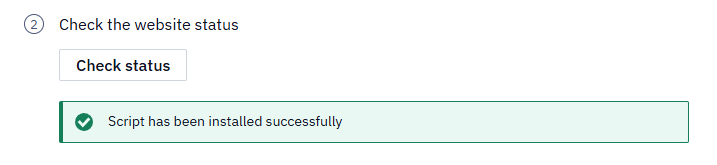
Now you can return to the main web tracking page, where user activity on your site is tracked (Settings → Web tracking).

NoteData for Additional events will not be available until a product feed is uploaded into the system and the corresponding events are set up by our support.
2. Upload the Product Feed to the System
ImportantWe recommend adding to the product feed as many additional product parameters, for example, size, color, gender, material, etc. This directly affects accuracy of the recommendation algorithms. The more diverse parameters the product feed contains, the more relevant products will be shown to the website visitors.
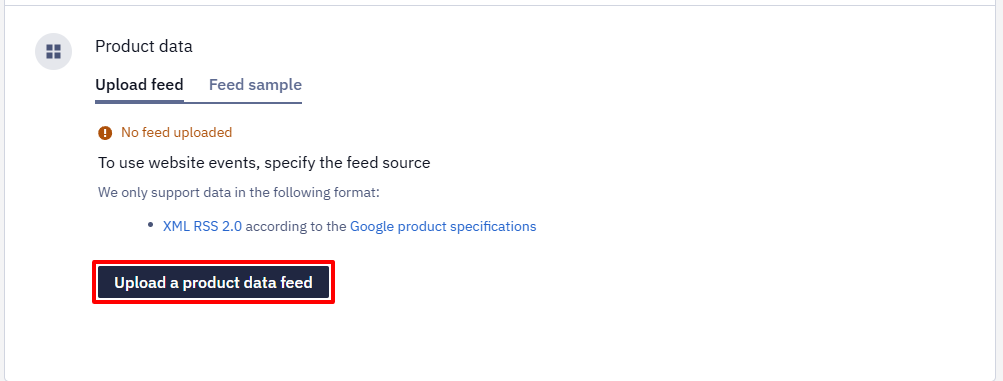
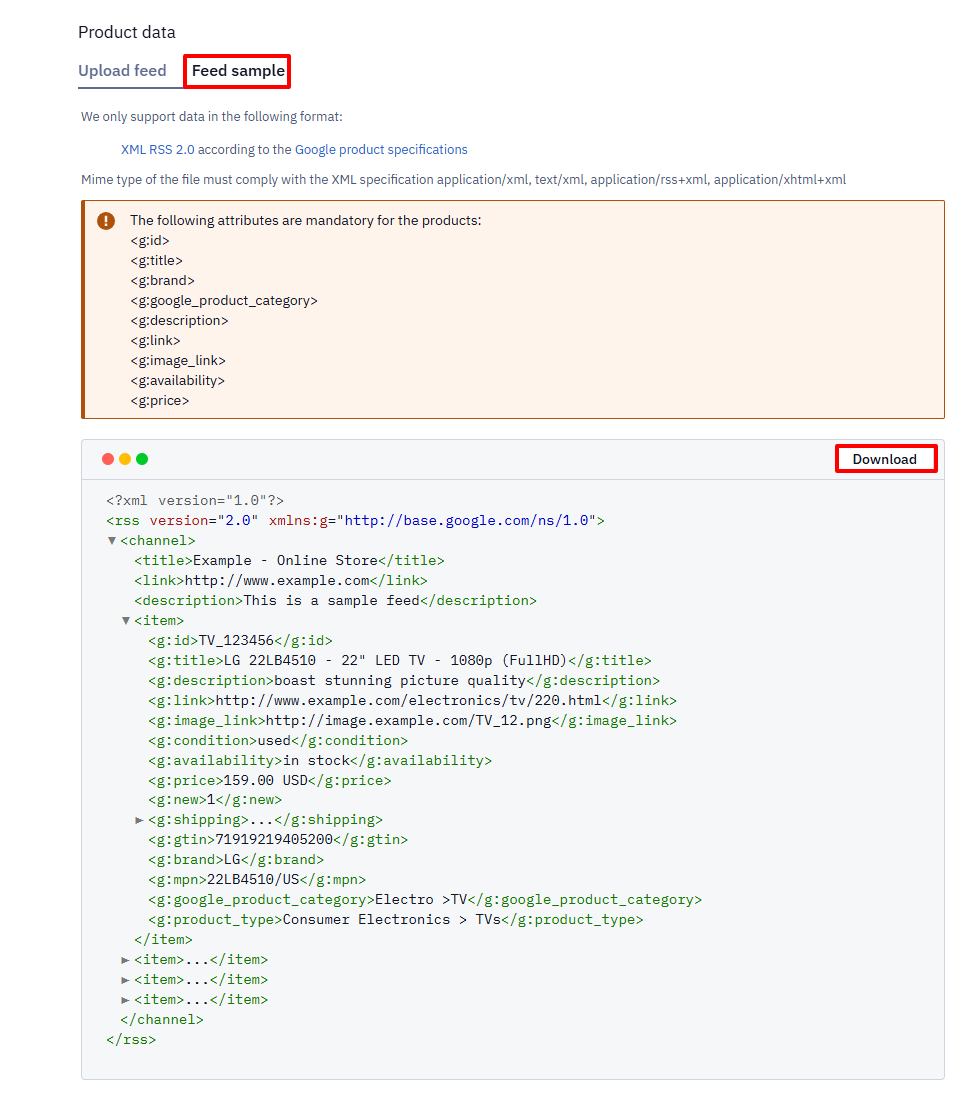
The supported formats are XML, RSS 2.0 according to Google specifications. Mime type of the file must comply with the XML specification application/xml, text/xml, application/rss+xml, application/xhtml+xml. Click Feed sample to view the sample.
- In Feed settings, specify the feed URL and set up update frequency based on time of your website product list update. You can set up a feed to be updated every day or every week on a particular day.
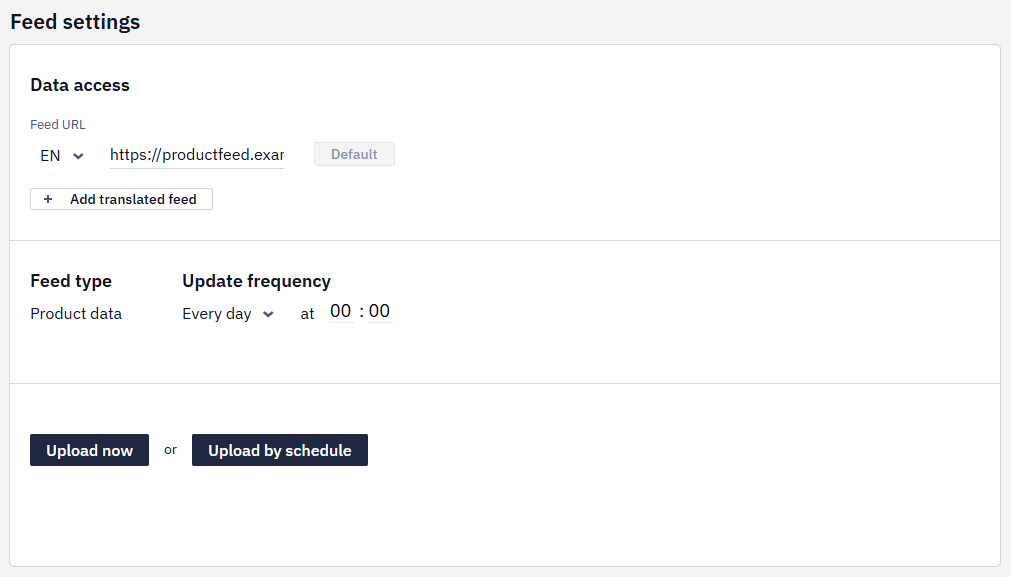
NoteFeed type is Product data by default.
- Click Upload now or Upload by schedule (for example, if you set up web tracking in the morning, and product feed update on your website is scheduled at 8 p.m.). The loading process will start.
If the feed upload has failed, you will see an error warning and the corresponding description.
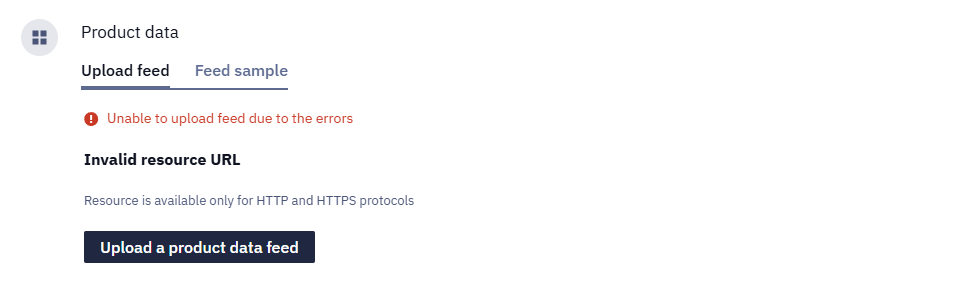
Make necessary changes to the feed and re-upload it. Until then, the previous successfully uploaded data will be used. If the case of the first upload, no data will be available for web tracking until a successful feed upload.
After a successful upload, you'll see the number of products in the feed.
- Available products;
- Products with zero price;
- Products with no category;
- Uncategorized products.
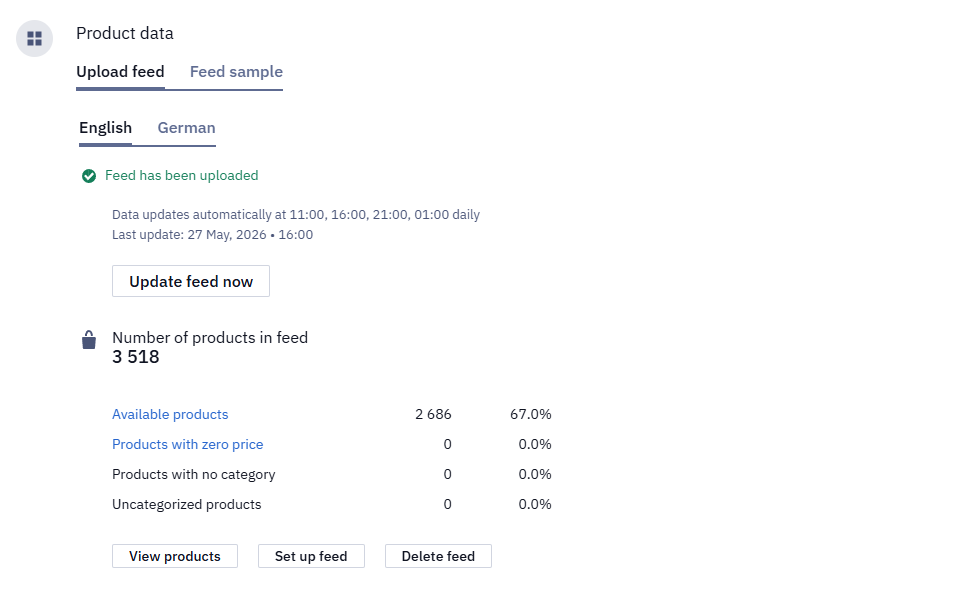
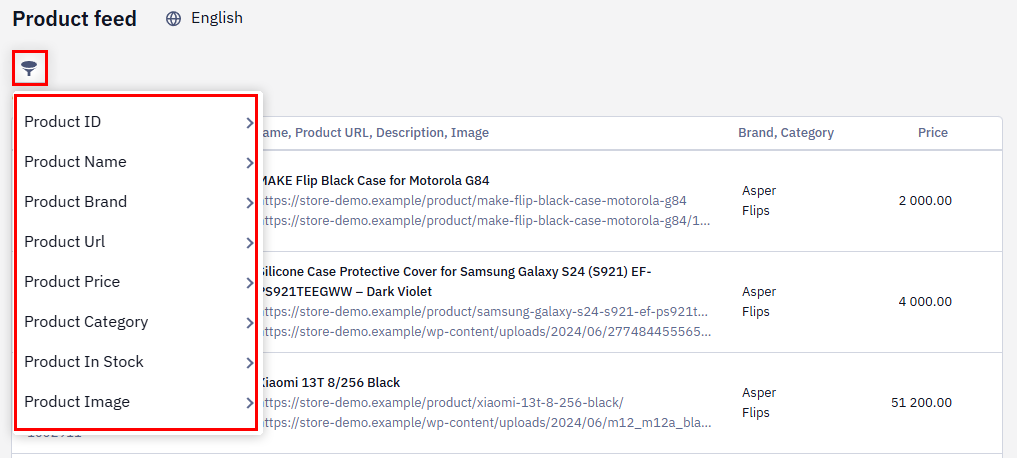
- Click View products to see information on each product. For convenience, you can view products by categories.
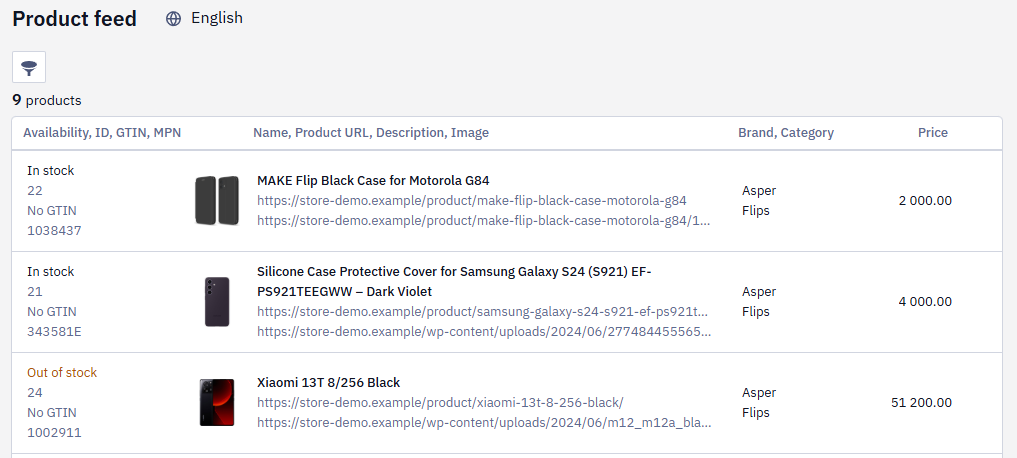
The missing information on the product is highlighted in red. Use a filter in the top left corner to search the errors by:
- product ID;
- name;
- brand;
- URL;
- price;
- category;
- availability;
- product image.
If you need to go to the main settings, click Set up feed.
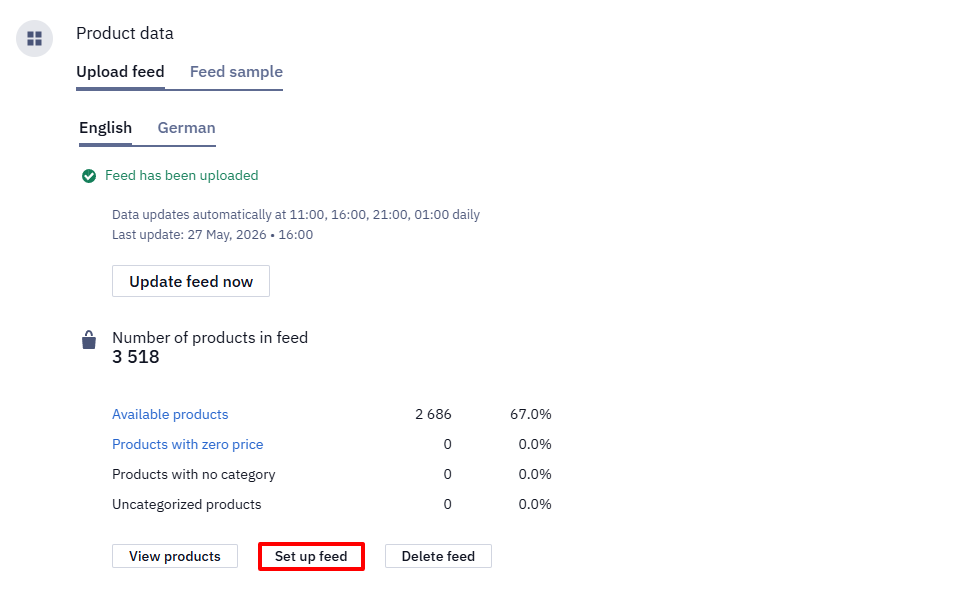
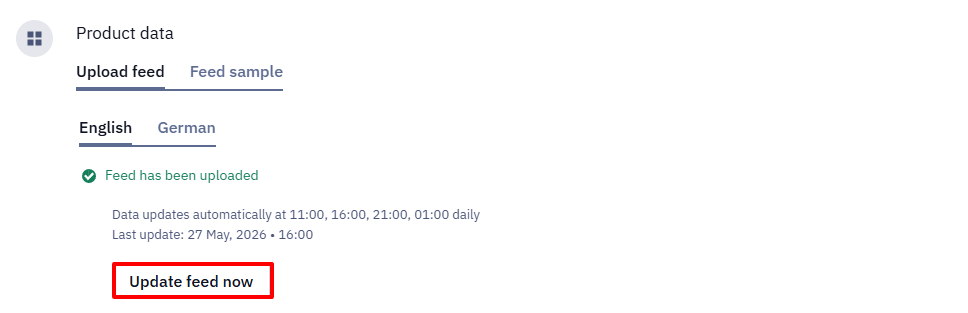
- To update the feed off schedule, click Update feed now.
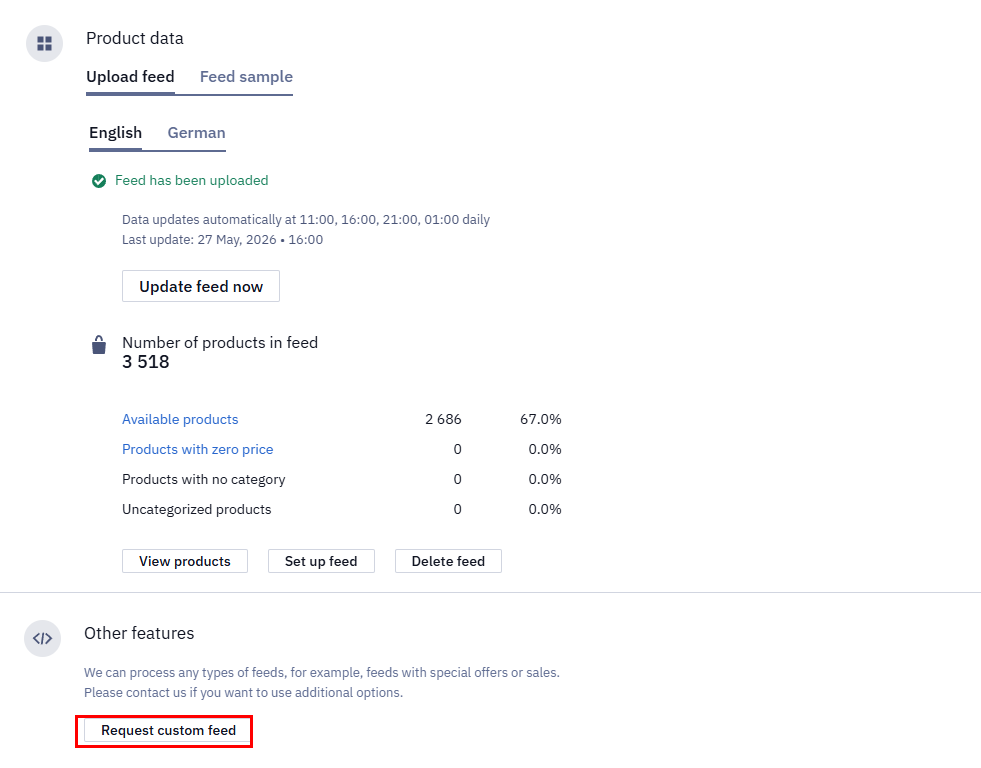
You can upload one product feed by default. If you need to use more feeds, please contact our support.
3. Add productKey
ProductKey is a unique product ID contained in the feed. It must be present in:
- product card;
- product card pop-up;
- cart.
If it’s absent, add it to the page code as a hidden element. You only need to add productKey inside the container of each product.
Example:
<div class="container basket item">
   <div data-productKey="196272">
   </div>
</div>
4. Add Email Addresses of Authorized Users
In the website code, add email addresses or phone number of the authorized users. This is necessary so that our system can identify the person currently browsing the website, assign them to the event and send an email.
Example:
<span id="EsMail" style= "display:none">[email protected]</span>
<span id="EsPhone" style= "display:none">+380661234567</span>
If your website doesn’t have authorization, contact our support team for a customized solution to be able to collect email addresses (purchase form, subscription form).
5. Activate Web Tracking
When all of the above steps are completed, you need to set up tracking on your site to collect user activity. Setup Instructions. If you have any difficulties or are unable to set up tracking yourself, please contact our support team to enable web tracking.
6. Test and Launch
After web tracking is installed, contact our support and they will set up and test dynamic content for product cards. Emails with dynamic content will include personal product recommendations for each visitor. Depending on the workflow and email complexity, testing can take up to 3 days.
Updated 7 days ago