
Managing Users
Owners of Reteno organizations can invite or block managers and manage their access rights to account capabilities and information in it.
List of Account Roles
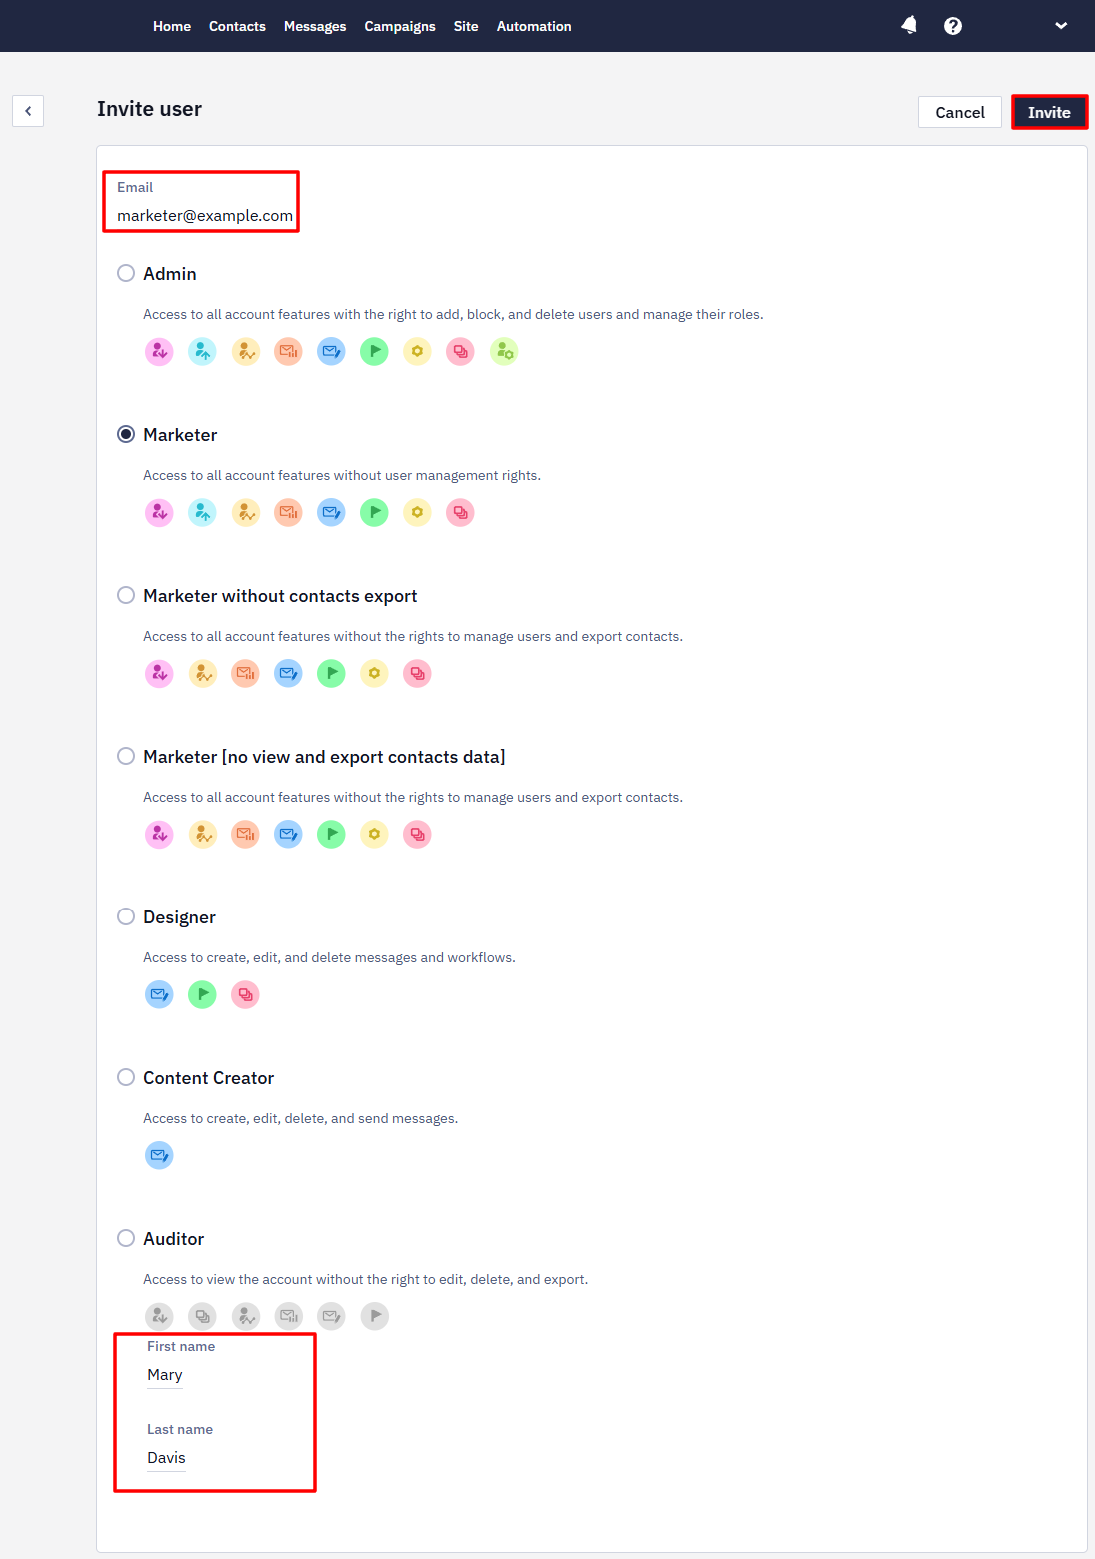
- Admin: access to all account features with the right to add, block, and delete users and manage their roles.
- Marketer: access to all account features without user management rights.
- Marketer without contacts export: access to all account features without the rights to manage users and export contacts.
- Marketer[no view and export contacts data]: access to all account features without the right to export and view emails and phone numbers.
- Designer: access to create, edit, and delete messages and workflows.
- Content Creator: access to create, edit, delete, and send messages.
- Auditor: access to view the account without the right to edit, delete, and export.
NoteInviting users is only available in accounts with activated multi-factor authentication.
Choosing a Role for Common Cases
- Support staff who need to see what communications a contact received — Marketer (or a variant with export restricted, if they don't need to export contact data).
- Analyst who needs to pull contact data for reporting — Marketer, since export rights are required; Auditor doesn't include export.
- Someone who only needs to review campaigns/workflows without changing anything — Auditor.
- Content or template creator who shouldn't send campaigns or manage users — Content Creator (can send) or Designer (cannot send, edit-only).
Inviting a New User
-
Log in to your account using administrator credentials.
-
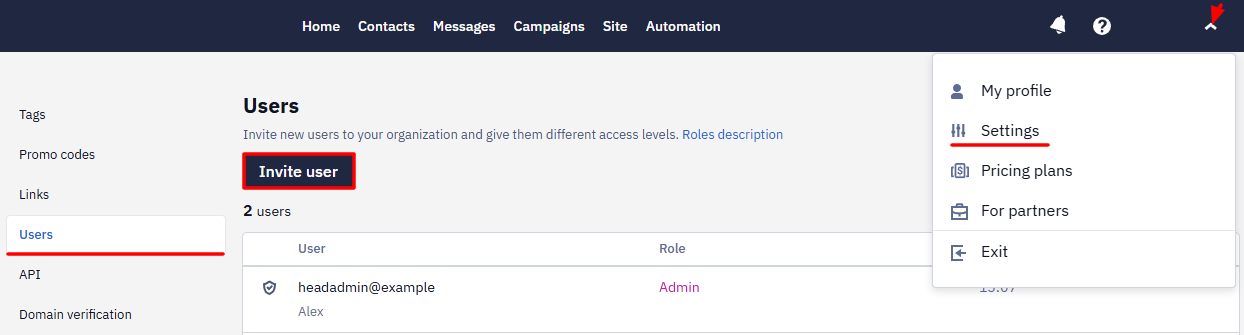
Go to settings → Users and click the Invite user button.
- Enter the user's email and select a role (for example, Marketer). Optionally, add the name and surname of the invitee at the bottom of the page. Click Invite.
-
The invited user will receive an email with a link to activate their account.
-
By clicking on the link from the email, the user will go to a registration page.
-
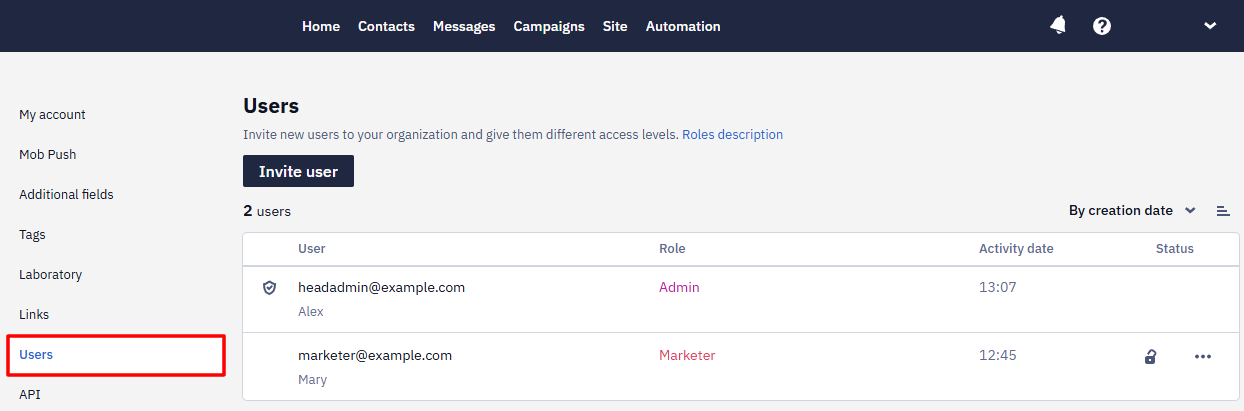
After this, the invited user will be activated in the provided role and appear in the Users tab.
Note
- You can invite a maximum of 5 users during the day.
- The maximum number of users added to an organization is 20 (these can be users with different roles).
- One email can be a log in for only one account. If the email is registered in another organization, it must be deleted from the previous one to transfer it to a new account.
Blocking / Deleting a User
To block a user, click the lock icon in the user's line in the general list.
You can block a user permanently or temporarily, for example, during an employee’s vacation.
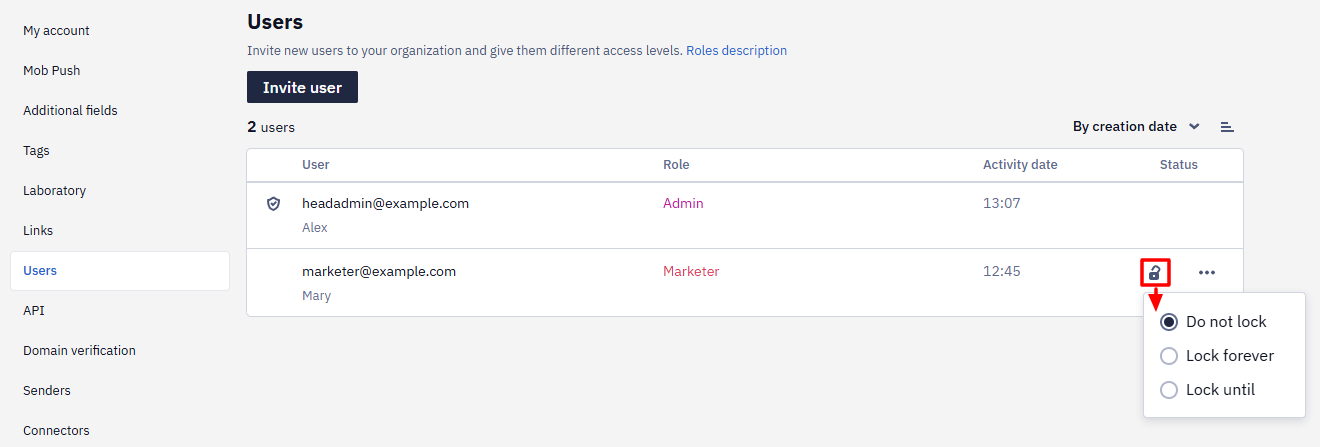
If the administrator blocks a user, access will be instantly closed, and the system will log out this user, even if they are currently working in the system. The administrator can remove all types of locks at any time.
To delete a user, click the ellipsis at the end of the line.
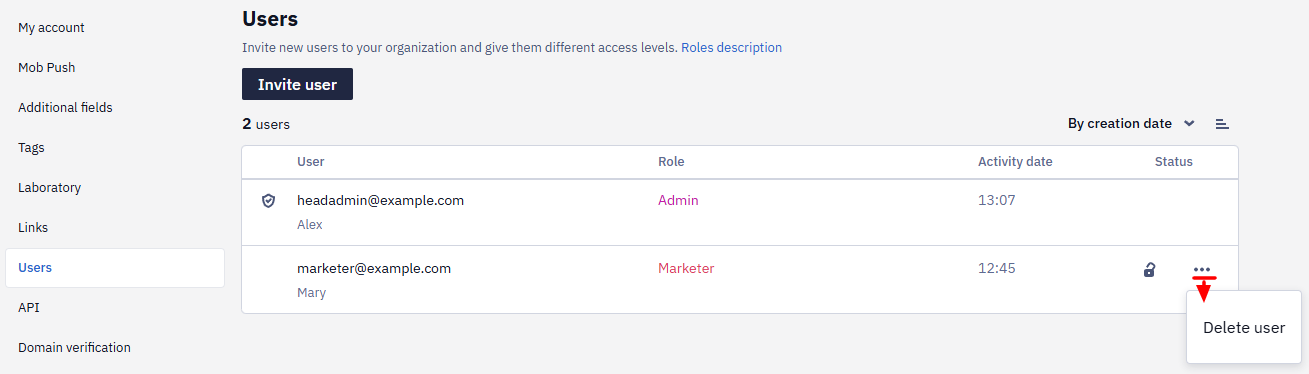
If you delete a user, you will not be able to restore it, but you will be able to create it again.
Updated 2 days ago