
Segmentation by User Events
An event is any action in your mobile app or on the website that has a timestamp, type, and a set of required and optional parameters.
Examples of such events are:
AppInstallSubscriptionStartedTrialStartedStreakExtendedWorkoutStarted
Set up segmentation by events so that custom events and their parameters are recorded in contact cards and can be used to create dynamic segments.
NoteSegmentation by events is available depending on your pricing plan. To activate it, contact to [email protected].
Event Parameters for Contact Mapping
When using the Generate event v3 method, a new contact is created, provided segmentation is enabled for the event.
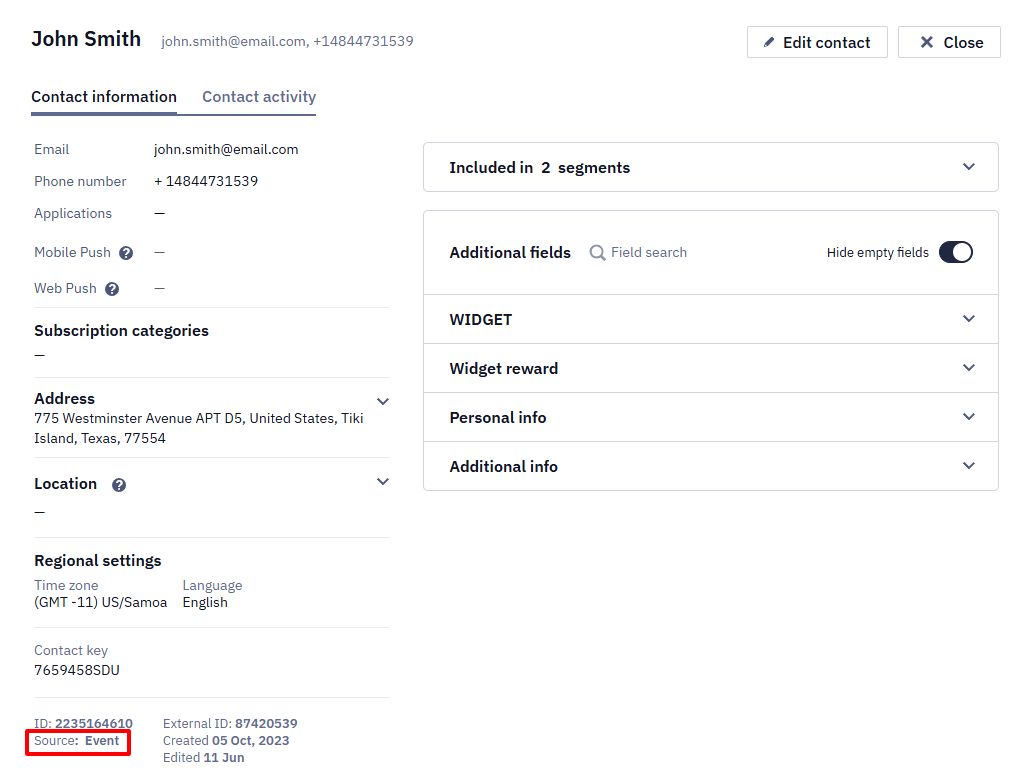
If a contact identifier is found in the event parameters, the system associates it with this contact; if not, it creates a new one. The source for creating such a contact will be recorded as Event in the contact card.
To save the event assigned to the contact, the event parameter must contain the contact identifier, by which the contact can be found in the Reteno. Also, you need to know which contact field is used as an identifier.
By default, the system connects events with contacts when passing the following parameters:
| Event parameter | Contact field |
|---|---|
| ContactId | Contact ID |
| externalCustomerId | External ID |
| Email EmailAddress UserEmail ContactEmail | |
| Phone SMS PhoneNumber | Phone number |
| PushToken | Web push or mobile push token |
| ContactKey Contact_key | Additional contact field with the name {ContactKey} |
Note
- Standard parameter names are compared with the passed event parameter names, case insensitive.
- Parameter values, except the email address, are compared with the passed event parameter values, case sensitive.
Suppose an event has one of the parameters listed in the left column. In that case, Reteno will automatically associate it with the corresponding contact field in the system (right column) when it finds such an identifier.
Here is the event example automatically assigned to the contact:
{
  "eventTypeKey": "Applogin",
  "keyValue": "bkeUc9sCpWoKLCOwmcZFKQ--",
  "params": {
    "contactId": "12312345612"
  }
}
The event key is "contactId" : "12312345612". Reteno will assign the event to this contact if such contact exists.
Mapping Events with Contacts by External IDs >
Checking the event parameters
Pick the event type you plan to use for segmentation and verify its parameters. Let's look at the SubscriptionExpired example.
- Go to Automation → Event history and select the
SubscriptionExpiredevent type.
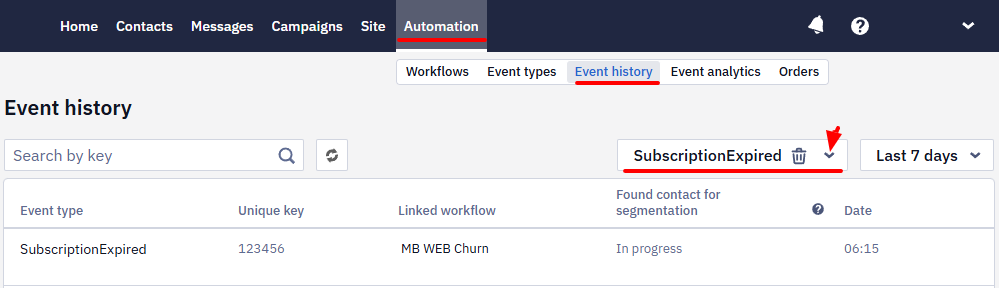
- Click the event name to see the event's parameters and check them with the parameters from the table above.
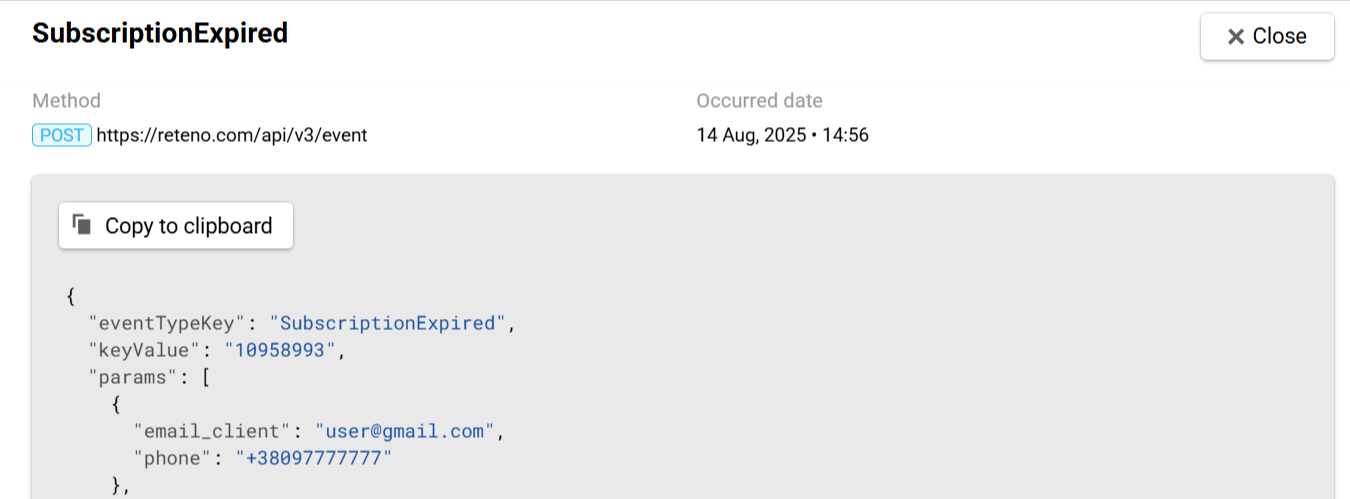
In the example, email_client parameter doesn't fit any value from the table. In this case, additional configuration for the email_client parameter is required.
| Event parameter | Contact field |
|---|---|
| Email EmailAddress UserEmail ContactEmail |
Setting event parameters
Set a matching rule to bind event parameters to a contact ID if you want to use a different event parameter name or a different contact field.
- Go to Settings → Events.
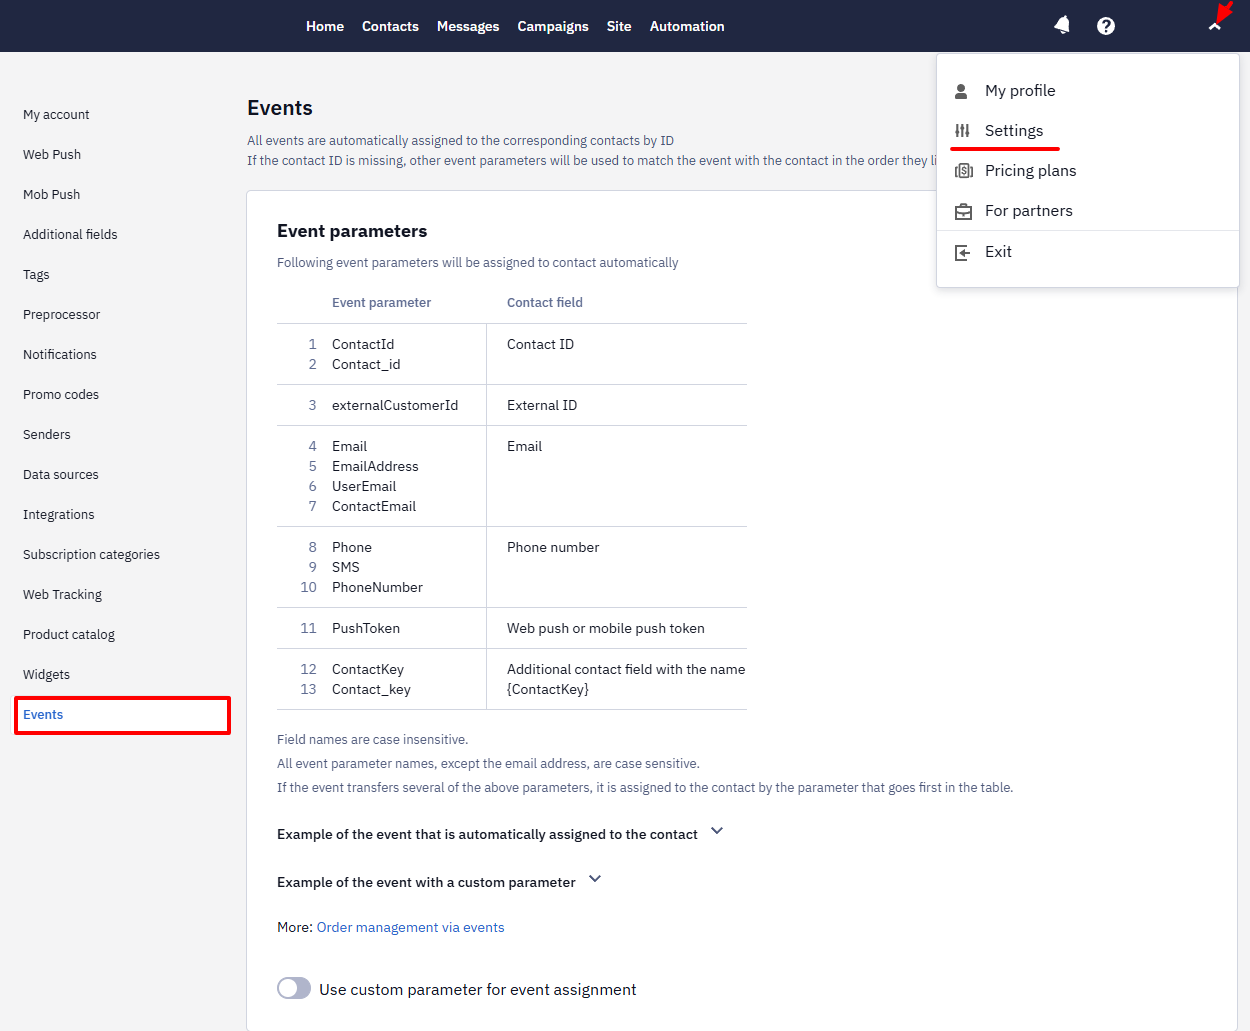
- Activate Use custom parameter for event assignment switcher, select the contact field, and enter the event parameter name.
In the example, the search for a match will go by Email additional field and email_client event parameter.
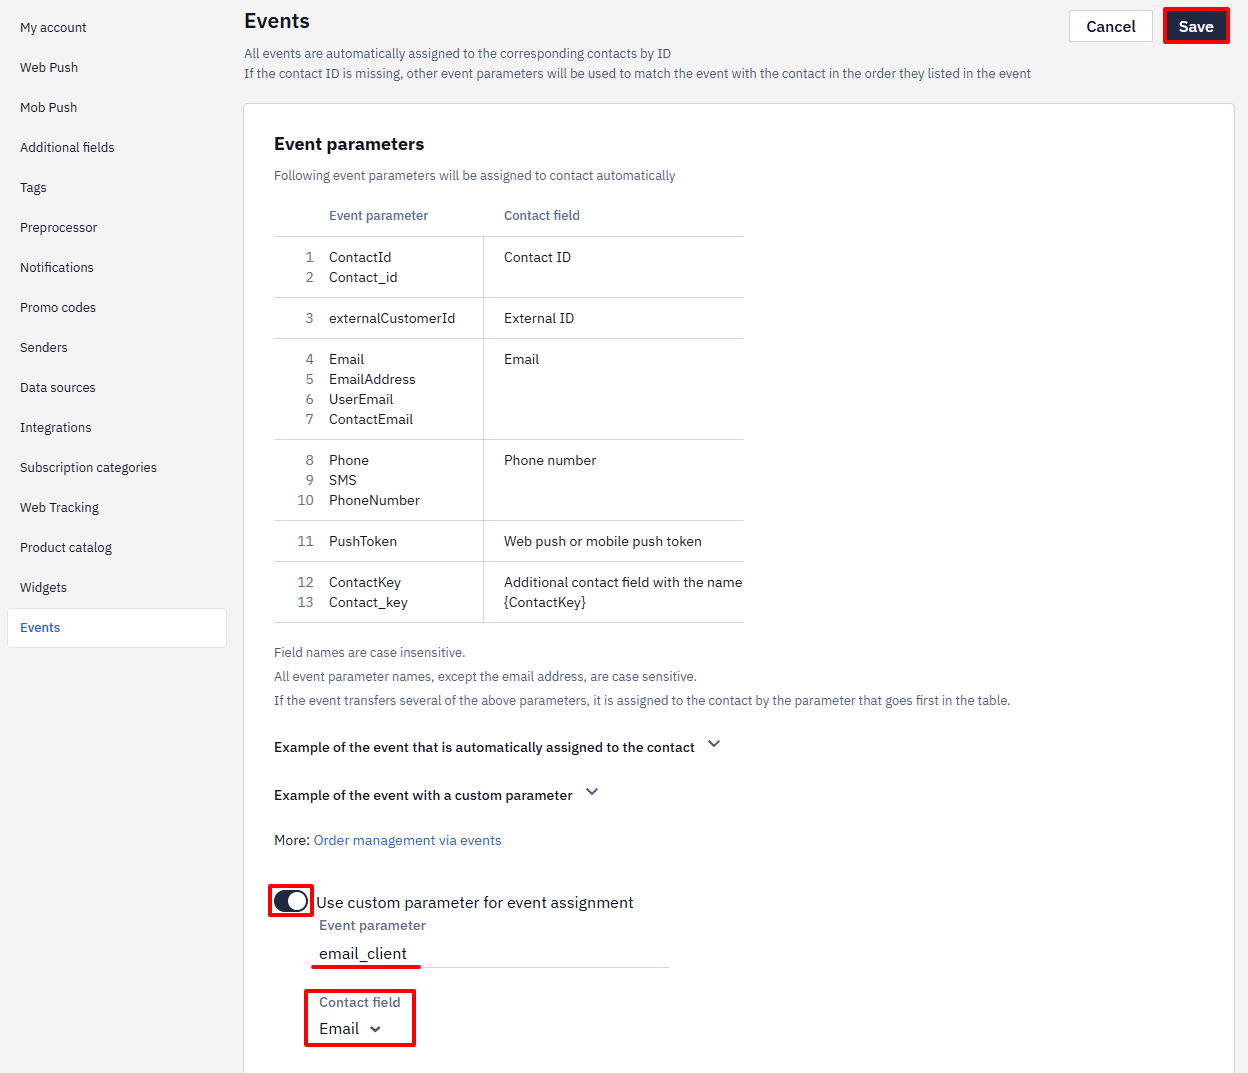
- Click Save.
Using Events for Segmentation
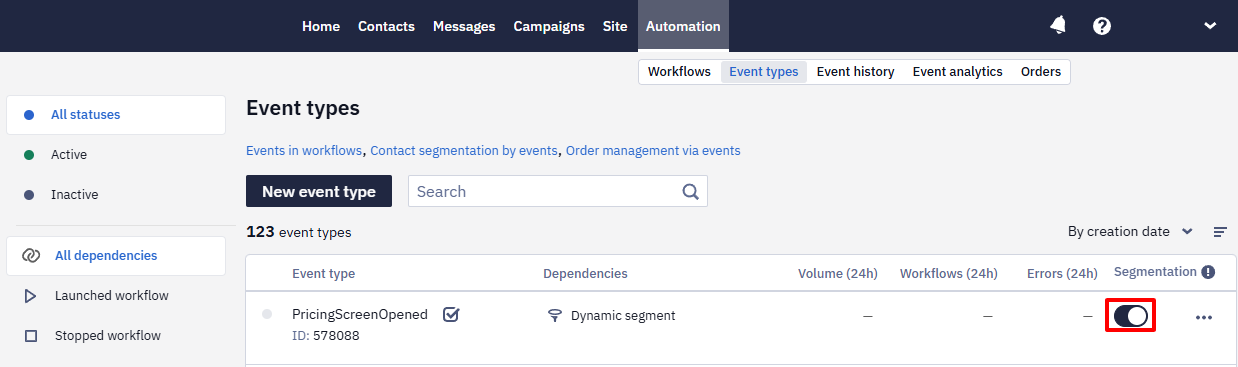
- Go to Automation → Event types and activate the switcher for the required event type.
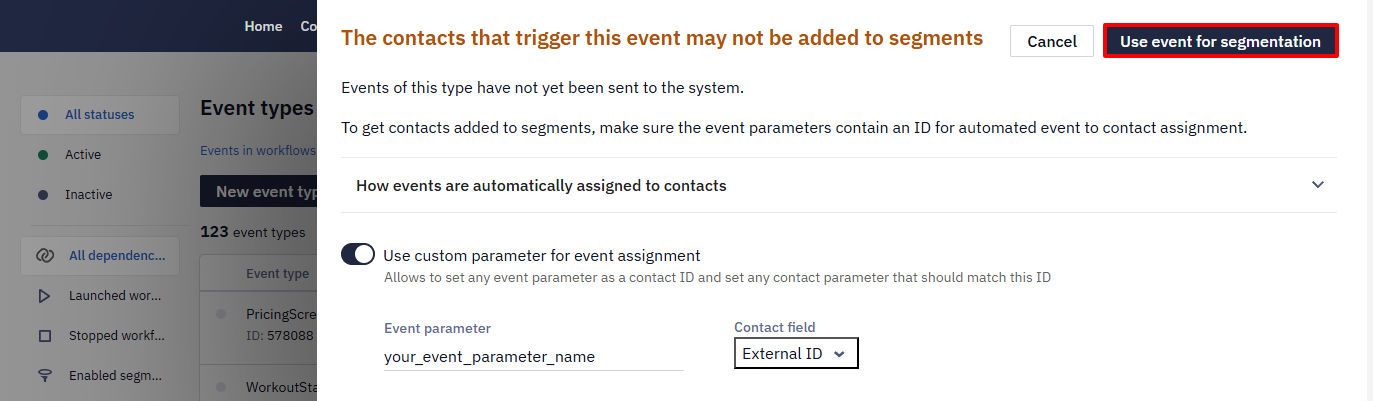
- In a pop-up window, click the Use event for segmentation button.
Important
- Only the events that occur after the feature has been enabled are used for segmentation.
- You can use up to 50 events for segmentation. This is an account-wide default — contact support if you need it raised.
Adding a Dynamic Segment for Segmentation by Events
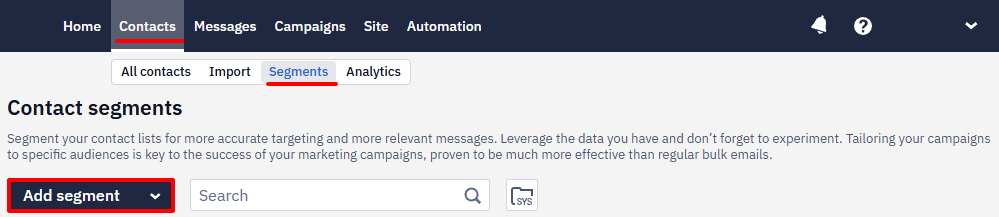
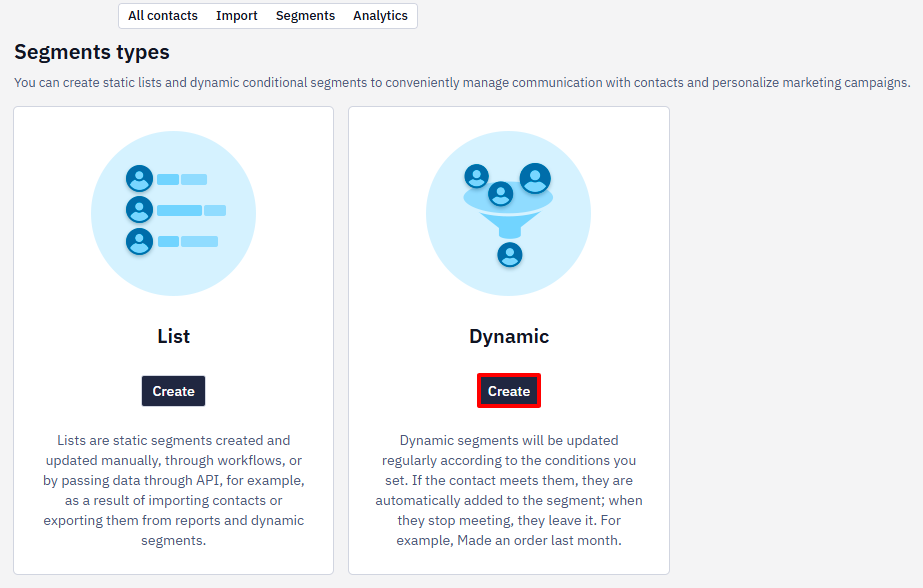
- Go to Contacts → Segments. Click the Add segment button.
- Choose the Dynamic segment type and click Create.
- Fill in the general properties:
- Segment name: it will be displayed in the general segments’ list.
- Segment purpose: for example, for regular promo campaigns.
- Tags: to find and filter the segments in the general list.
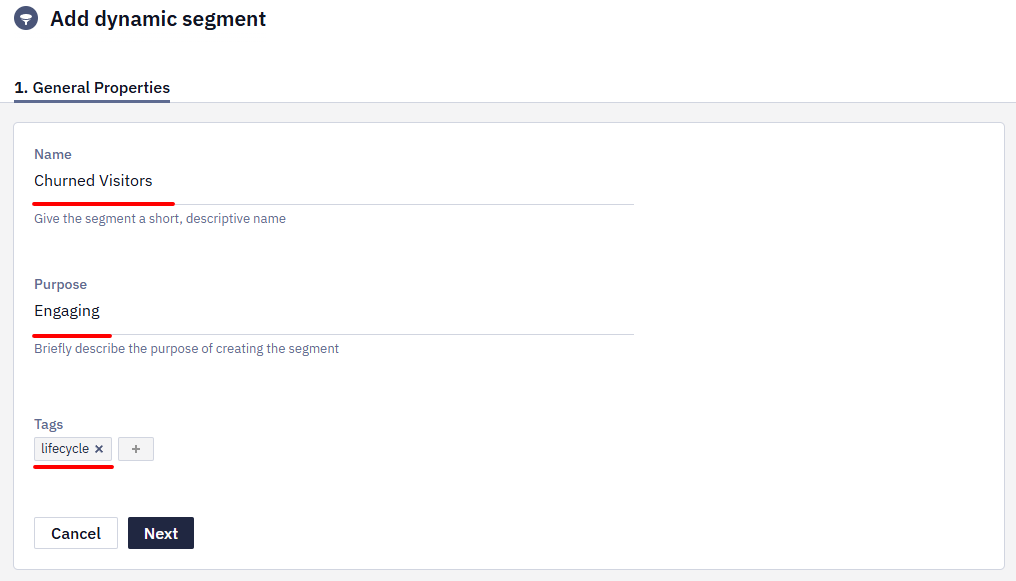
Click the Next button.
- Click the Add condition button. A new set of fields will appear in the list of conditions after the system receives event. Select the Custom event → Other fields.
- With basic segmentation, you can segment events only by the number and type;
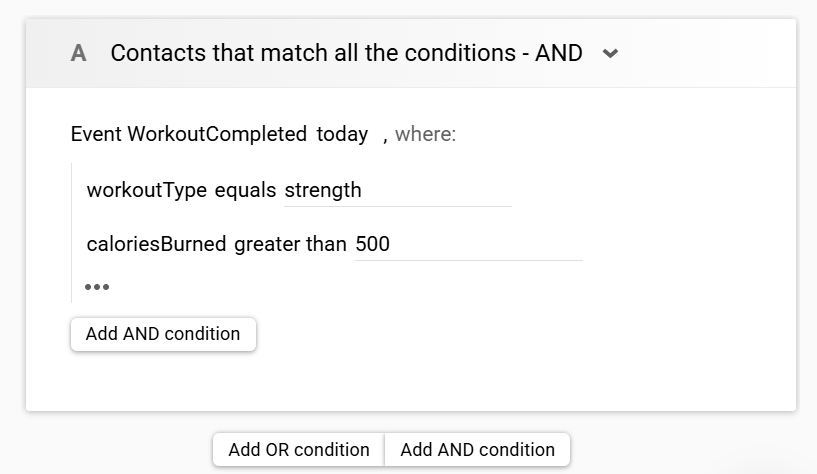
- With advanced segmentation, you can segment events by the event parameters.
For example, you can find users who completed a Strength workout today and burned over 500 calories.
NoteThe event count in a condition is scoped to the selected event period (for example, "5 times today" or "5 times during the last 30 days") — it's not a running lifetime total across all time. To segment by a true all-time count (for example, "5+ app opens ever"), export events to BigQuery, aggregate the count there, and feed it back as an additional field on the contact.
Card Conditions
We can select the event parameters required for additional filtering by clicking on the three dots in the card.
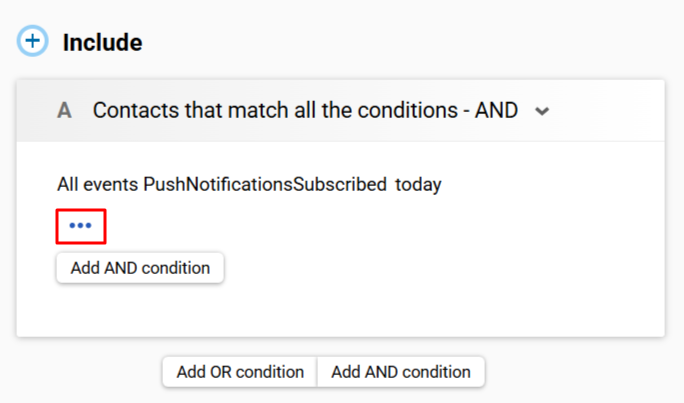
Let's choose the following options:
deviceCategory→ Mobile.osType→ iOS
The segment card will look like this:

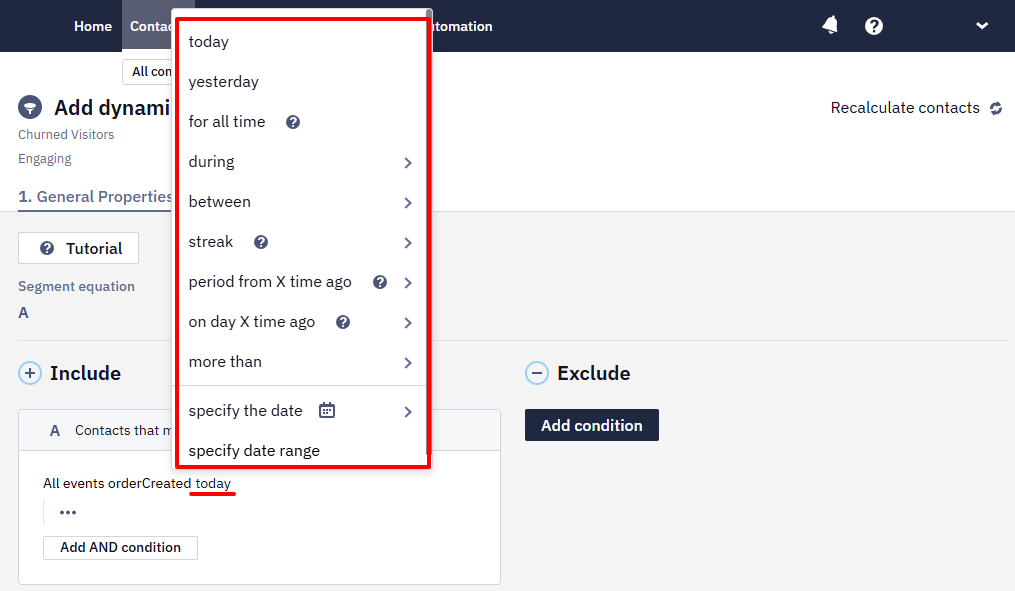
Event period
NoteBy default, the system sets the event period to today.
To change the period, click on the word today and select another option from the drop-down list
Streak – used to check the regularity of events and to segment users who stay consistently active. The event must occur at least once in each of the N previous complete periods in UTC (day, week, or month).
Example: streak → 4 → previous complete weeks.
The segment will include only those contacts who were active every week, with at least one event in each of the last four previous complete weeks.
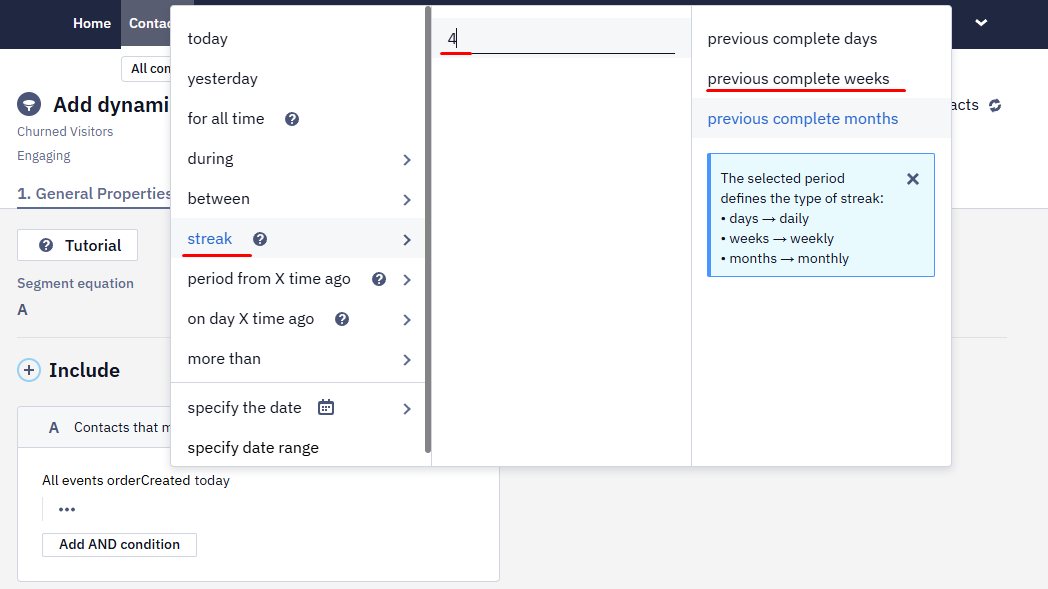
Click Done.
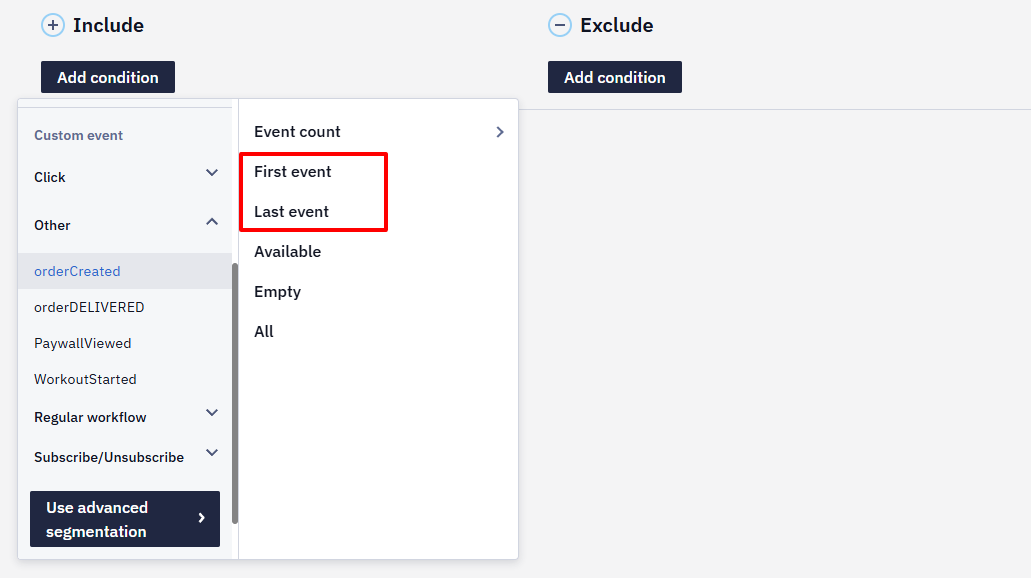
To create segments based on events that reflect the customer lifecycle stage, use the following conditions:
- First event – to identify the user's initial interaction (e.g., subscription, unsubscription, purchase, etc.);
- Last event – to understand when they last engaged in the same event.
These conditions help you:
- Identify new users (e.g., the first event occurred within the last week, month, or a specific period);
- Find inactive users (e.g., the last event happened a month ago or hasn't occurred within the selected timeframe);
- Analyze returning users (e.g., the first event was a year ago, but a new one occurred last week).
This allows you to clearly distinguish between new and returning users. For example, if a contact was previously subscribed, then unsubscribed, and re-subscribed a few months later, they should not be considered new.
Updated 1 day ago