
Setting Up Web Pushes for Safari
Safari Push Notifications are triggered remotely using Apple Push Notification service (APNs), even when the Safari browser isn’t running. Web pushes work just like app push notifications. To set up web pushes for Safari, you need to have an Apple account
and a developer account (paid).
NoteVoluntary Application Server Identification (VAPID) allows sending web pushes to Safari versions 16+.
If you are using VAPID and don't need to send pushes to older Safari versions, you can skip the manual below.
Step 1. Registration of Web Push ID
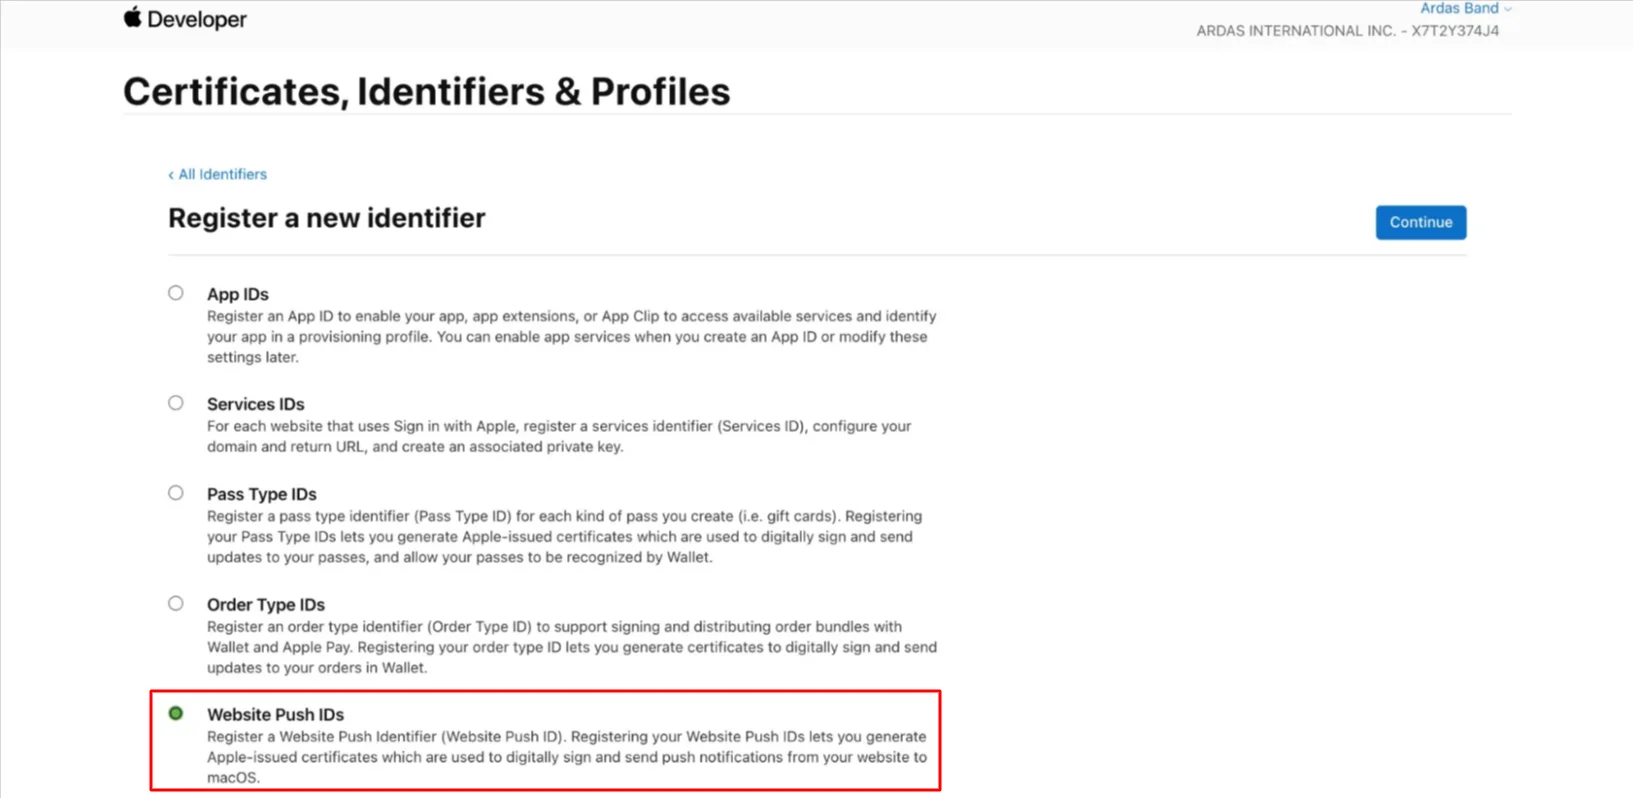
- In your developer account go to Identifiers and select Website Push IDs.
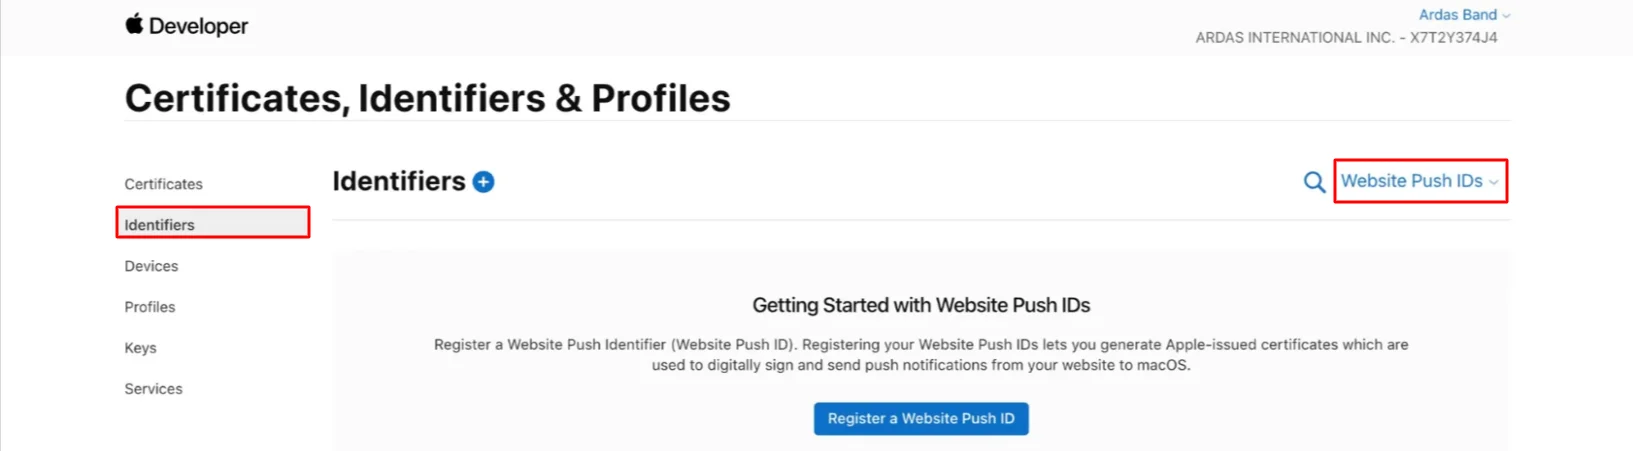
- Select Website Push IDs and click Continue.
- Fill in Description and Identifier fields, and click Continue.
- Description. Your service name for the Provisioning Portal which labels your Website Push IDs with a more human-readable description.
- Identifier. Your unique reverse-domain string that must start with web (for example, web.com.example.domain).
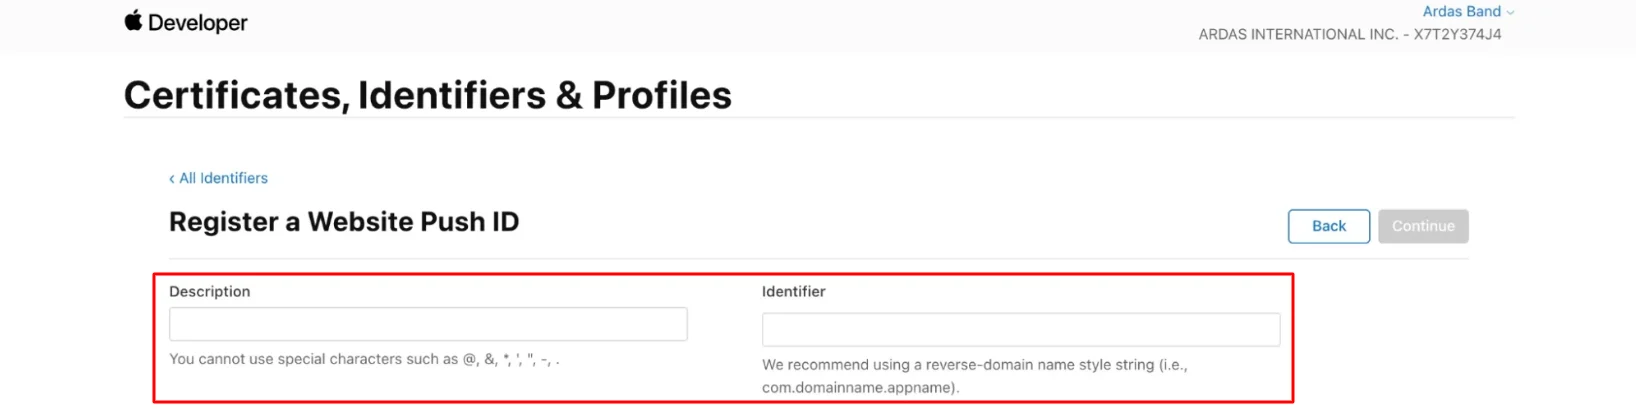
The new ID will appear on the Web Push IDs list.

Note. Your certificate may be revoked by Apple if you violate any of the push notification service rules and provisions. Thus, you’ll be unable to send new notifications. In case of unauthorized violation, you can personally revoke your certificate at your developer account → Certificates → Identifiers & Profiles.
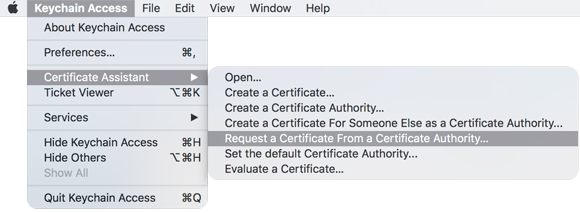
Step 2. Certificate Request in Keychain Access for MacOS
- Open Keychain Access. It's standard for all Apple devices. In the menu, choose Certificate Assistant → Request a Certificate From a Certificate Authority.
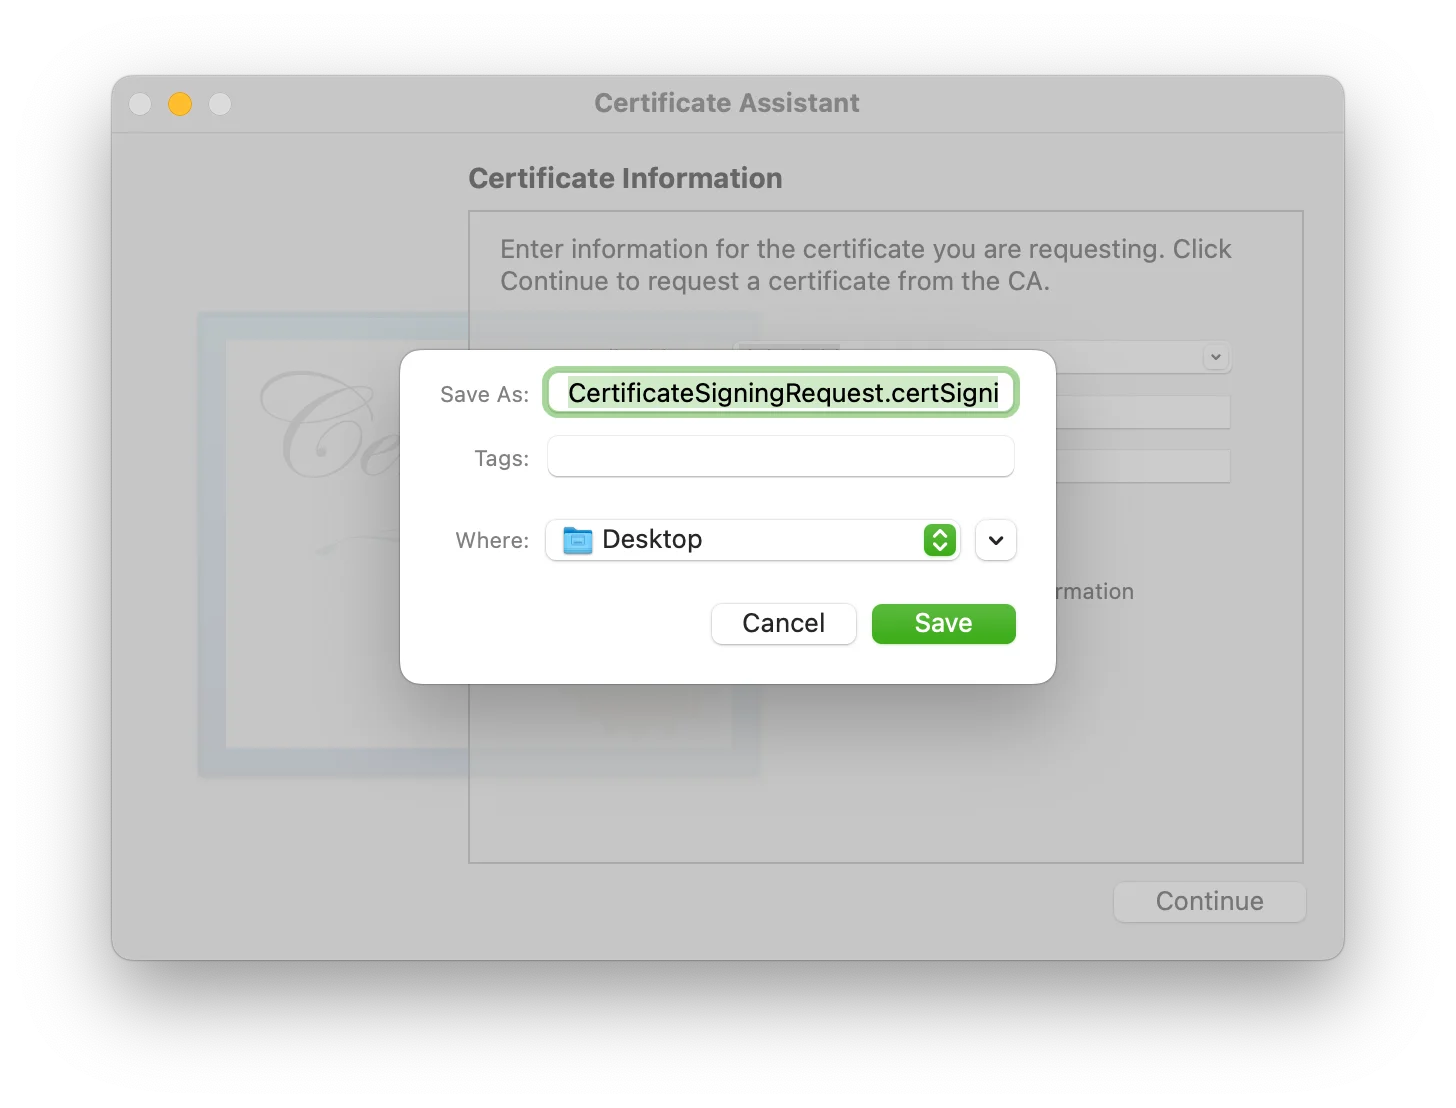
- Fill in the User's Email Address and Common Name fields, and select Saved to disk.
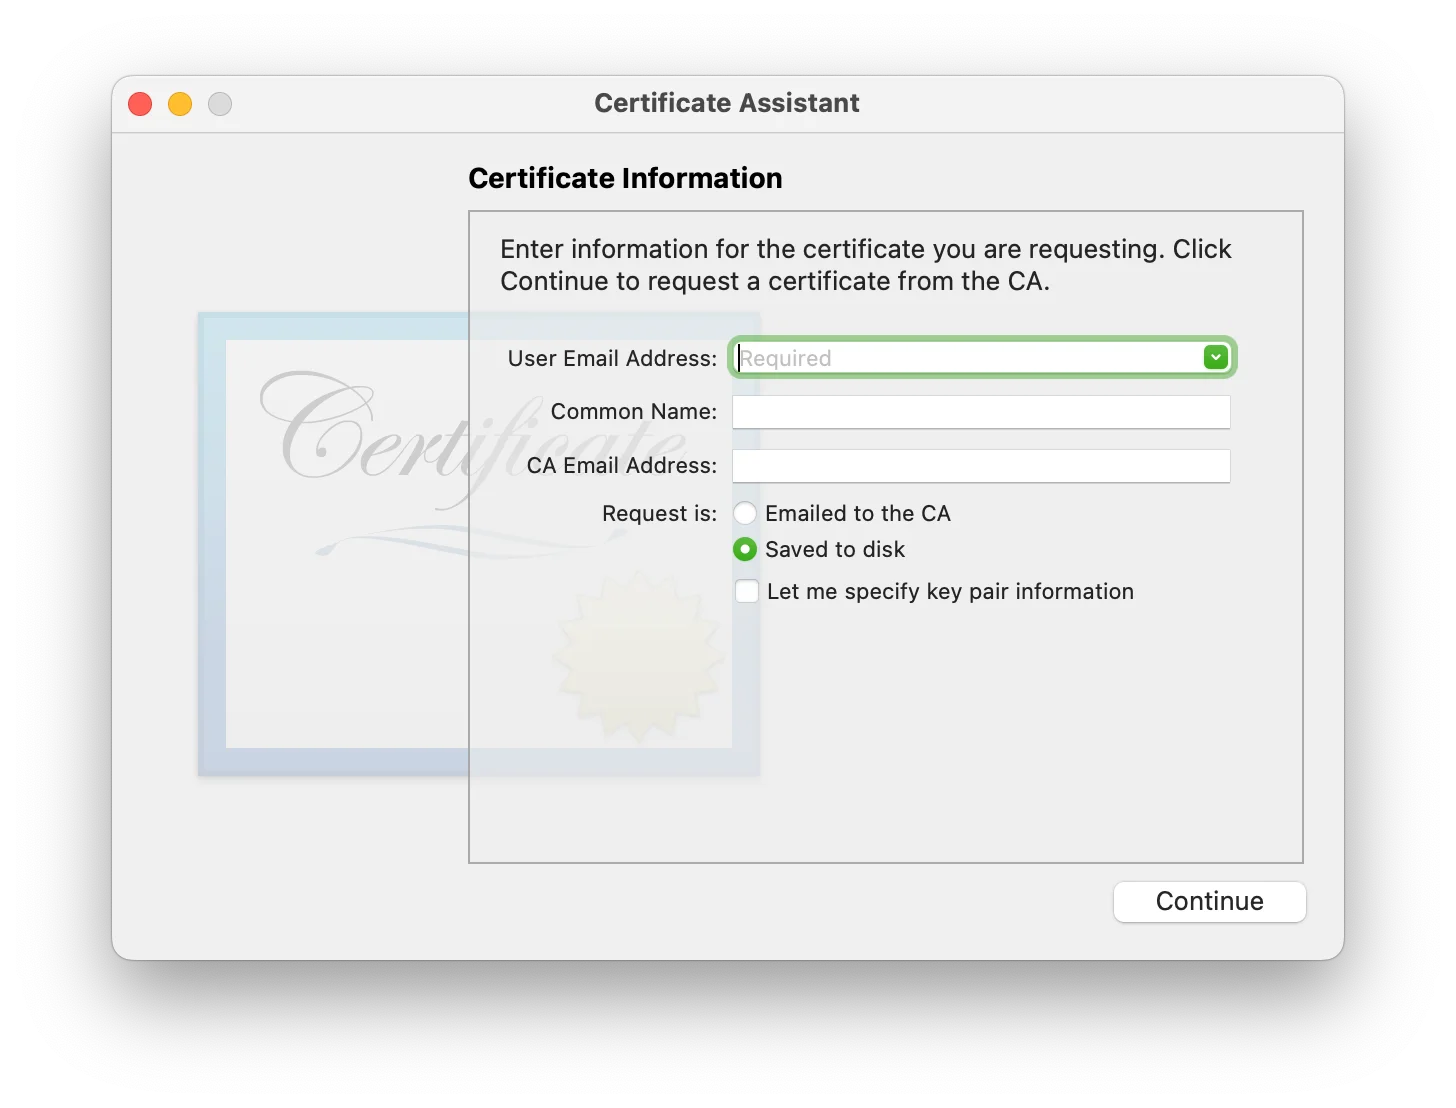
- Click Save.
Step 3. Certificate Generation
- In your developer account, go to iOS Certificates and click Create a certificate.
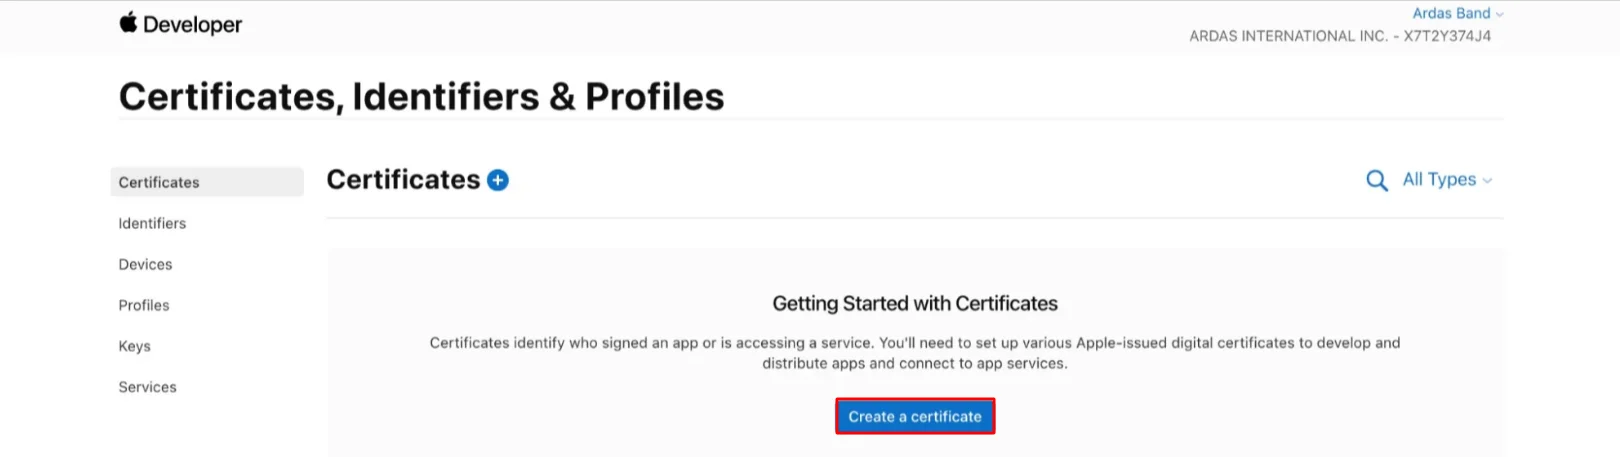
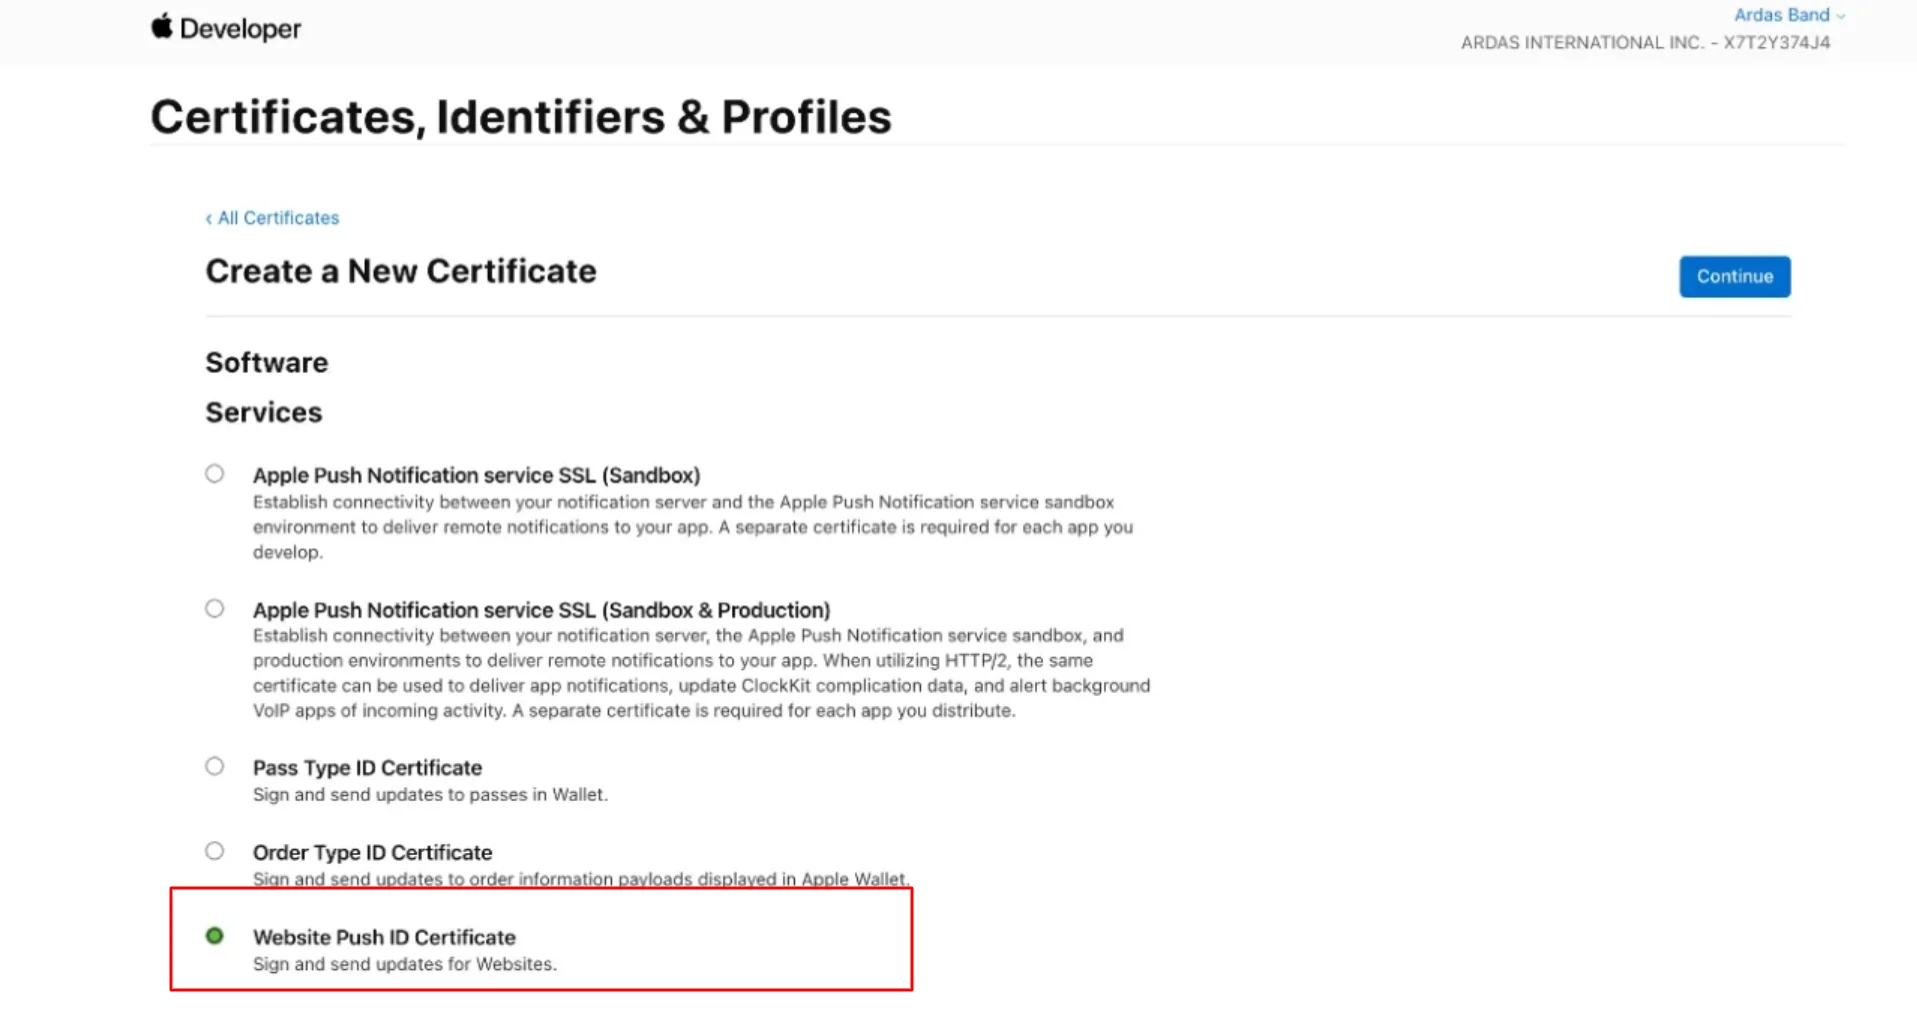
- Choose Website Push ID Certificate and click Continue.
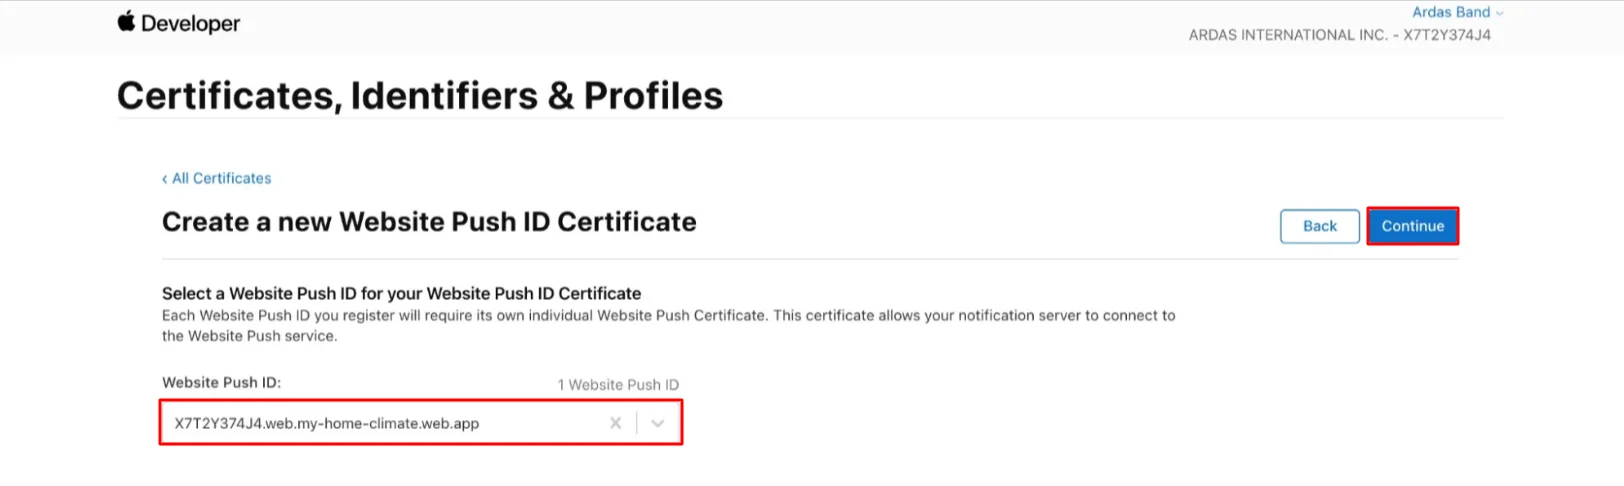
- Select the Website Push ID you’ve created and click Continue.
- Upload a Certificate Signing Request.

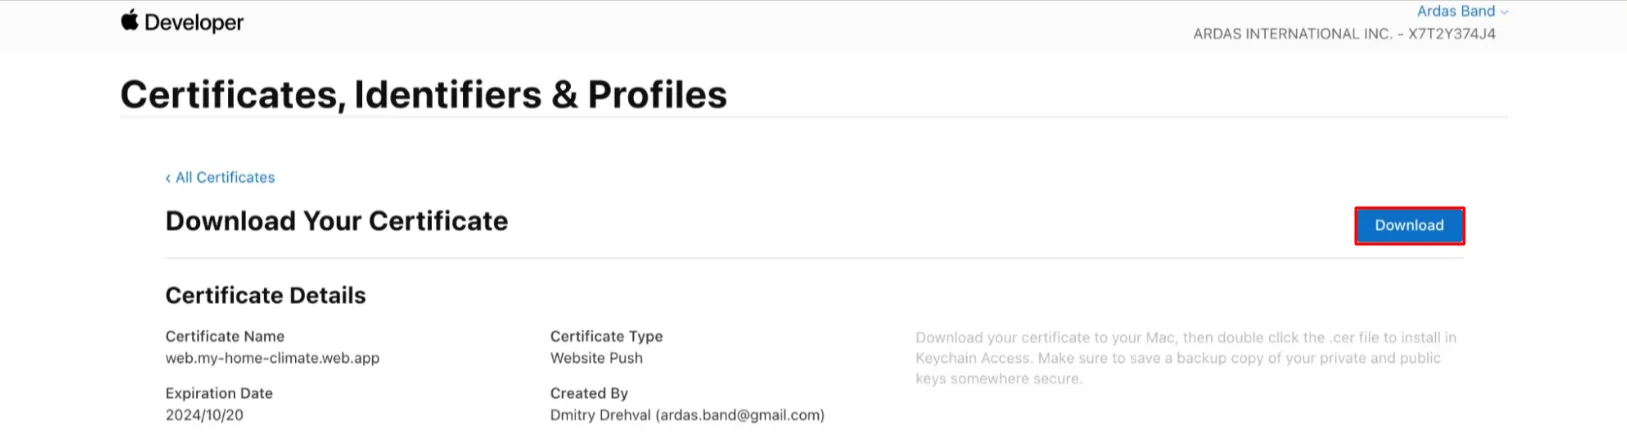
- Download the certificate.
Step 4. Certificate .p12 Export
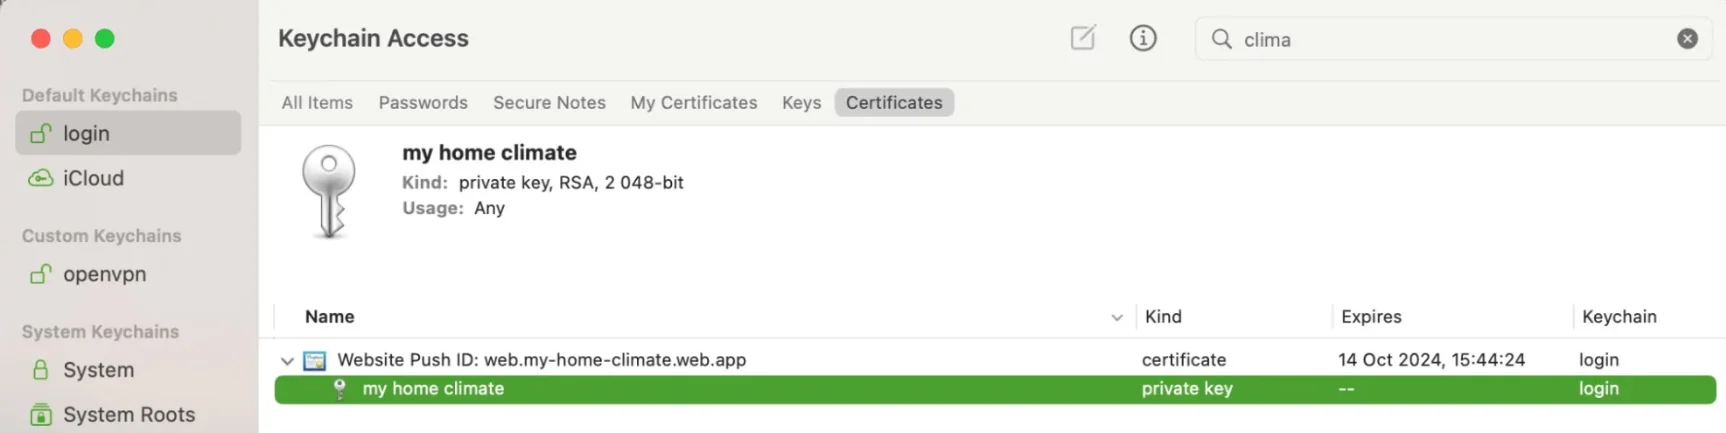
- Double-click the downloaded file. In opened Keychain Access, go to My Certificates and select the necessary certificate.
- Right-click the certificate accordion and select Export.
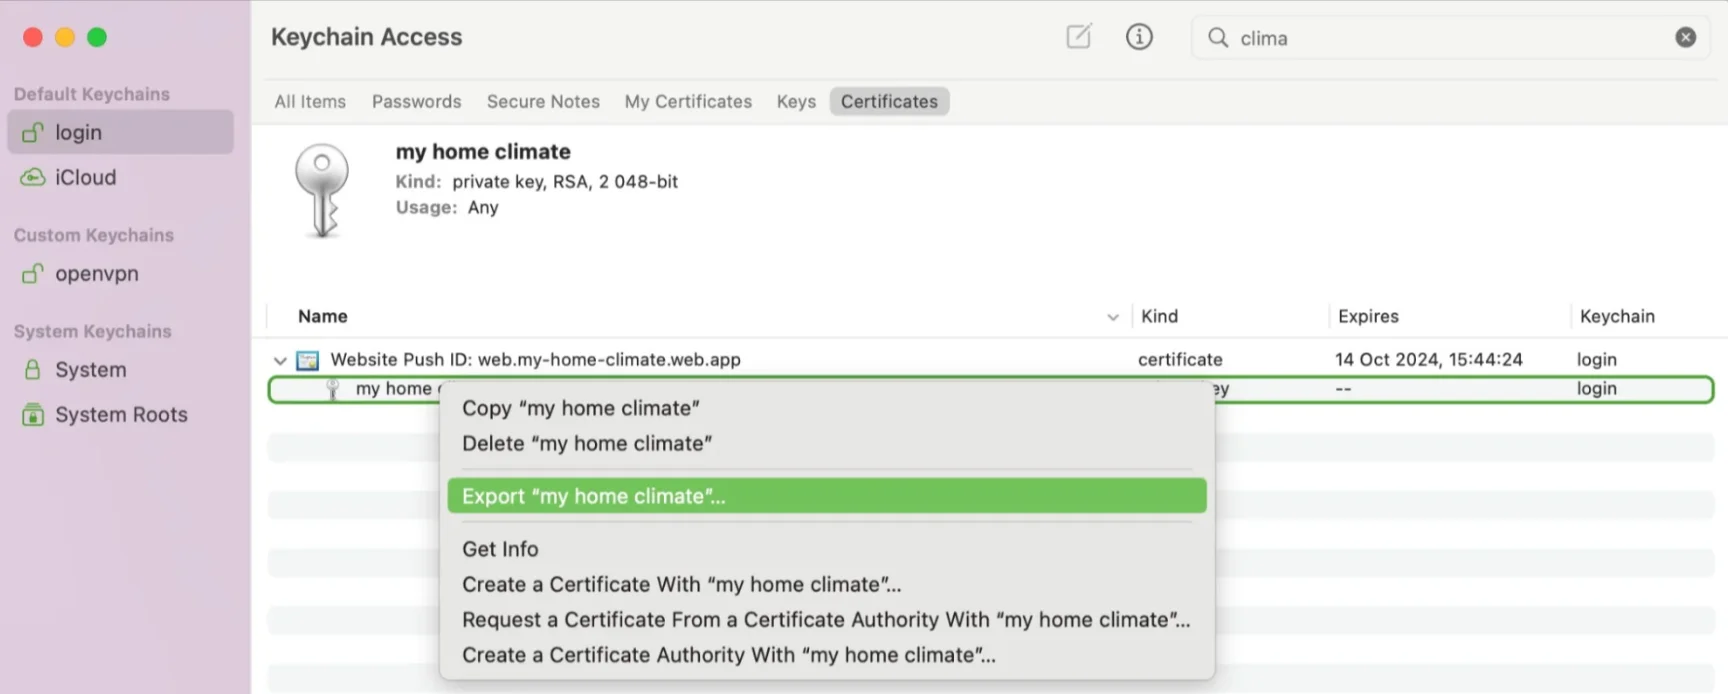
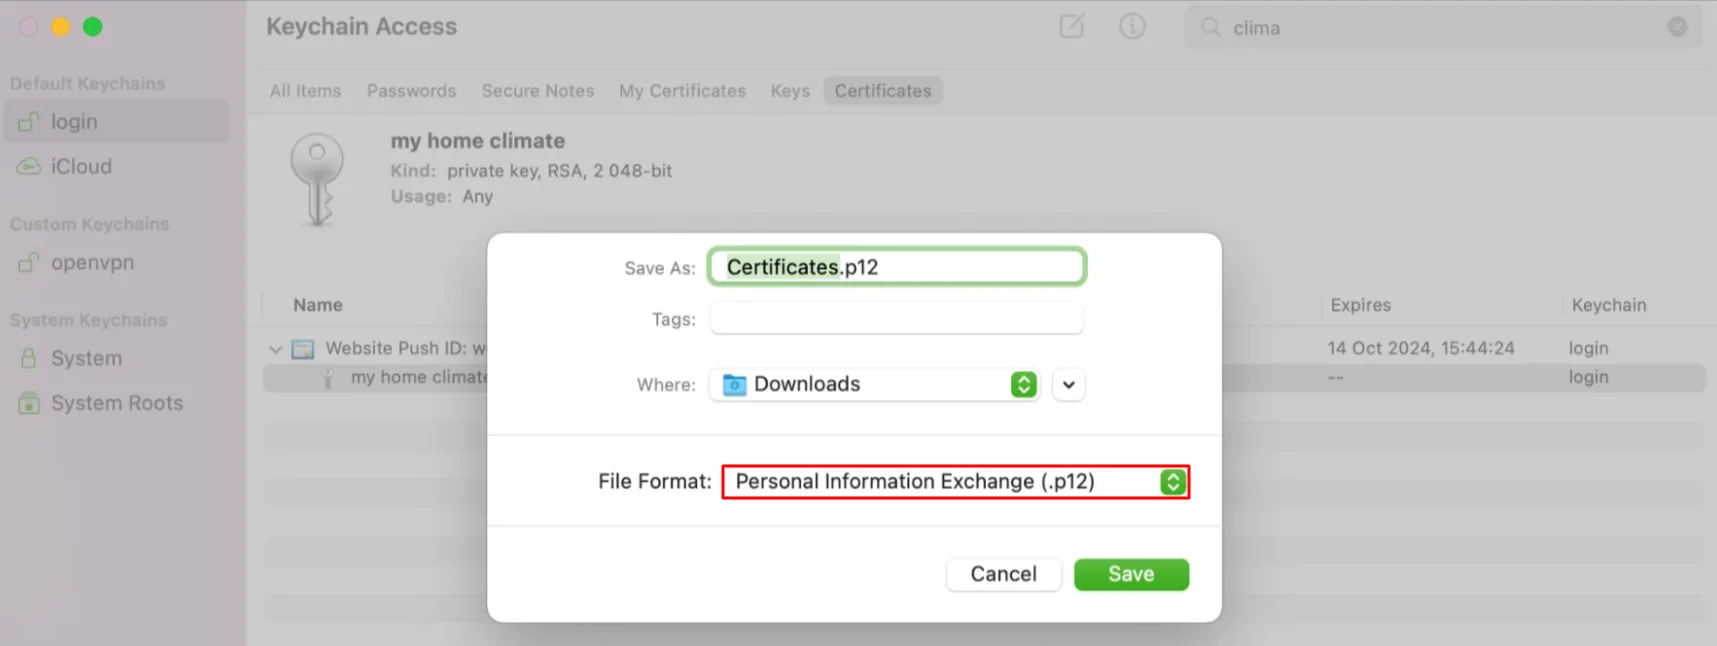
- In File Format, select Personal Information Exchange format (.p12).
- In the file generation window, you can add an additional password to the
.p12certificate file.
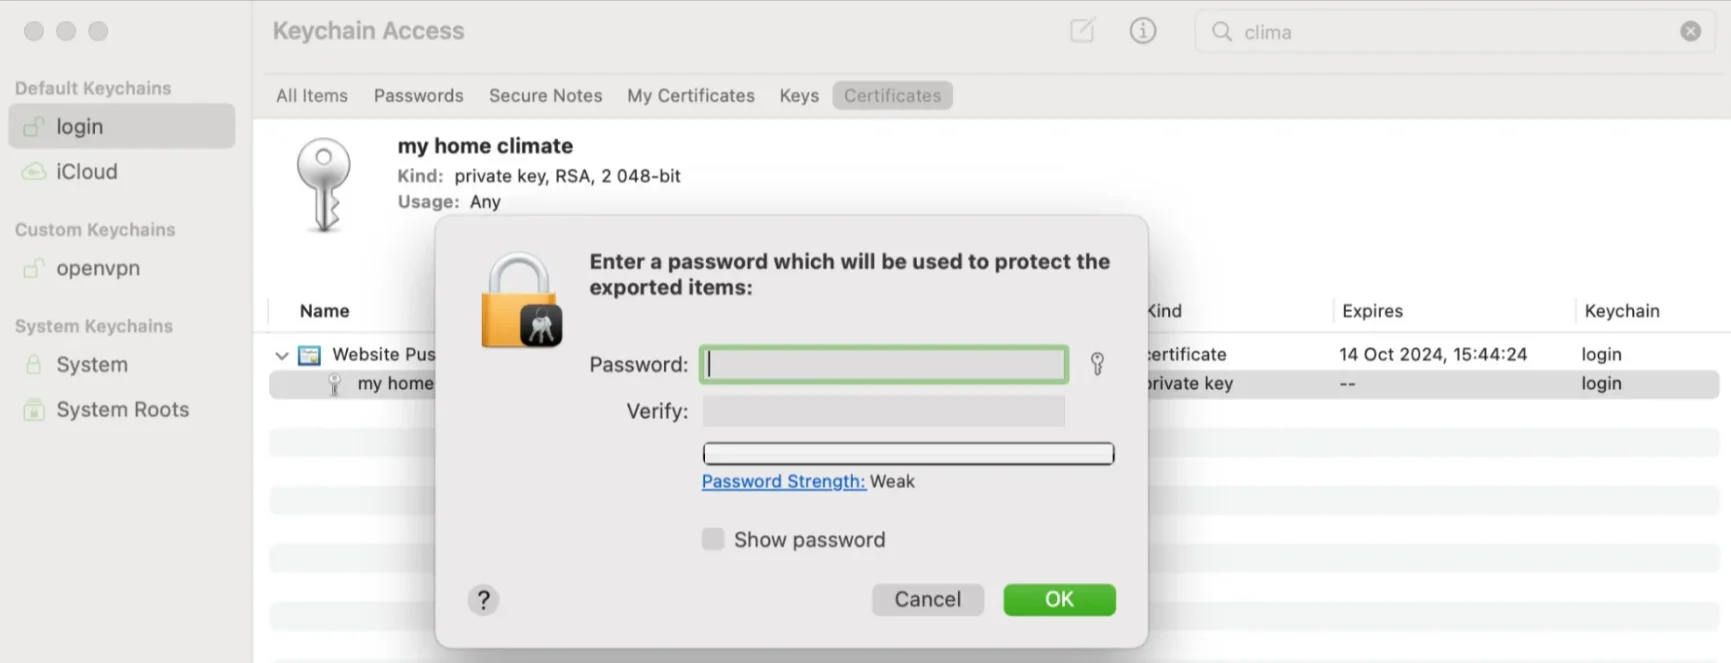
You can leave these fields blank and click OK. Next, click Allow and enter your Mac password to export the certificate to your computer.
Step 5. .p8 Certificate Download
The .p8 extension is a text file with keys that are used to execute JWT content for APNs messages.
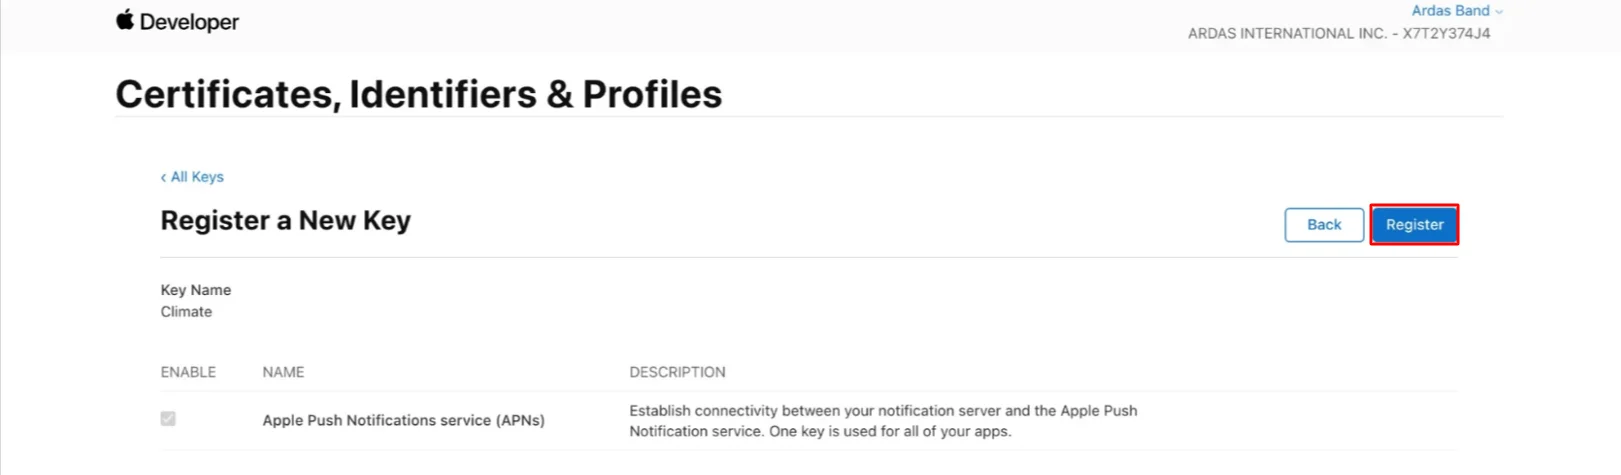
- In your developer account, go to Keys and click Create a key.
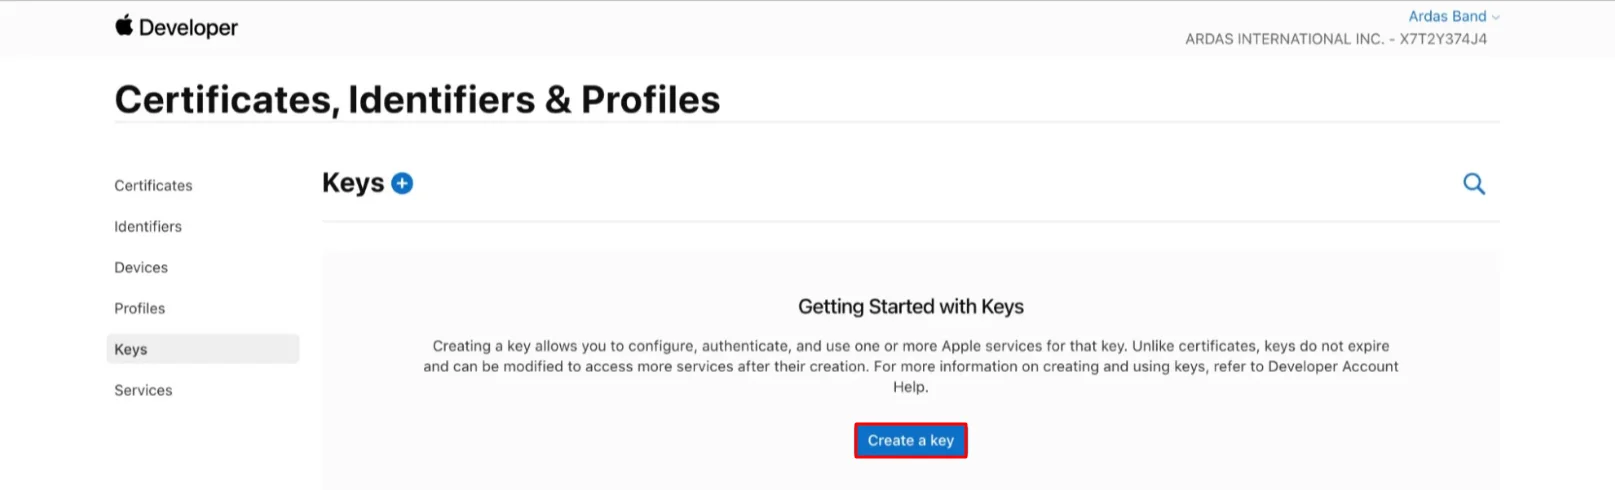
- Select Apple Push Notifications Service (APNs).

- Register a new key.
- Download the
.p8certificate.
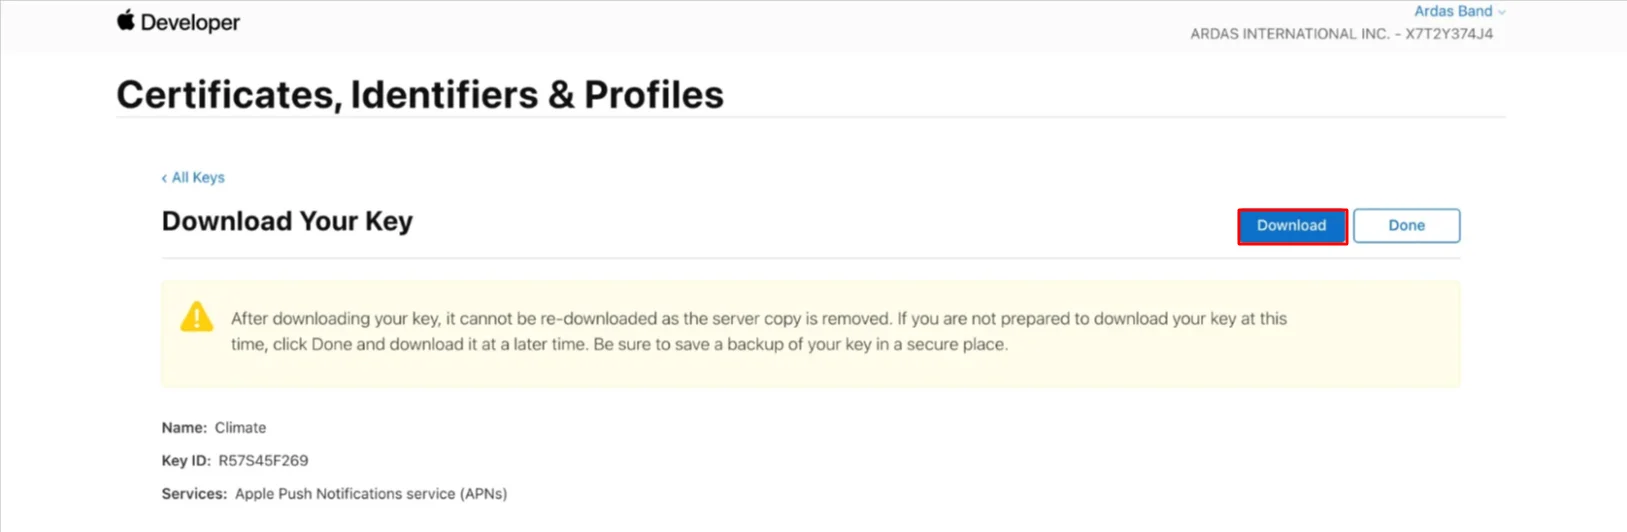
The new key will appear in the Keys list.

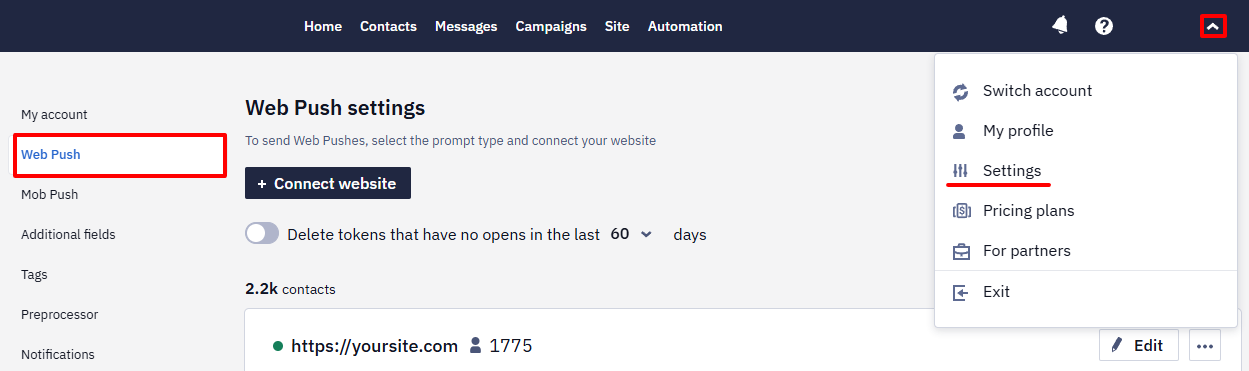
How to Set Up Safari Web Pushes in Reteno
- In your personal account, go to Settings → Web Push.
- If you add Safari to the existing website, click on its link (1). If you don't have a website, click + Connect website (2).
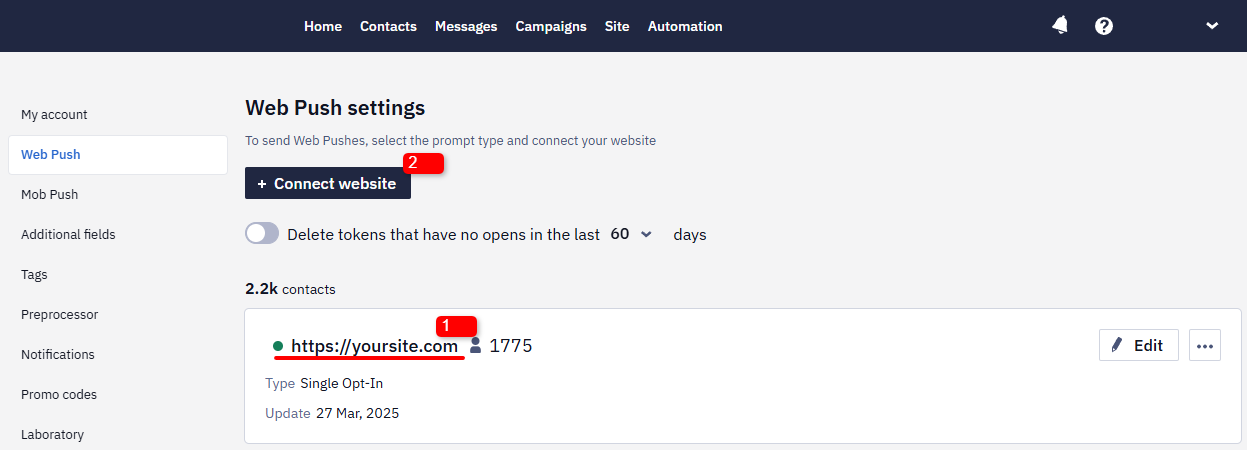
For a new website, fill in all the fields. If the site already exists, fill out For Safari.
- In the Legacy browsers support section, upload files
.p8andp.12.
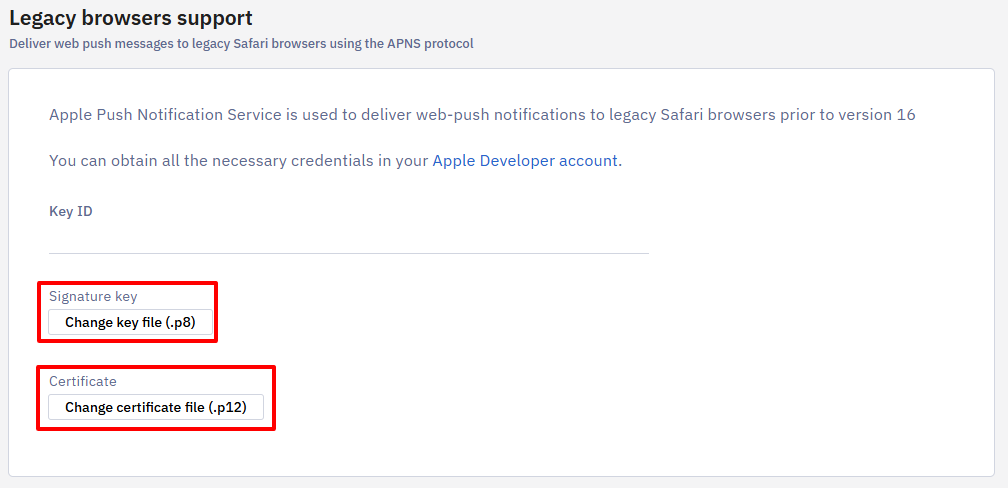
- In the Key ID field, insert the corresponding ID from your developer account → Keys → All.
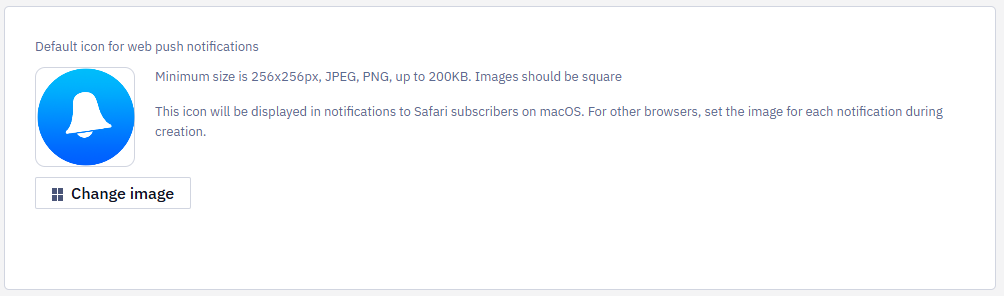
NoteSafari icons should be not less 256x256px,
JPEG,PNG, up to 200KB. Images should be square. Unlike other browsers, the icon for Safari is installed once and cannot be changed. If you change the icon, old subscribers will receive notifications with the old image, and new ones with the new one.
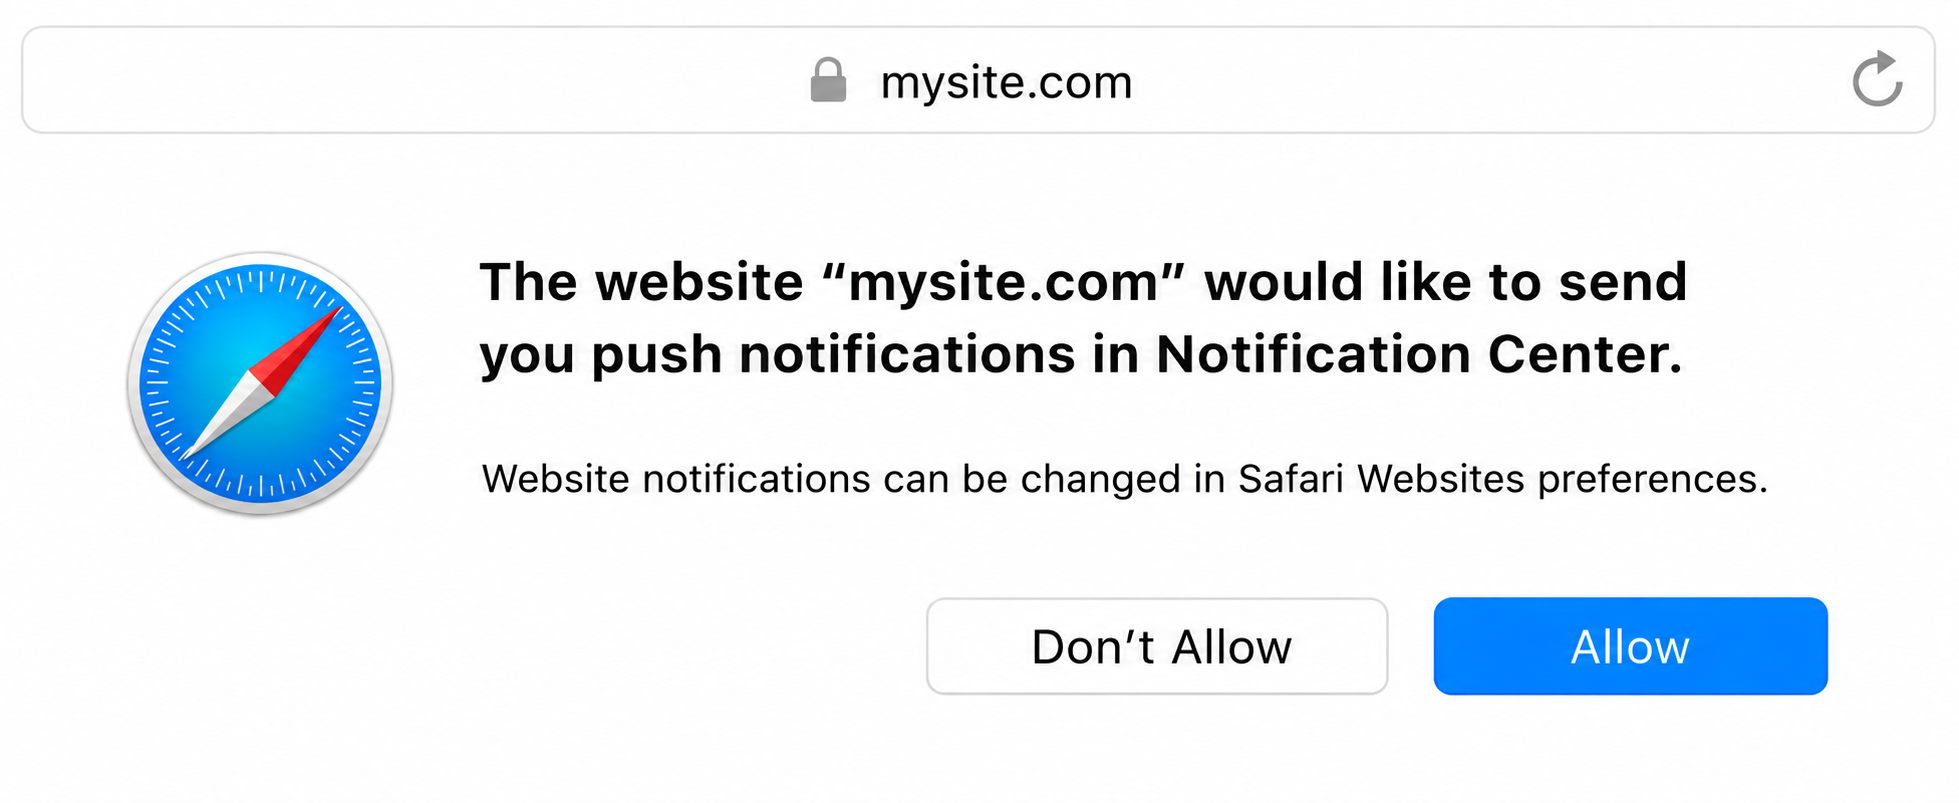
Once you’ve saved all the settings, enter your website in Safari and see a web push permission prompt.
Updated 4 days ago