
Unsubscribe Forms
Unsubscribe forms are web pages that users land on after clicking the Unsubscribe link in an email.
ImportantThe unsubscribe link/footer is mandatory in every email — including transactional ones — per Google's sender requirements (February 2024). Reteno automatically re-adds it if it's removed from a template; there's no way to turn it off.
Unsubscribing — through the button, the footer, or your own page calling the API — changes the contact's system subscription status and they stop receiving emails. It doesn't update a custom contact field, such as a consent flag you set during your own onboarding. To keep such a field in sync, add a workflow that starts on the unsubscribe event and includes an Update contact field step.
Benefits of Using Unsubscribe Forms
- Protecting the sender’s reputation: The form allows you to end the communication neatly, leaving the user with a positive impression of the brand.
- The ability to save the contact: Instead of an instant unsubscribe, you can offer an alternative, for example, a thirty-day pause or changing subscription categories.
- Analytics of reasons for unsubscribing: Contacts can indicate the reason for unsubscribing, allowing you to improve content and communication in the future.
- Flexible brand experience: The ability to customize the form allows you to design it according to your design, style, and user language.
Unsubscribe forms are available upon request. Please contact us at [email protected] to activate the functionality for your account.
Why the Form Address Can't Be Copied
The unsubscribe link in a template is not a fixed address. At send time it is wrapped into a short link that is unique per recipient, and that link is what identifies whom to unsubscribe or re-subscribe. The same is true of the subscription form.
Copying the form's address into an email you assemble and send yourself therefore doesn't work: the link isn't wrapped, so the page has no contact to act on. For the same reason a wrapped link is personal — passing yours to someone else won't unsubscribe them — and a page opened through an unwrapped link can't fill in personalization, so merge tags stay on screen as raw text.
To keep this form while sending over the API, send a template created in the platform — with Send prepared message, for example. The link is then wrapped exactly as in a regular campaign. If you would rather keep sending from your own system, host the page yourself and call the unsubscribe event from it, as described in the next section.
Whichever way you send, the global "unsubscribed from all" status is available only in the account UI. Get contact and Search contacts return the contact card, but not the system email-subscription or blacklist status — so a consent field of your own is never the same thing as the system suppression status. See Contact Blacklist for what the API does and does not expose.
If the message body has to stay in your own system, the email still needs a way to opt out. A line of plain text with a working reply address is enough — for example, "If you no longer want to receive these emails, write to us at …". Use an address people can actually reply to, not a noreply one. An email with no opt-out at all gets the sender blocked, and mailbox providers start filing its mail as spam, which pulls down the open rate and the reputation of the whole domain.
Using Your Own Unsubscribe Page
Instead of a form built in Reteno, you can send contacts to a page hosted on your own domain. To do this, your page must trigger the Reteno unsubscribe event when the user confirms — call the Add to Unsubscribed (or Delete from Unsubscribed to reverse it) API method from your page. Without this call, the contact will be removed from your own list but will still be considered subscribed in Reteno and keep receiving messages.
Form Types
- Double Opt-Out Form: The contact first sees a page with the option to leave a comment and choose a reason for unsubscribing. The final unsubscription occurs after confirmation.
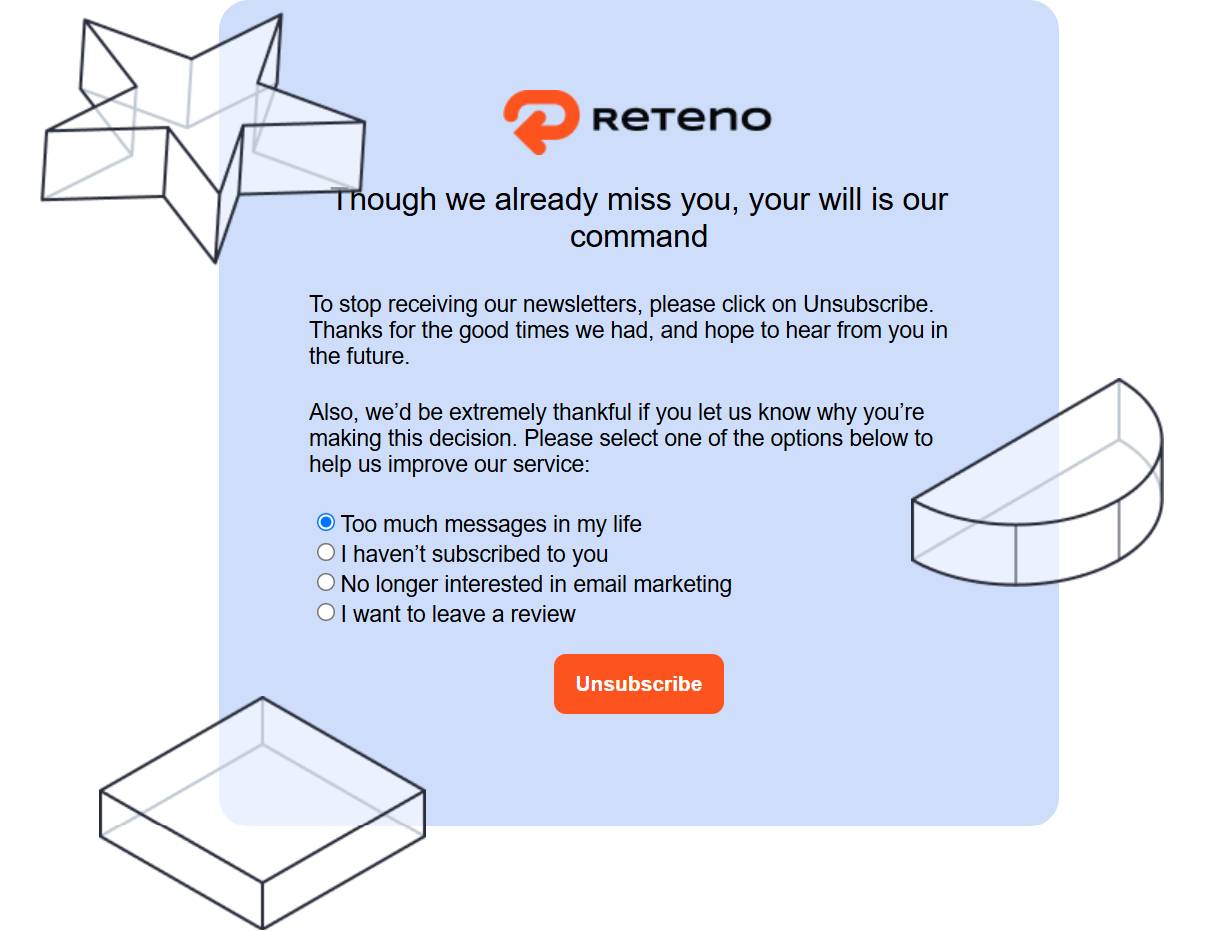
The form includes the following pages:
- Main page
- Successful unsubscribtion
The Double Opt-Out form has no re-subscribe page, so a contact who unsubscribed through it has no self-service way to subscribe again — they need to be re-subscribed manually or fill out a subscription form again.
- Opt-Out Form: The contact is immediately unsubscribed but can leave feedback, after which they will be offered the options to subscribe again now or in 30 days.
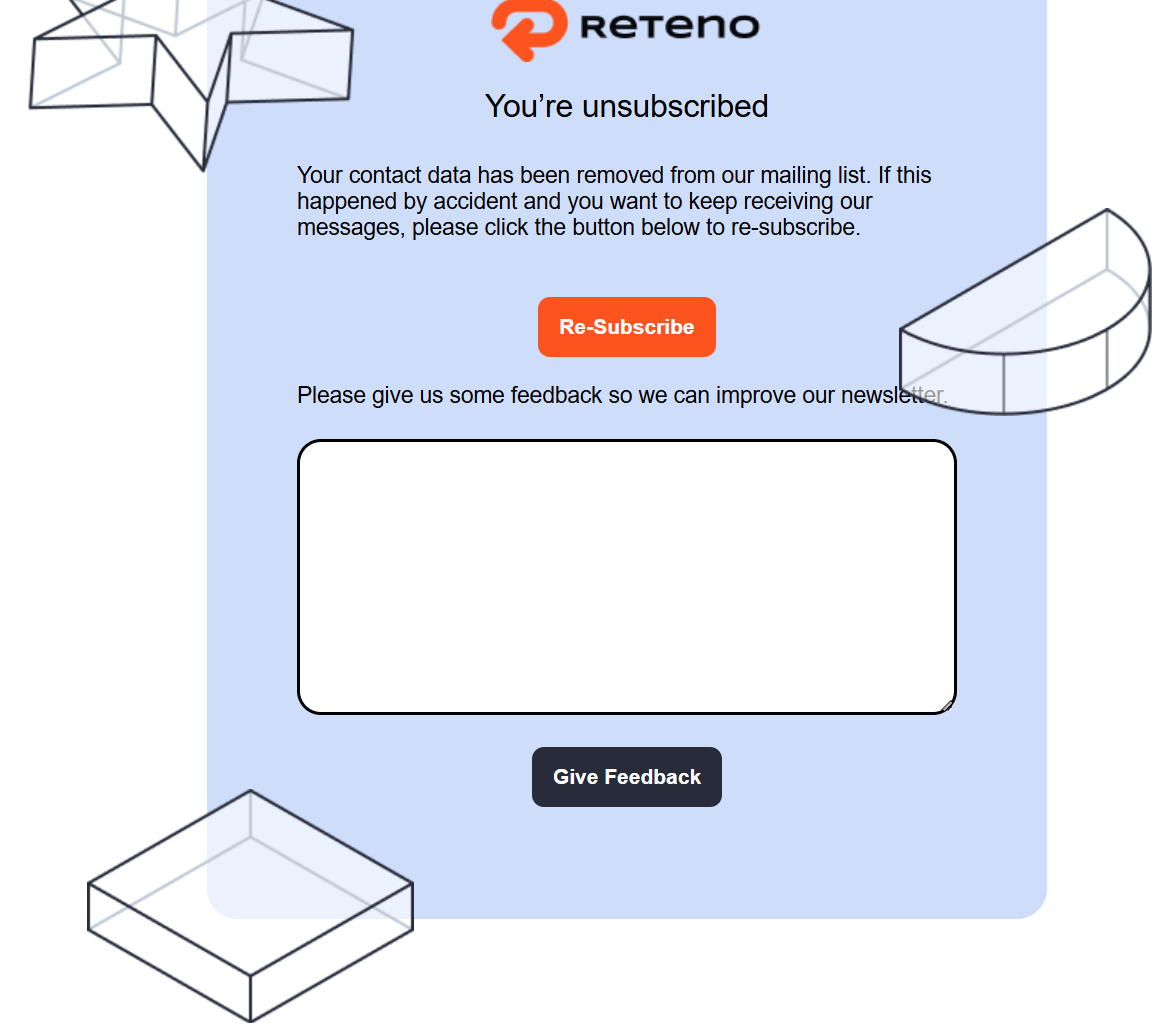
The form includes the following pages:
- Main page
- Contact sent feedback
- Contact subscribed again
- Contact paused subscription for 30 days
Changing Basic Settings
After activation, the default forms are ready to use. In most cases, you don't need to create them from scratch — just make a few basic changes:
- Replace the default image with your logo.
- Add your own text and language versions of the form.
- Adapt the colors of the buttons and texts to your brand palette.
NoteAll basic changes can be implemented without deep technical knowledge. This is safe, and the form's functionality will not be affected.
If you make more profound changes to the code, you risk breaking the form — for example, the unsubscribe may not be recorded, but the contact will remain active in the mailing list. Therefore, deep customization should only be done with the appropriate technical knowledge or with the help of a developer.
Creating an Unsubscribe Form
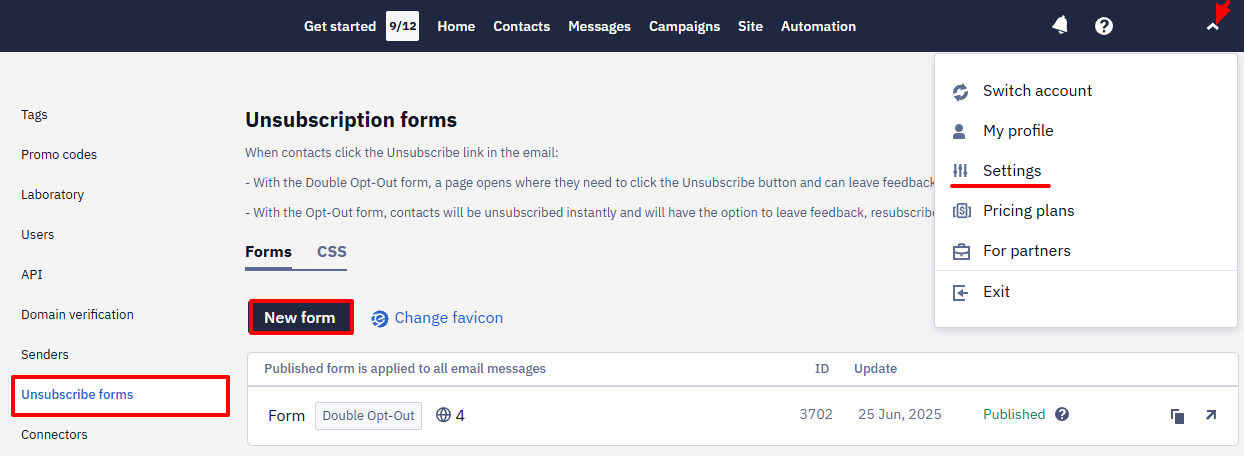
- Go to your account settings → Unsubscribe forms section → Forms → click New form.
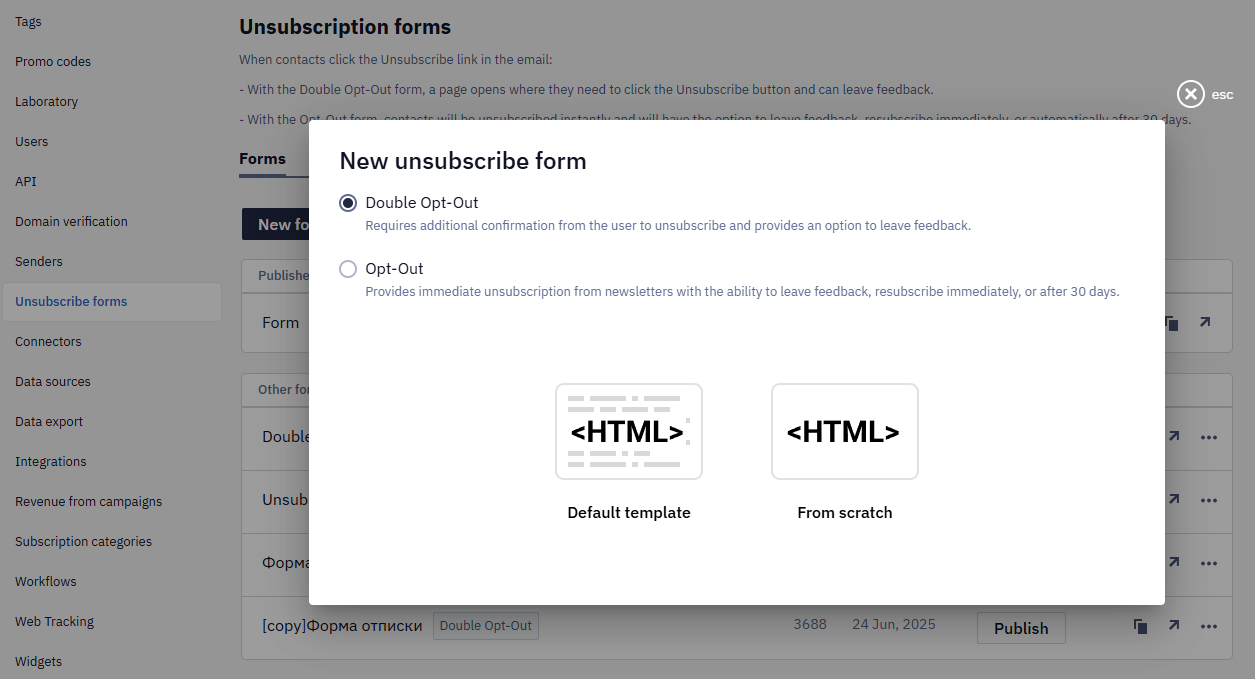
- Select the form type (Double Opt-Out or Opt-Out) and how you want to create it:
- Default template: Сustomize the existing code.
- From scratch: Add your HTML.
Required Code Snippets
- The Double Opt-Out form must contain code that performs the unsubscribe after clicking the button:
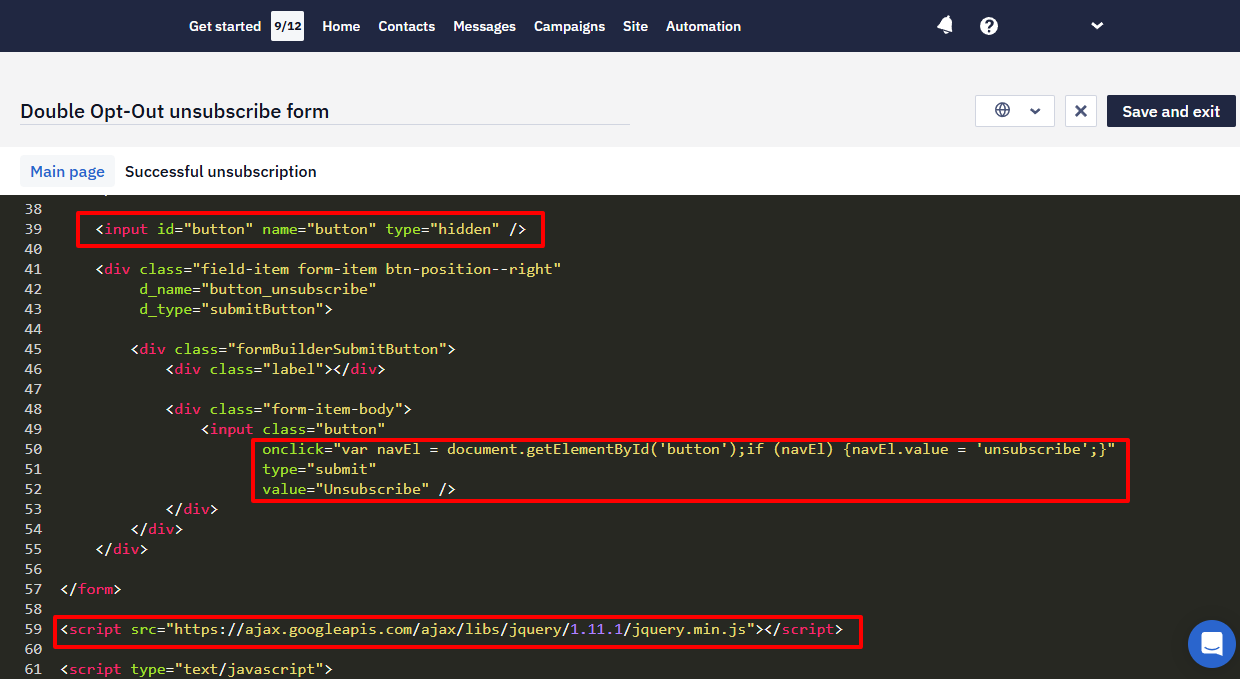
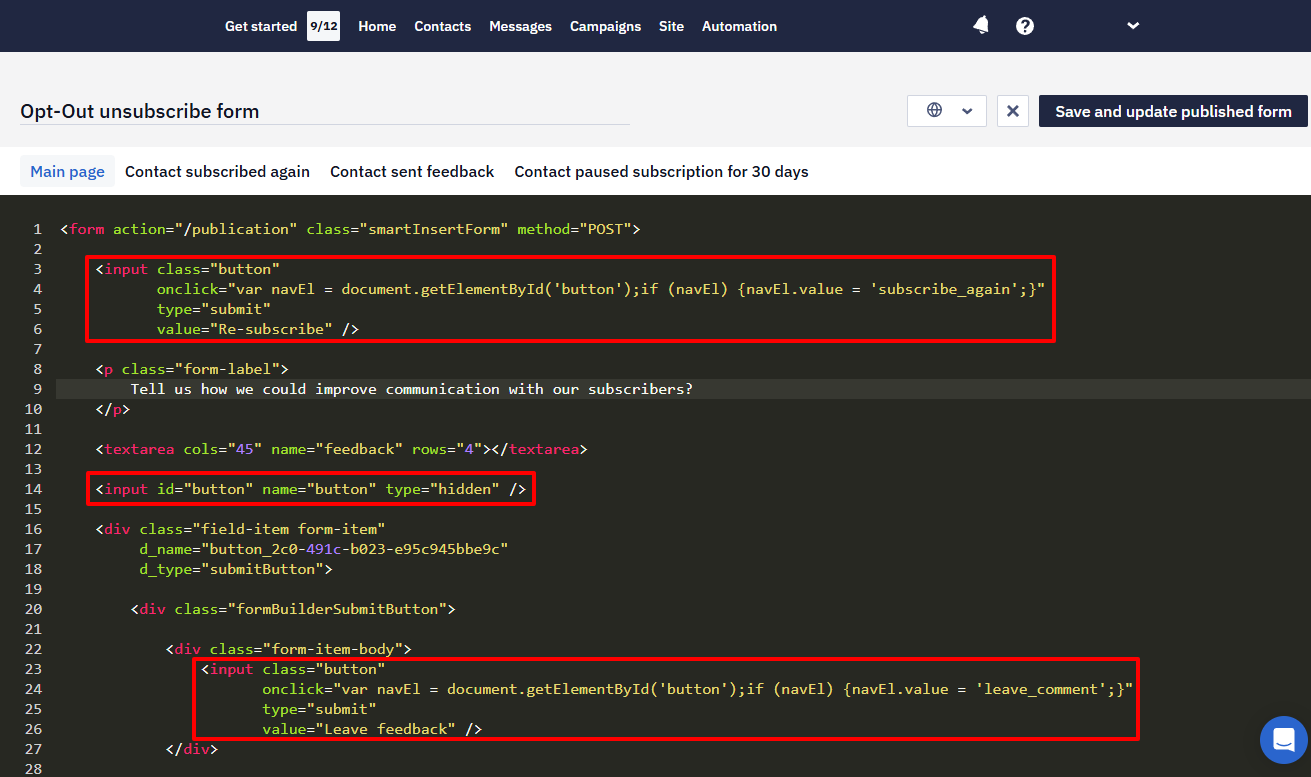
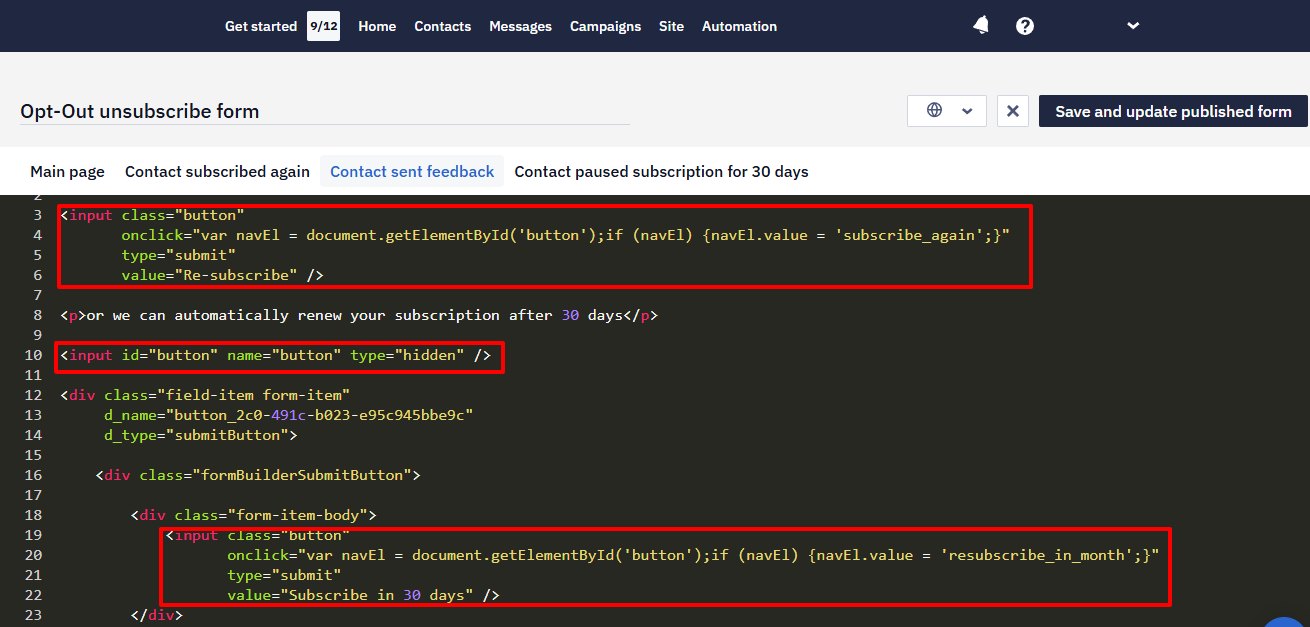
- The Opt-Out form must contain code that performs re-subscription and leaving feedback.
- Main page:
- Contact Sent Feedback page:
Avoid deleting service items and scripts
Multilanguage
Forms support multiple languages.
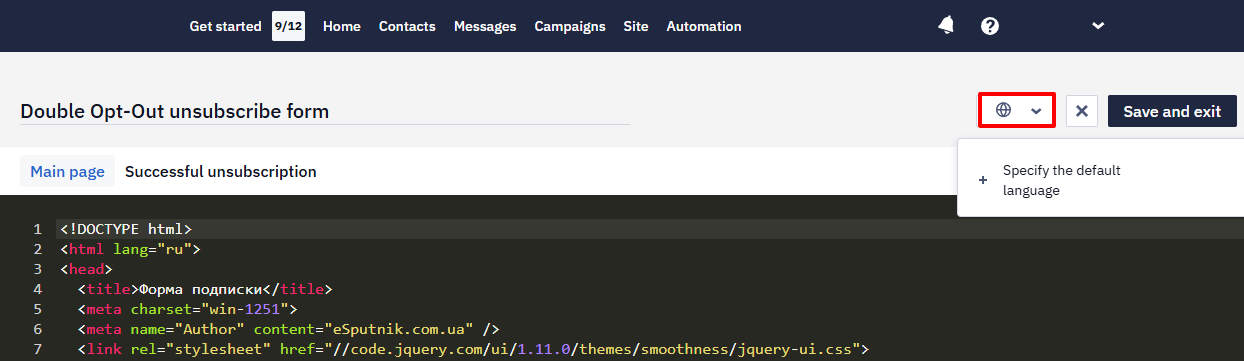
The language is determined automatically in the following order:
- The language specified in the message.
- The user's browser language.
- The language from the contact's profile.
- The default form language.
Setting CSS Styles
You can customize the CSS styles of your form in two ways:
- Upload the CSS file and add a link to it on each form page.
- Add the CSS code directly to the HTML code of each form page.
NoteAdding CSS styles is not required, but is recommended, as HTML without styles may not display correctly.
Using CSS file
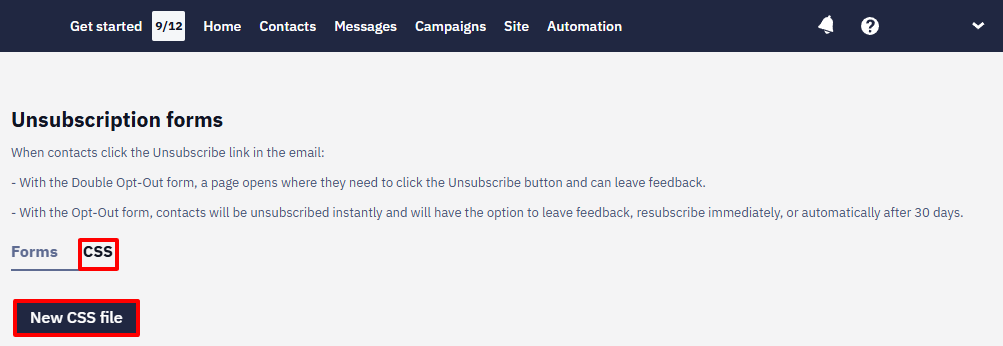
- Go to the CSS tab and click New CSS file.
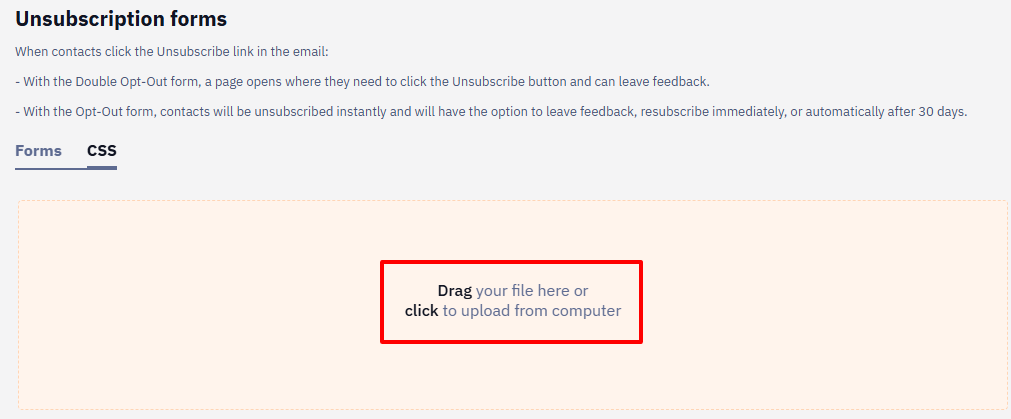
- Upload the appropriate file.
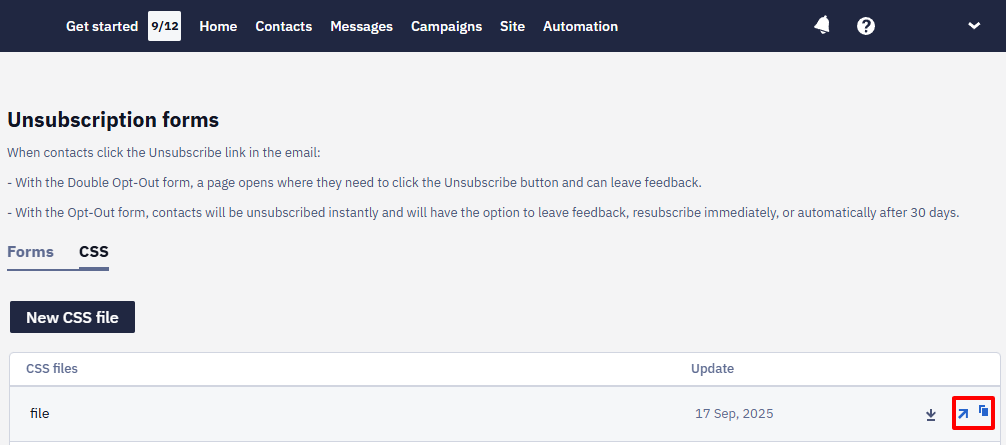
- Copy the link to the file.
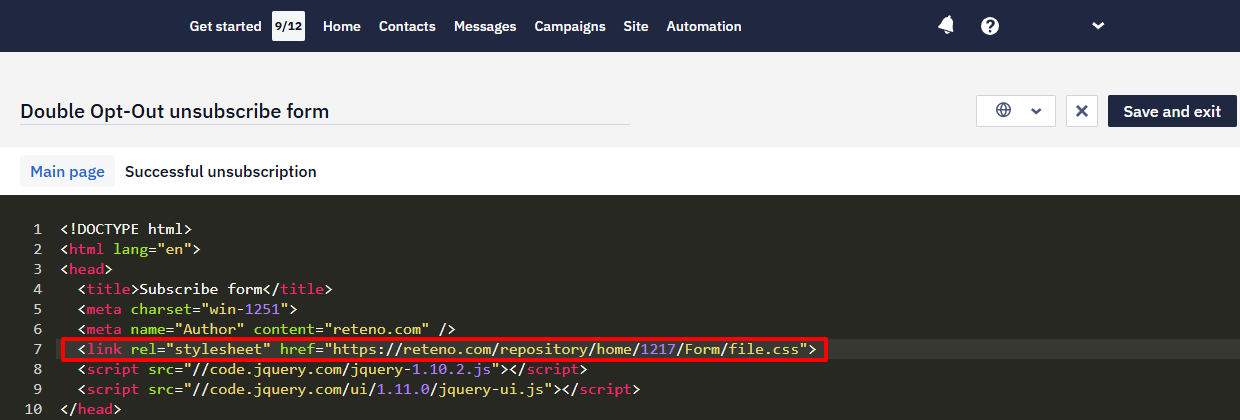
- Specify a link to the file in the HTML code of each form page.
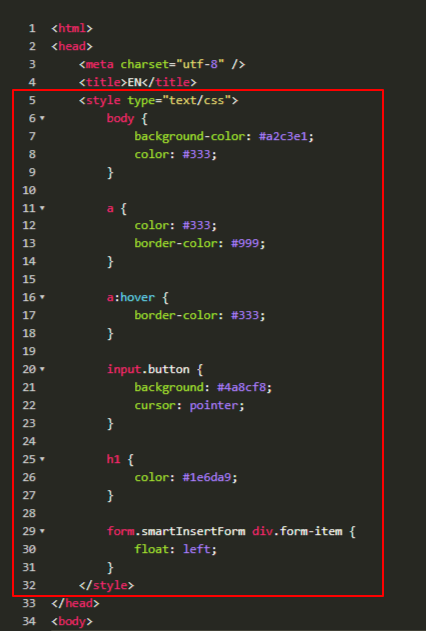
Adding CSS code
Add CSS code directly on each form page.
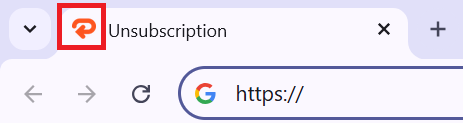
Changing Favicon
A favicon is a small icon that appears in a browser tab.
To change the form and email favicon, follow the instructions at the link.
Testing and Publishing
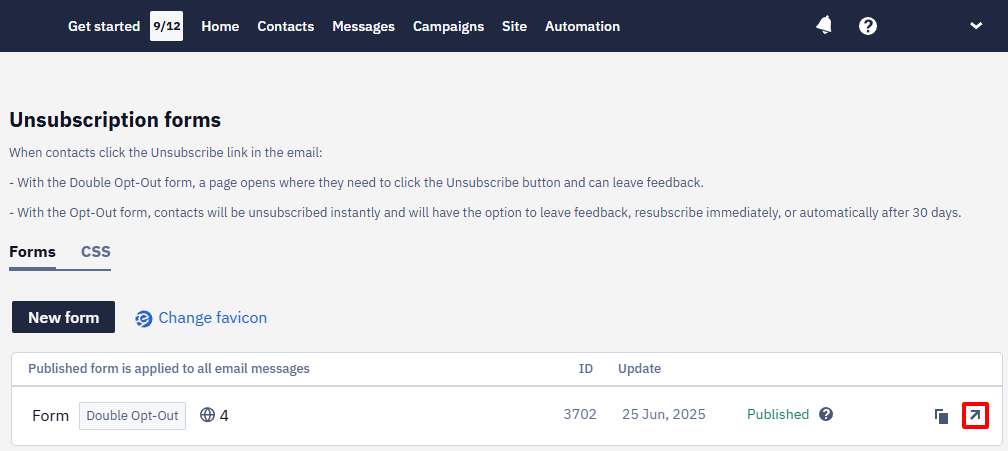
Copy the form’s link and follow it to view the created form in the browser.
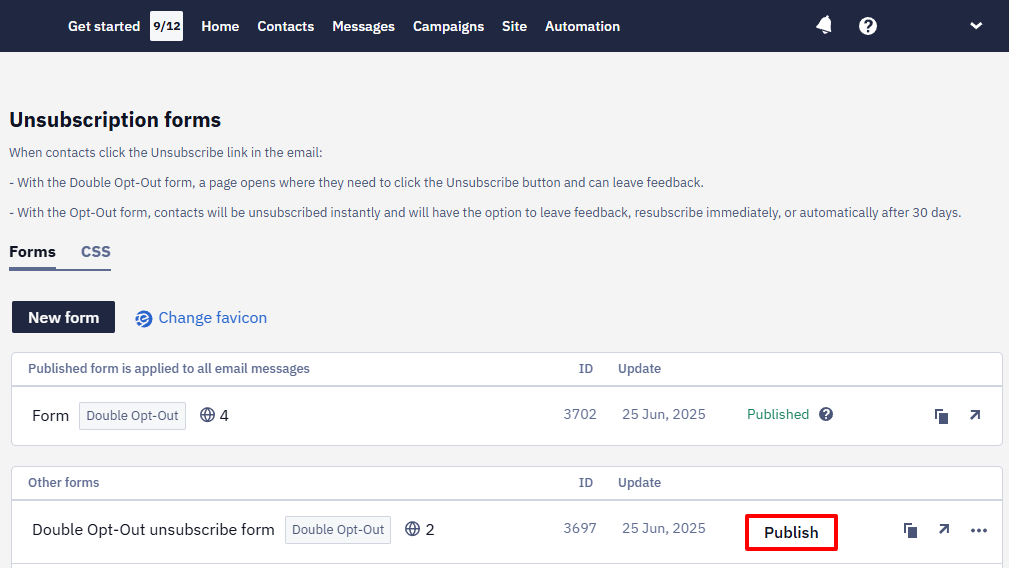
Click Publish so your contacts start going to the unsubscribe form.
Note
- A published form applies to all email messages.
- Only one unsubscribe form can be published.
- While the form is published, it cannot be deleted.
One-Click Unsubscribe Headers
The List-Unsubscribe and List-Unsubscribe-Post headers, which let mailbox providers show their own one-click unsubscribe, are added automatically to all emails, both bulk and triggered. You do not configure them.
Whether the button appears is up to the mailbox provider: Gmail may not show it even when the headers are correct.
Updated 8 days ago