
Email Domain Authentication in Cloudflare
We offer three options for domain authentication – Full, Full+ and Subdomain). Read more on these options >
In this article, we will look at examples of setting up all these options in Cloudflare.
Settings
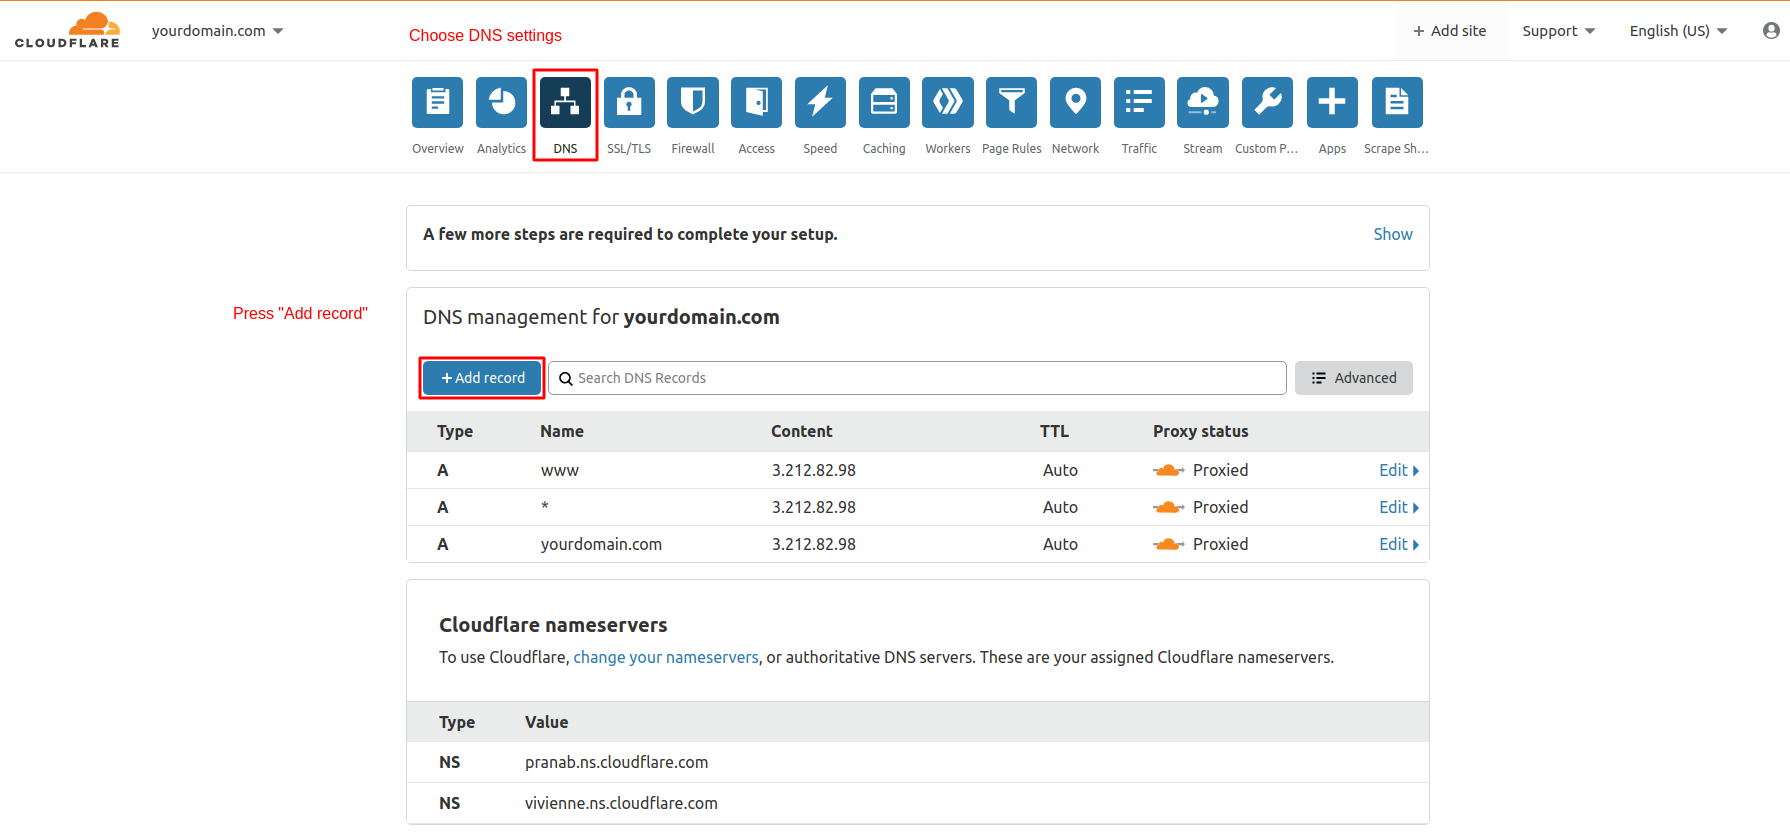
Log in to your Cloudflare account, go to the DNS app and click Add record.
Full
To verify your domain within the Full option, add the following records:
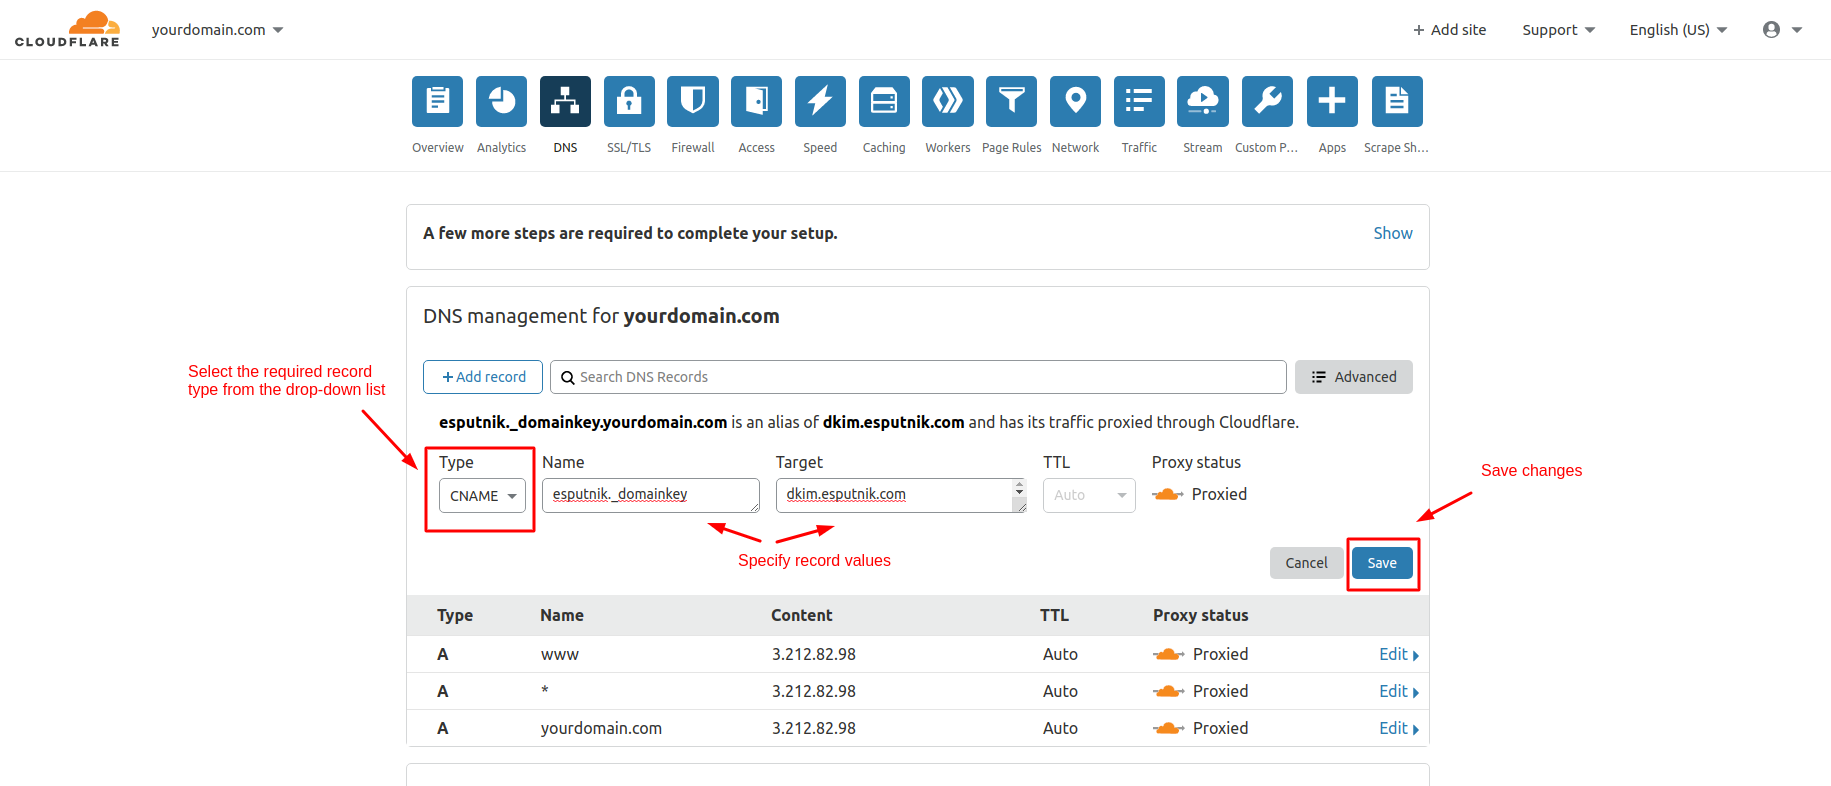
CNAME
- In Type, select CNAME.
- In Name, enter esputnik._domainkey.
- In Target, enter dkim.esputnik.com.
- Click Save.
TXT
- In Type, select TXT.
- In Name, enter your domain name.
- In TTL, select 1 hour.
- In Content, enter v=spf1 include:spf2.esputnik.com ~all.
- Click Save.
Full+
To verify your domain within the Full+ option, add the following records:
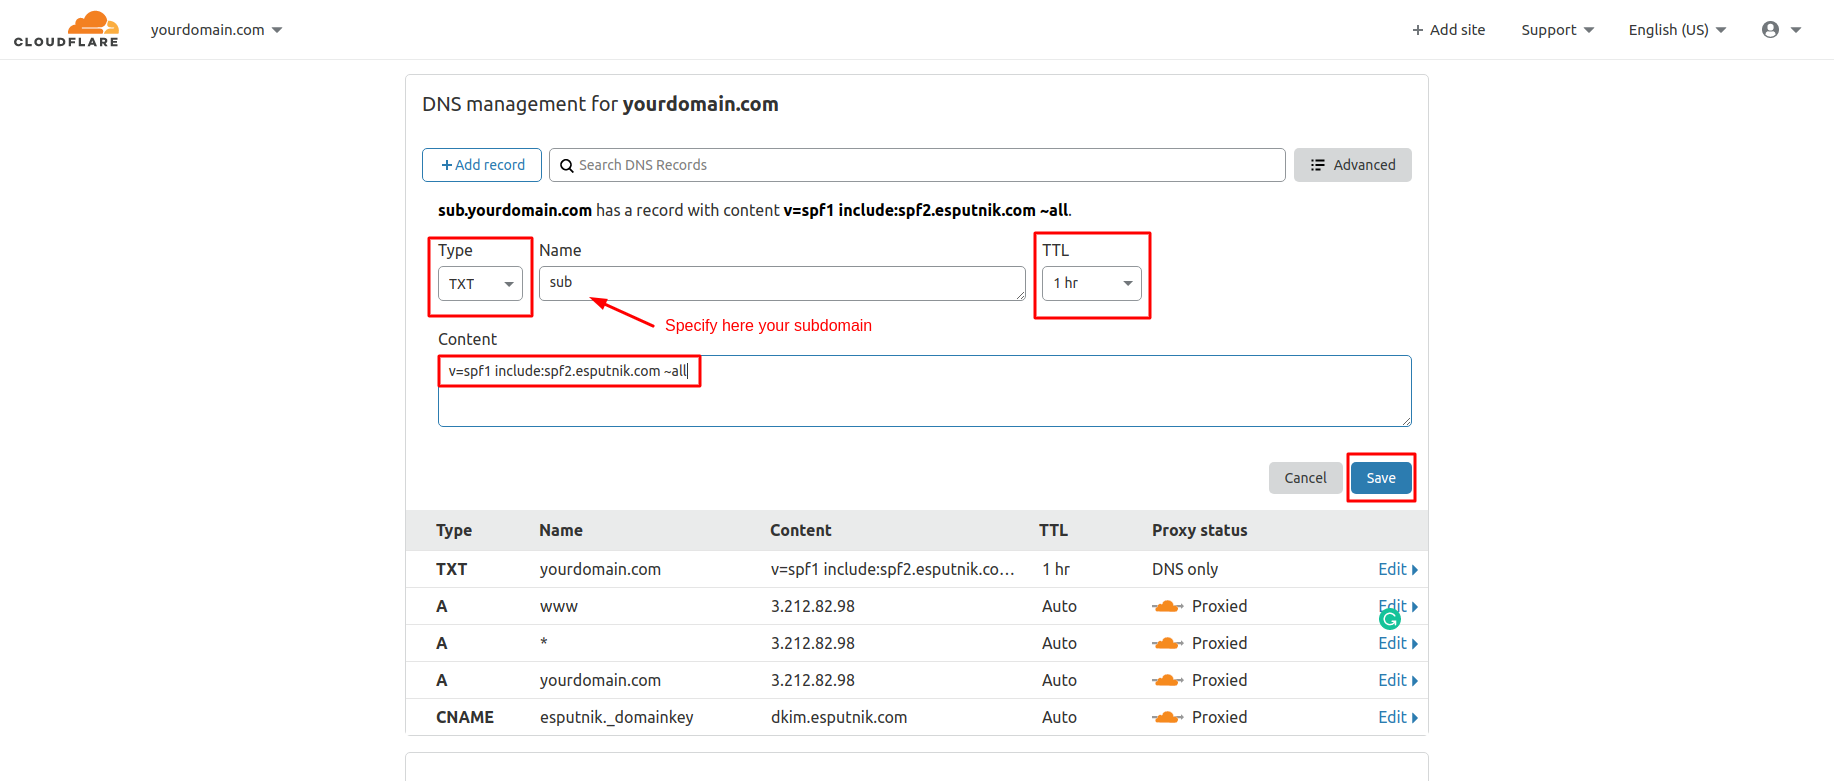
TXT
- In Type, select TXT.
- In Name, enter your subdomain name.
- In TTL, select 1 hour.
- In Content, enter v=spf1 include:spf2.esputnik.com ~all.
- Click Save.

MX
- In Type, select MX.
- In Name, enter your subdomain name.
- In Mail server, enter trap.esputnik.com.
- In TTL, select 1 hour.
- In Priority, select 10.
- Click Save.
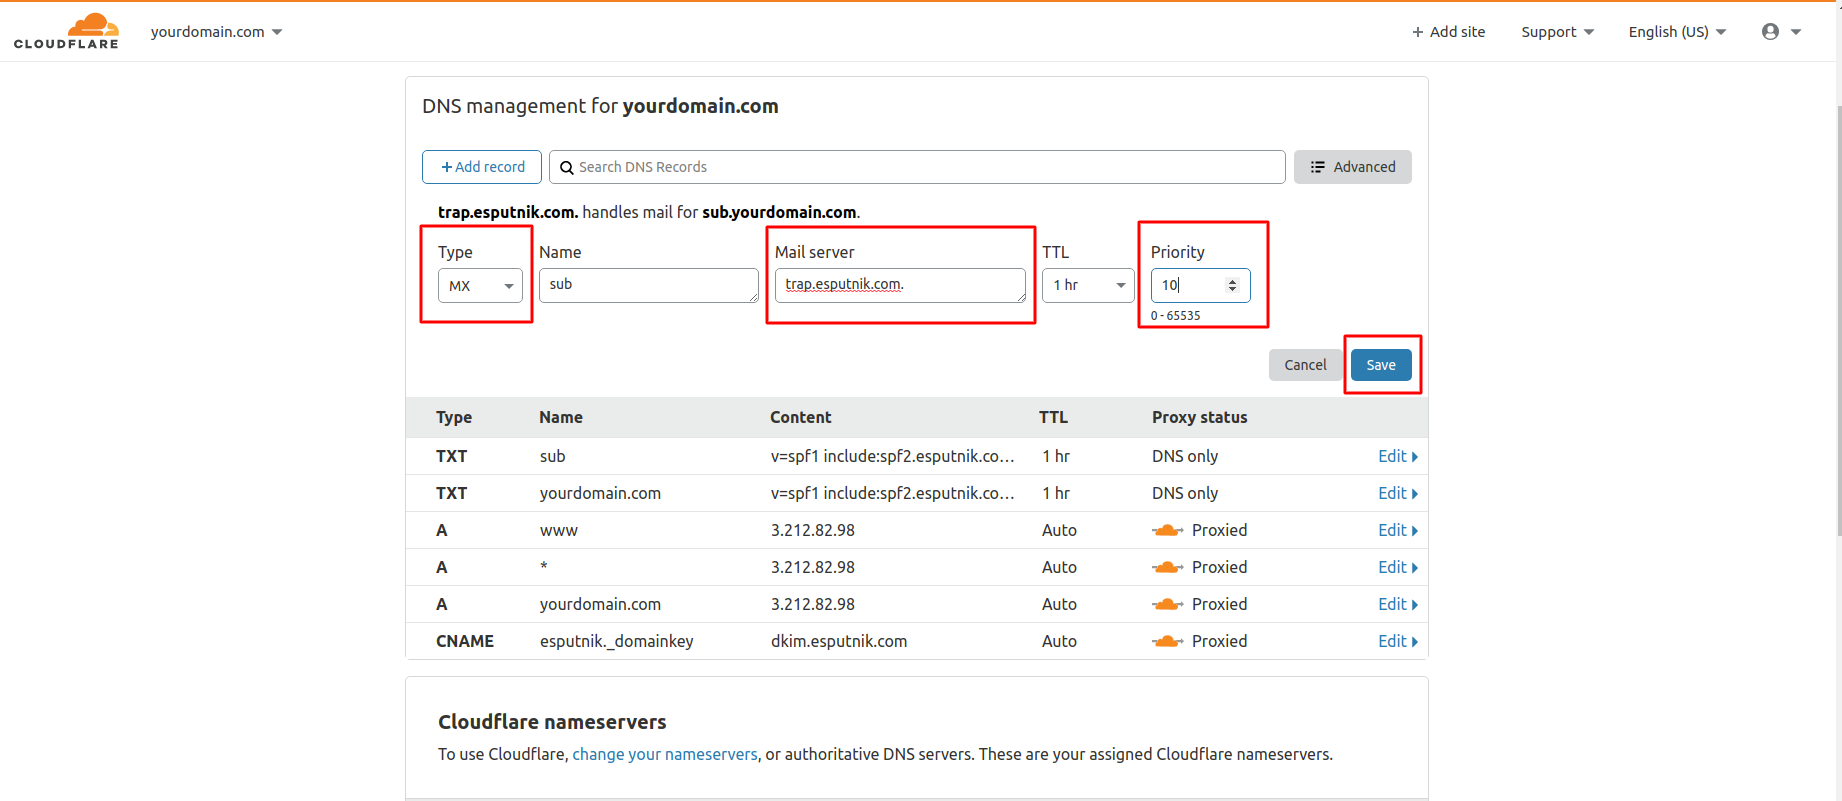
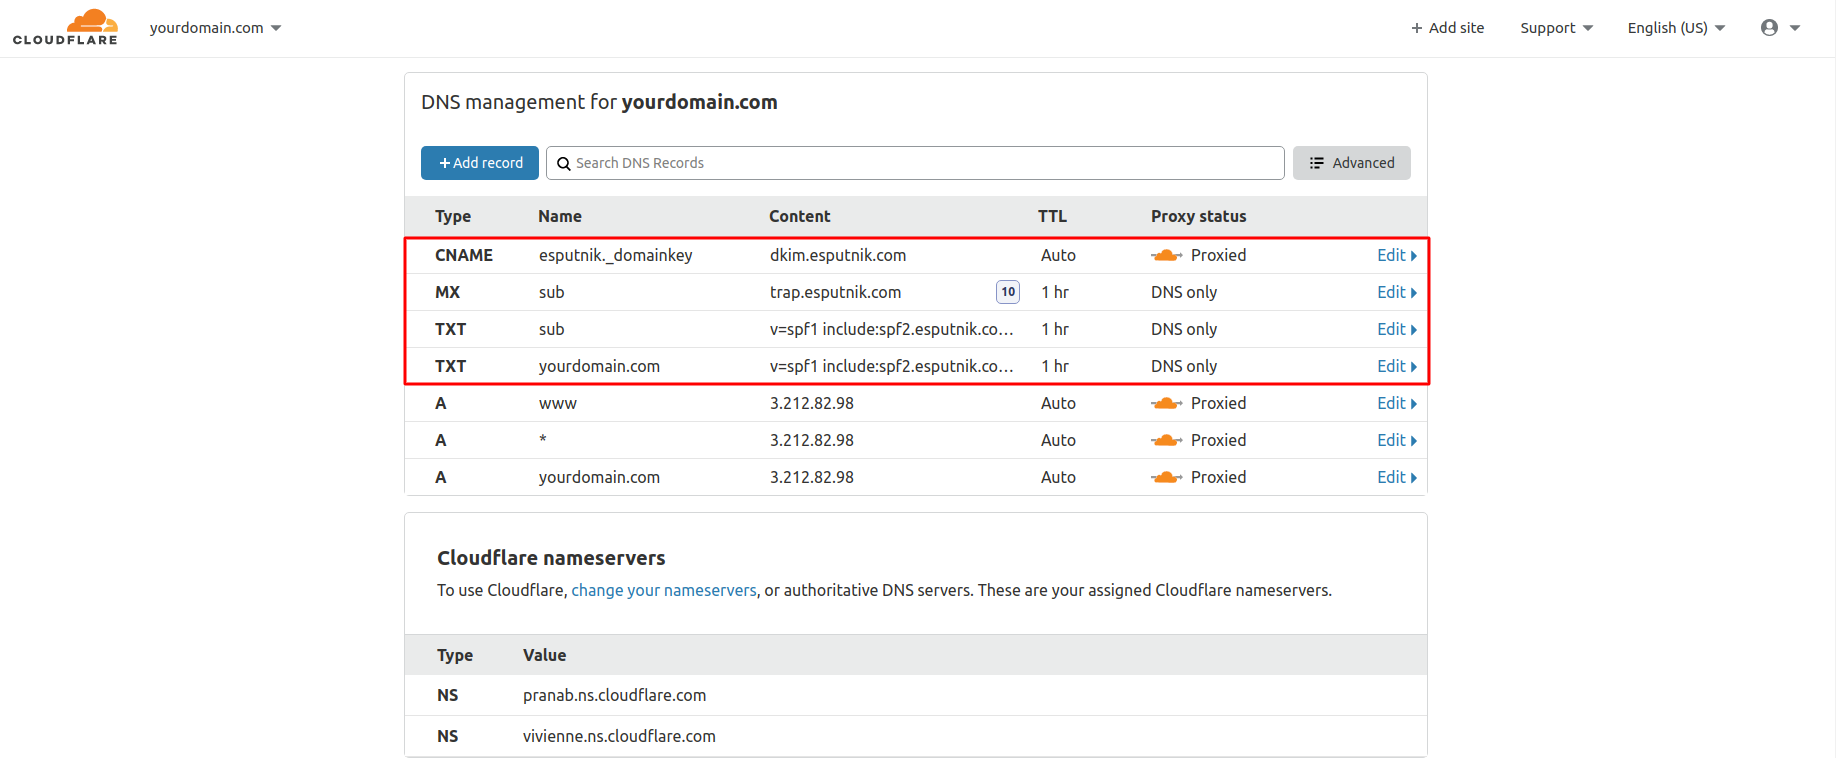
The ready record would look as follows:
Subdomain
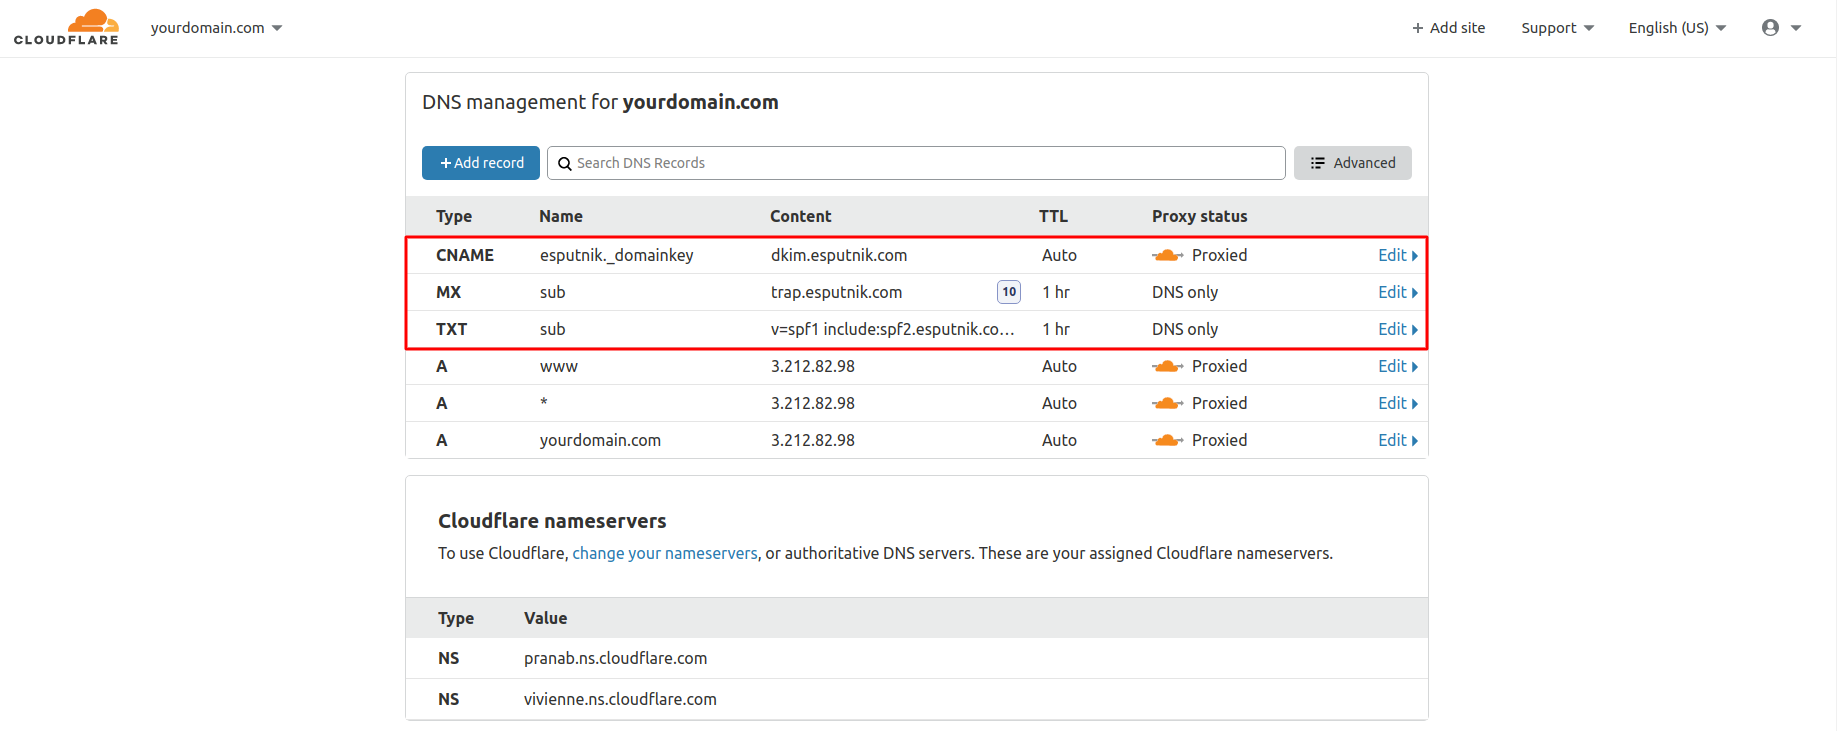
The ready record within the Subdomain option would look as follows:
Updated 12 months ago
Did this page help you?