
What Is Reteno?
Reteno is an AI messaging platform for app user retention that boosts conversions with event-triggered campaigns.
Timely and personalized messages will make users addicted to your app.
Use Reteno to track and understand user behavior. Reteno keeps your data up-to-date and makes it actionable with powerful lifecycle marketing tools for analytics, segmentation, and automation.
By leveraging the basic Reteno concepts described below, you can make data-driven decisions that enhance the effectiveness of your campaigns and contribute to the app's success.
You can watch the video, or go through the short overview below.
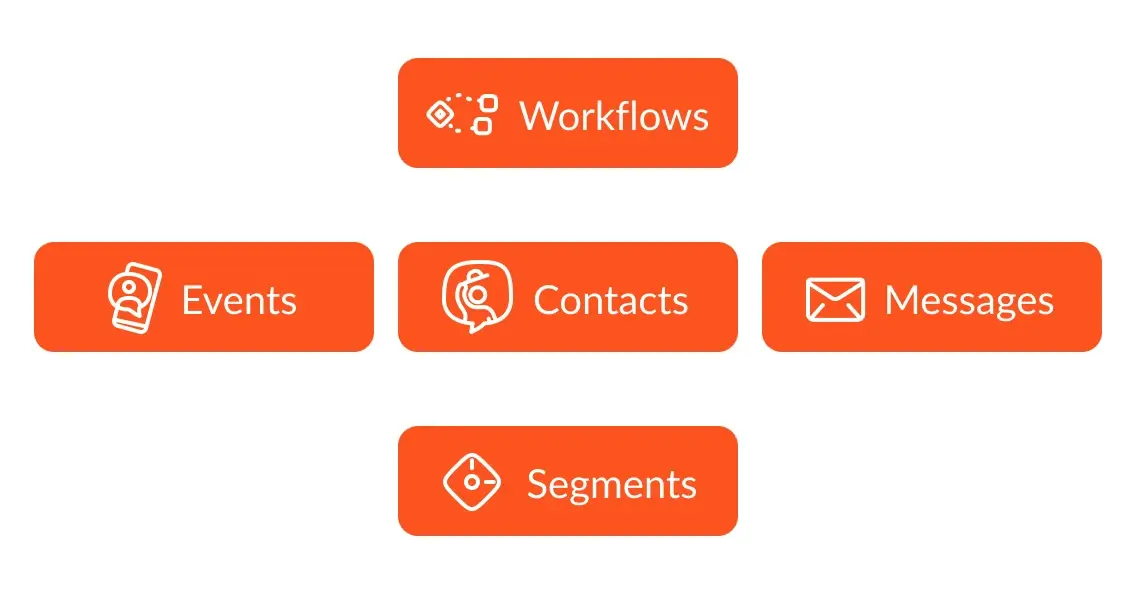
Contact
Contact (also called User) is an individual who interacts with your app or website.
All user data is stored in Contact Cards (also called User Profiles):
- User identifiers — external ID, email, phone number, mobile, and push tokens;
- System fields available by default — time zone, device platform, language;
- Additional fields — personal information (like name, age, gender) and any specific to your business information (like goal, number of completed levels, achievements).
All this data can be used in audience segmentation.
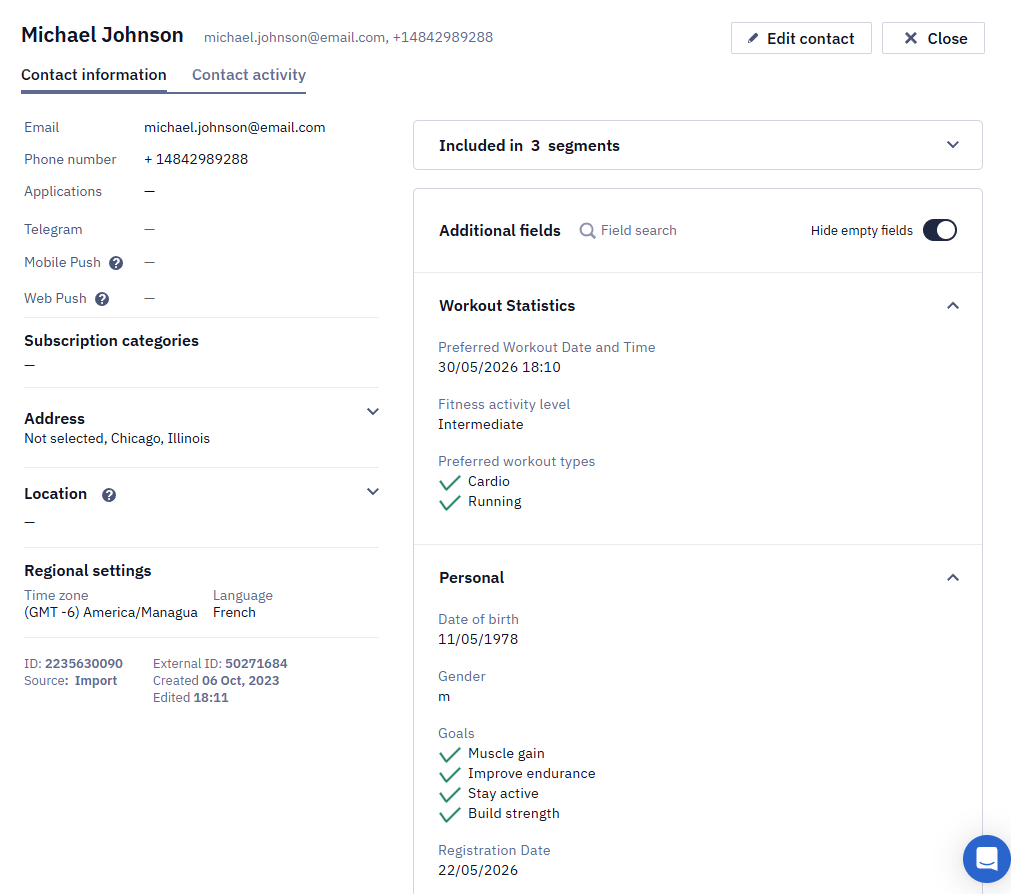
Contact cards aggregate all user data, so you can identify a single user on multiple channels and get a 360-degree view of all interactions with your app.
When we discuss contacts, we should also consider three basic concepts closely related to them: External ID, Additional fields, and Contact activity.
External ID
External ID is a unique contact identifier that combines all contact data — email, tokens, personal information, etc. It is external for Reteno, but it is your internal user ID for you. External ID guarantees that user profiles will be created without duplicating in Reteno. If you want to go technical, it is the primary key for all user identifiers.
The external ID must remain constant during the user's lifecycle. So, if you create a user with one External ID, it should persist and not change. If you are interested in how to work with anonymous users or multiple users logging in on the same device, check this article.
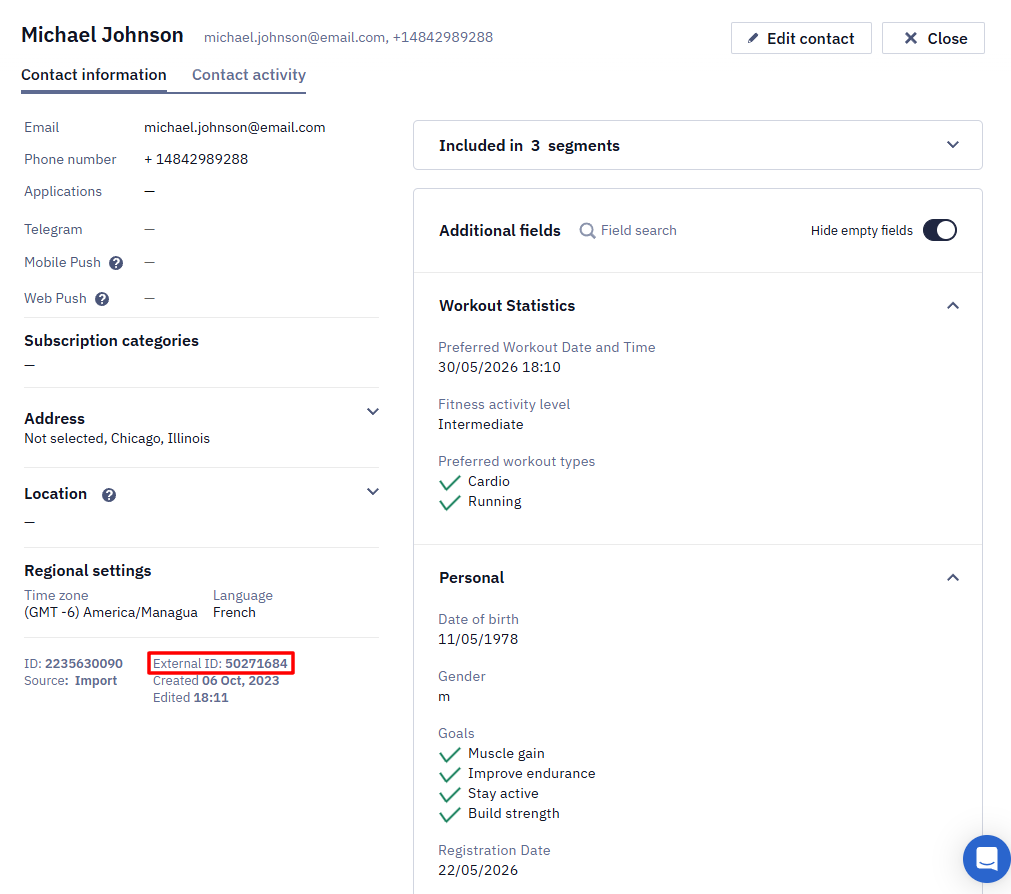
ImportantThe External ID must be created in your system when a contact signs up in your app or site.
Reteno uses device_id for mobile apps and cookies for the web to identify anonymous users.
Well-organized user identification is vital to your marketing strategy, so we recommend that you read more about user identifiers and data matching in Reteno.
Additional Fields
Additional fields should contain:
- Unchanged or rarely changed information that characterizes your users: all information provided during onboarding and all data from the user’s profile. For fitness apps, this includes age, weight, gender, etc.
- Historical data from some counters used for segmentation, such as the number of completed lessons or pieces of training.
NoteAdditional fields and events are two main options for transferring data to Reteno. When something happens with a timestamp, it’s better to transfer such information as an event. For example, you can send information about a completed lesson as an event and the total number of lessons as a value of the contact field.
More on using contact fields >
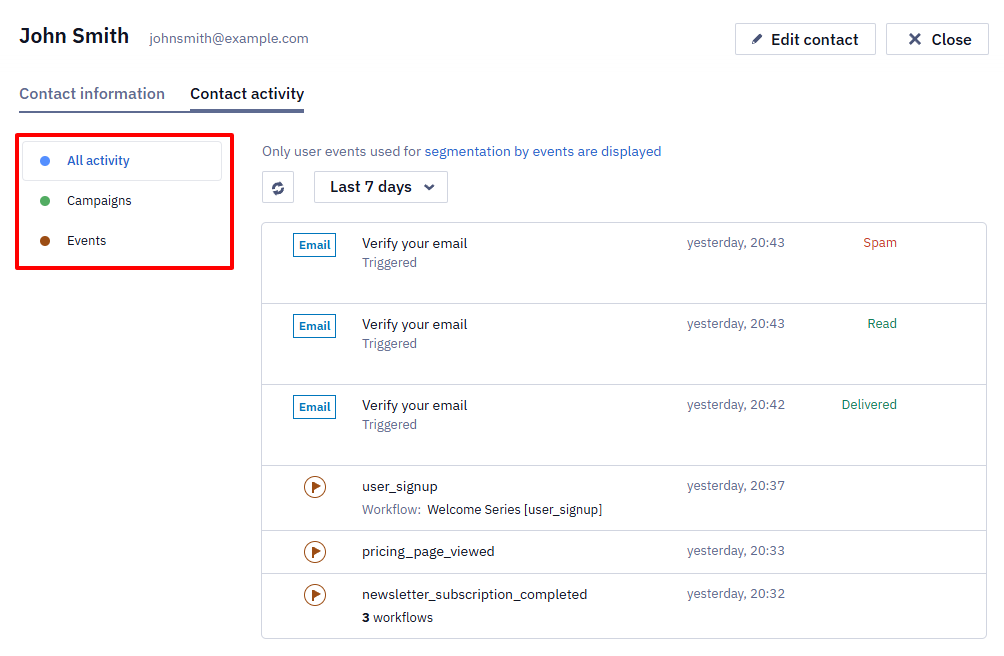
Contact Activity
The Contact activity tab of the contact card contains data on events and users' interactions with your campaigns, website, and mobile app.
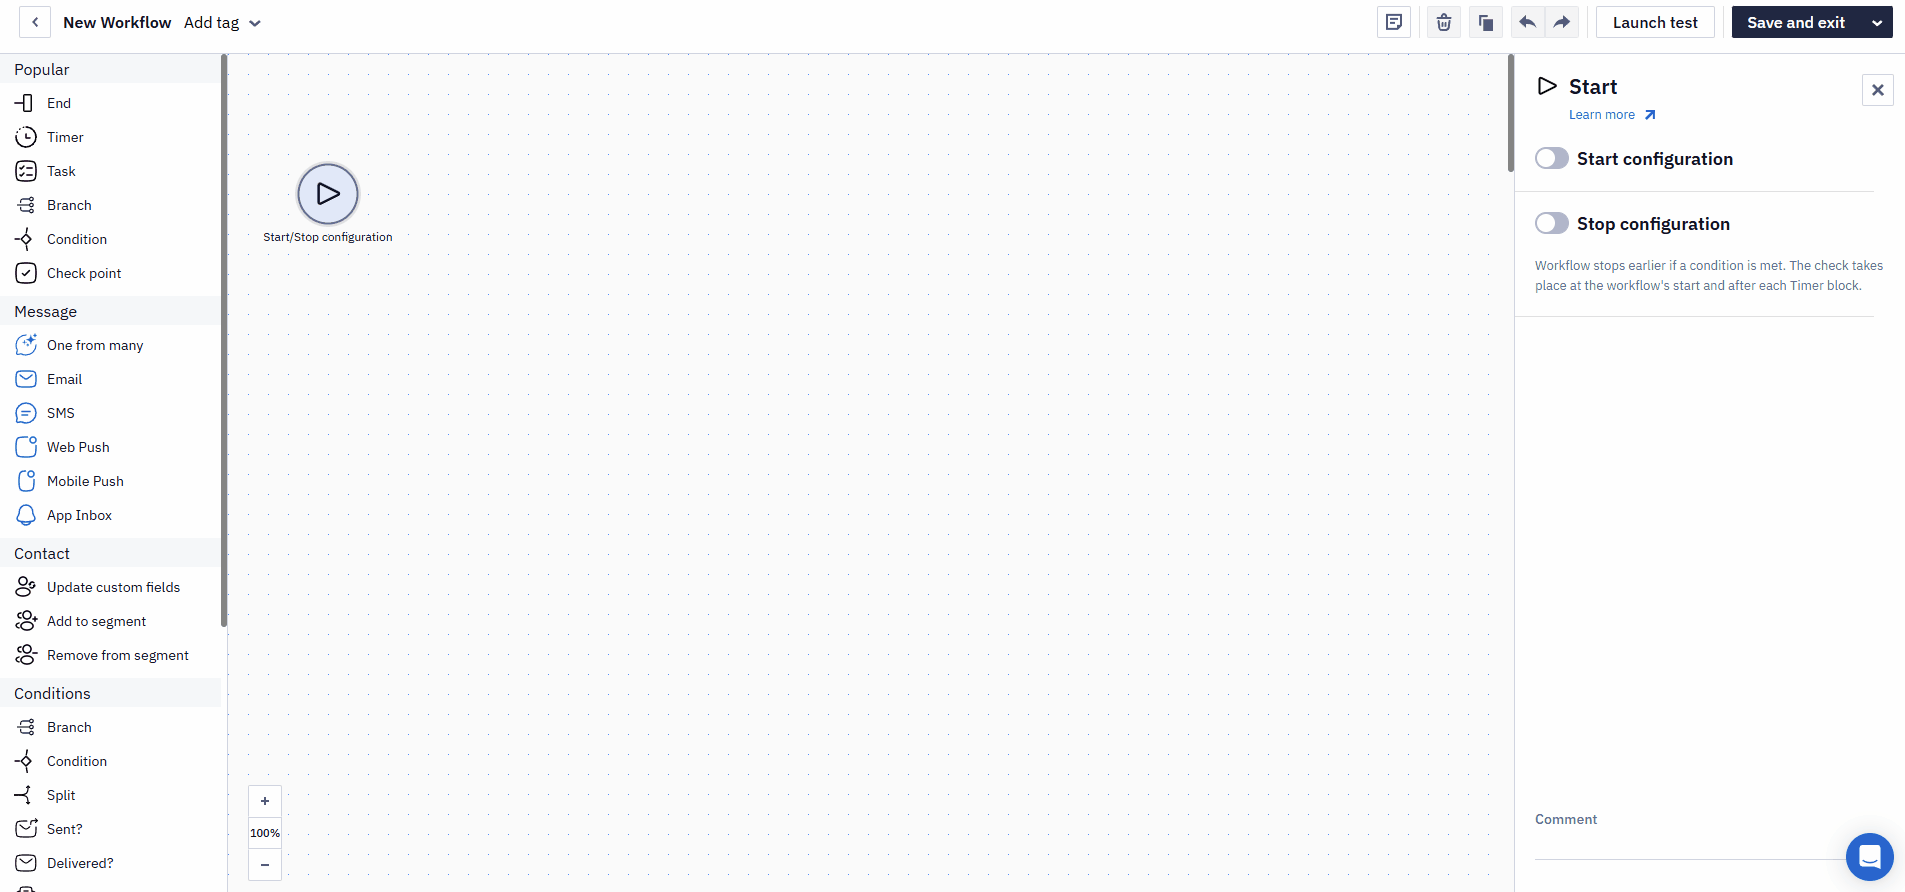
Workflow
Workflow (also called Journey) is an automated chain of actions launched based on predefined conditions (e.g., on an event) with a particular marketing purpose. It can be seen as the pattern of your app’s user journey and the touchpoints where automated communication occurs.
Use the drag-and-drop editor to build workflows with tasks and conditions as blocks. Create different campaign types, such as active user reminders, new user onboarding, reactivation, etc.
Event
Events are actions that users perform within your app, site, or messages, such as viewing a screen, adding a product to a cart, or upgrading a subscription. You can use system events and configure sending custom events. For instance, you can transmit the LessonStarted event every time a user joins a lesson.
Event parameters, also known as event properties or attributes, are additional information accompanying an event to provide more context. For example, the LessonStarted event could contain lesson ID, language, difficulty level, progress, etc.
Log events through mobile SDK or Backend API and use event data to
- Launch and stop workflows,
- Build segments,
- Personalize messages.
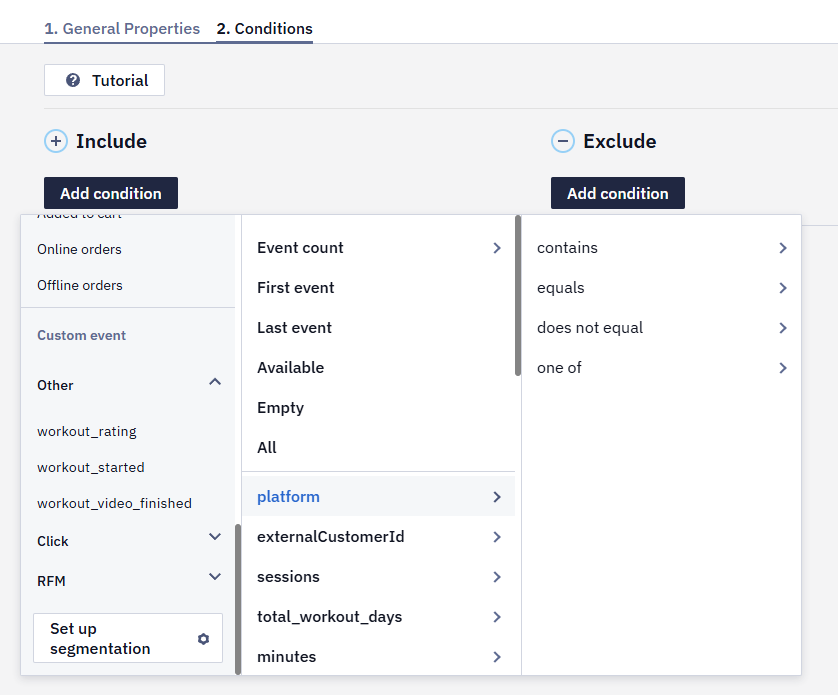
Segment
Segment is the group of contacts associated with some common property, such as
- User identifiers like selecting all users with active mobile push tokens,
- Contact fields (like gender, birthday, and language),
- User events (tracked sleep, achieved goals),
- Message events (for example, read/unread, last login, or behavior in delivered messages).
Reteno provides two types of segments: Lists and Dynamic.
List
The List is a static segment which could be created and updated manually, via workflows, or by transferring data via API. For example, you can create the list of contacts who opened emails on July 31, 2024.
Dynamic Segment
Dynamic segments are a flexible tool for defining the target audience for your campaigns. Such segments automatically include contacts that match the rules specified in the segment settings. For example, you can select all users who have met their fitness goals (e.g., 10,000 steps/day for a week). The most valuable data for dynamic segment creation is information from events and their parameters.
Craft segmentation to get the most of the contact data: build unlimited segments, adding infinity and beyond conditions. It’s easy to handle any triggered campaign setting with Reteno's dynamic duo of segments and workflows.
Message
Effective messaging in mobile app marketing leads to better user engagement, higher retention rates, and increased revenue by ensuring timely, relevant, and personalized communication.
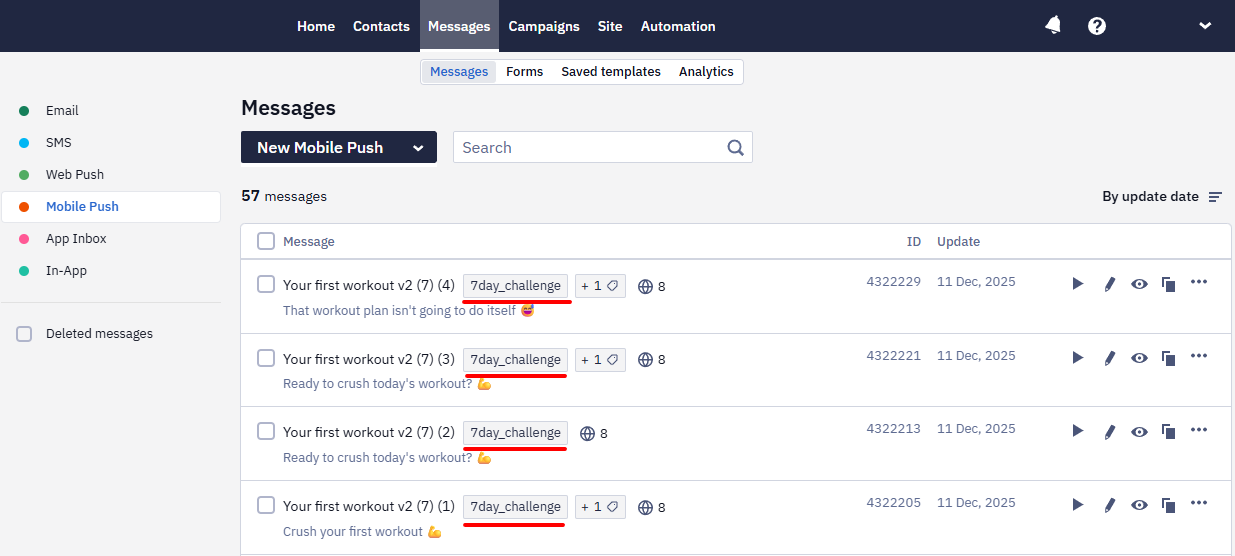
Reteno allows you to create and send different message types: Mobile Push, Email, In-App, App Inbox, and four more channels. Message editors provide the flexibility to create personalized and multilingual messages, which you can save as templates for quick future use.
Manage these channels within a single platform and choose the most suitable tool for each situation. The more relevant channels you use in your omnichannel strategy, the more effective each channel will perform.
Tag
Tags allow you to group messages, segments, reports, and workflows that share common marketing goals. Tagging makes it easier to filter and search different objects in your account. Also, tags are used in the One from many workflow’s block that automates A/B testing, diversifies triggered communication, and defines the most effective message from the pool of options.
Ready to start? Proceed to Migration Guide or go straight to Integration Manual.
Updated about 2 months ago