
Sending Reminders at the Time Specified by the User
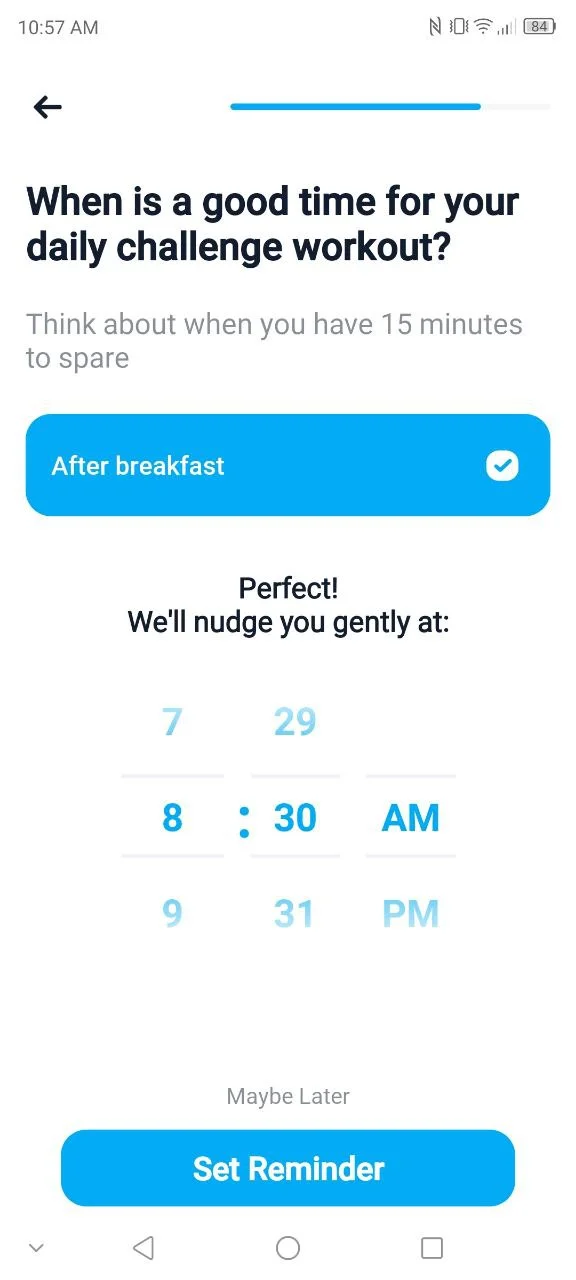
Setting reminders based on users' time preferences is essential for improving user experience and customer retention. For example, you can allow users to choose when to exercise or take classes and send them regular reminders at the specified time.
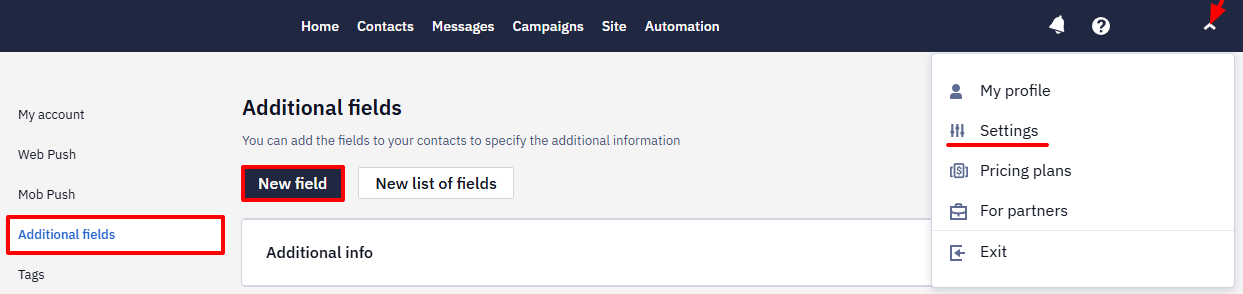
Creating Additional Contact Field
An additional contact field stores any users’ information; in our case, we need a storage for user time. If you already have such a field, skip this section.
- Go to your account settings → Additional fields tab and click New field.
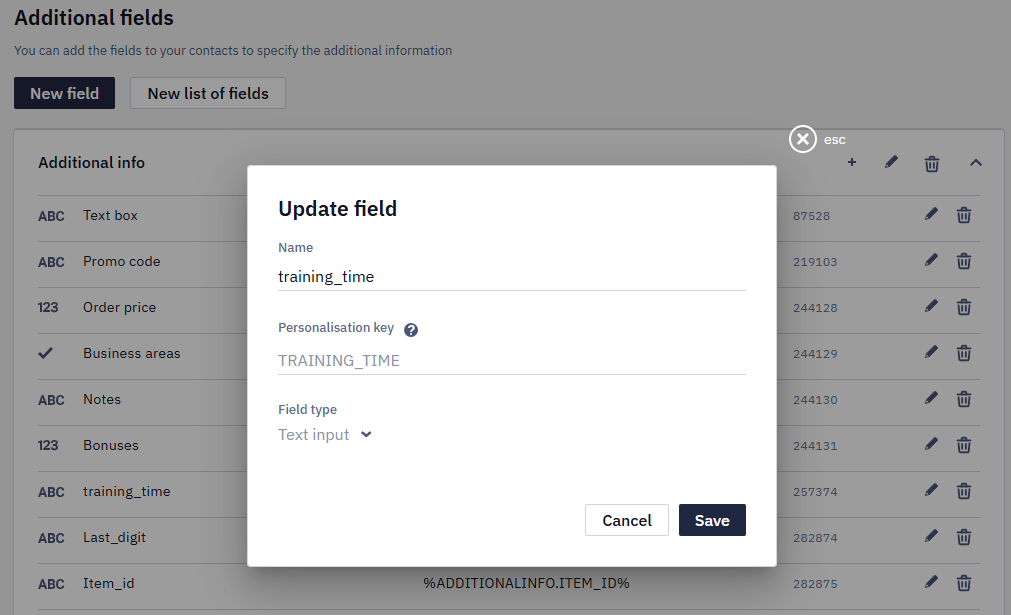
- Configure the field parameters:
- List of fields — select the existing one from the drop-down list.
- Name, based on which personalization key will be generated.
- Personalization key.
- Field type — Text input.
After creating the field, you can fill it by importing a file with the corresponding data or by API (Add/update a contact or Add/update contacts methods).
The time must be sent in the HH:MM or HH:MM:SS format.
As the system waits until the specified time in the user's time zone, configure recording the user's time zone in Reteno through SDK or API.
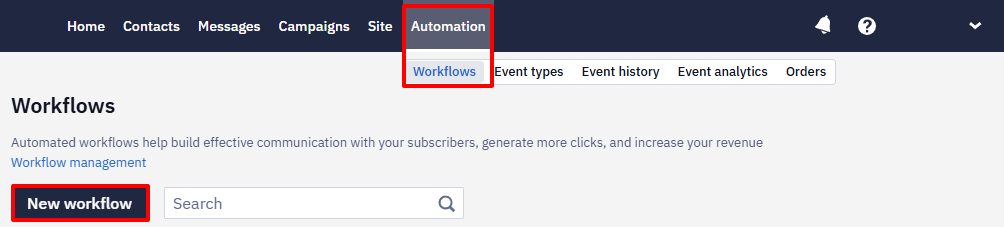
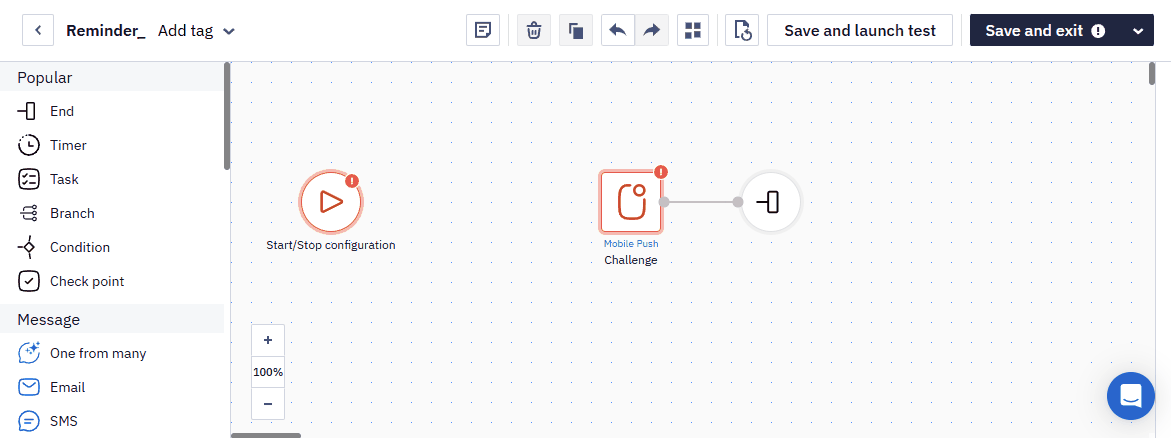
Setting Up Workflow with Timer Block to Automate Reminders
- Go to the Automation → Workflows section and open or create a workflow.
- Drag the Timer block from the left sidebar into the workflow.
NoteThe Timer block sets a time gap before the following in the workflow action.
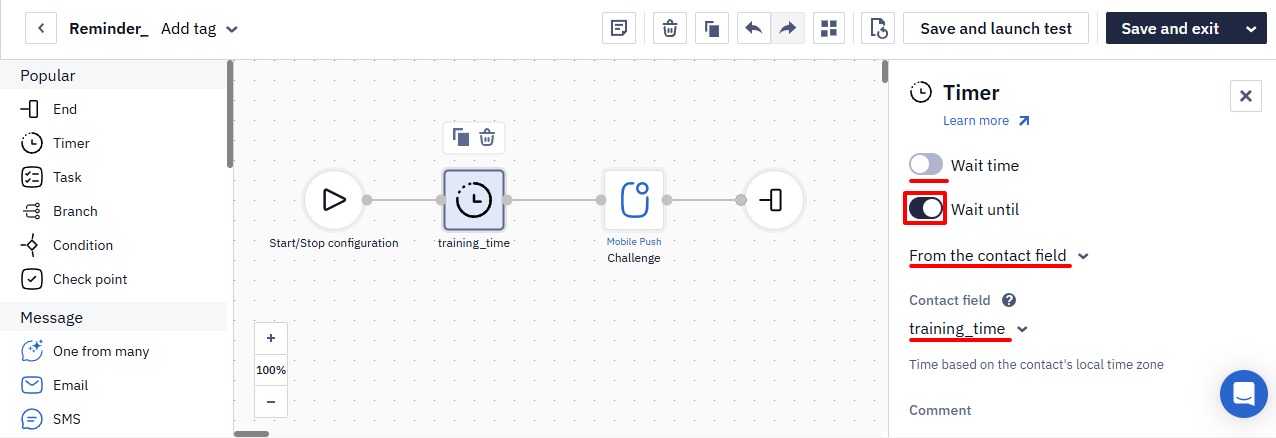
- Configure the block parameters:
- Disable the Wait time switcher and enable the Wait until switcher to send reminders as soon as the specified time comes
- Select the From the contact field option from the drop-down list
- Select the created contact field from the drop-down list
NoteUse the One from many message block to improve retention with diverse content for training or lesson reminders.
- Save the workflow.
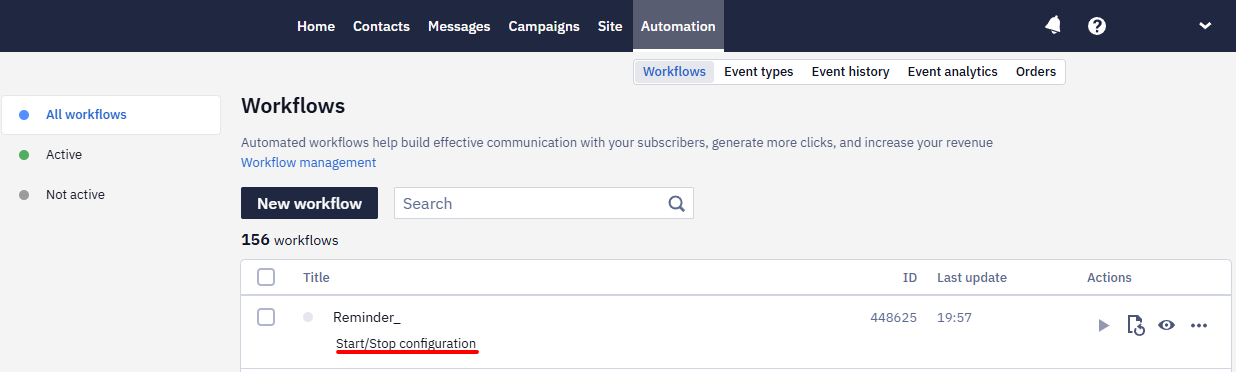
Workflow’s Start Configuration
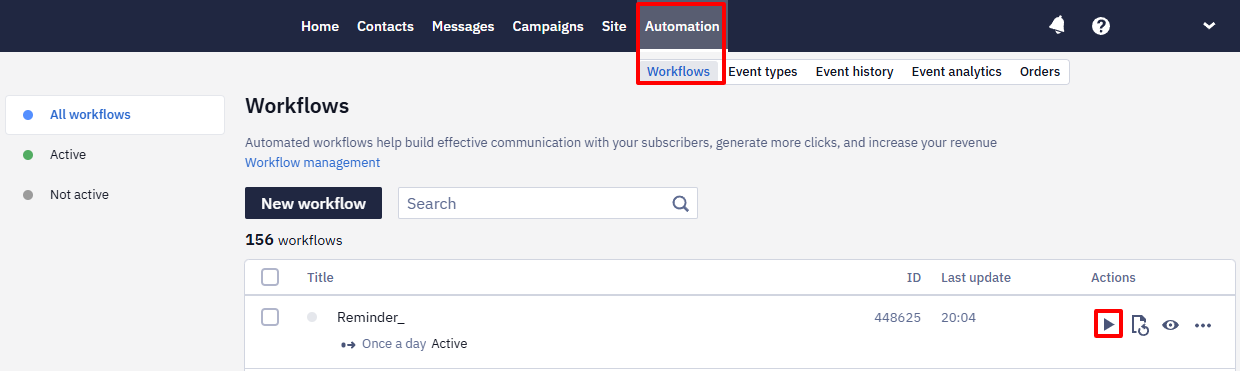
- In Automation → Workflows, select the created workflow and click Start/Stop configuration.
- Activate Start configuration switcher.
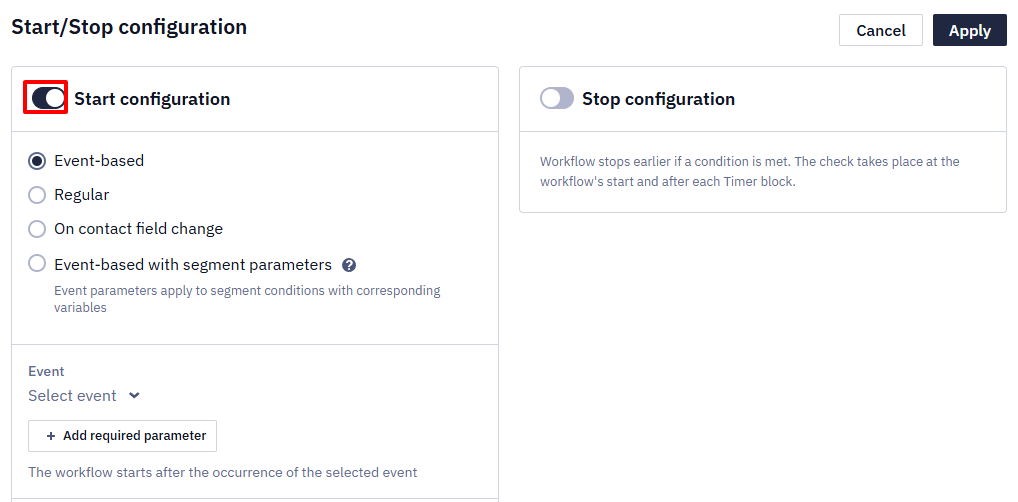
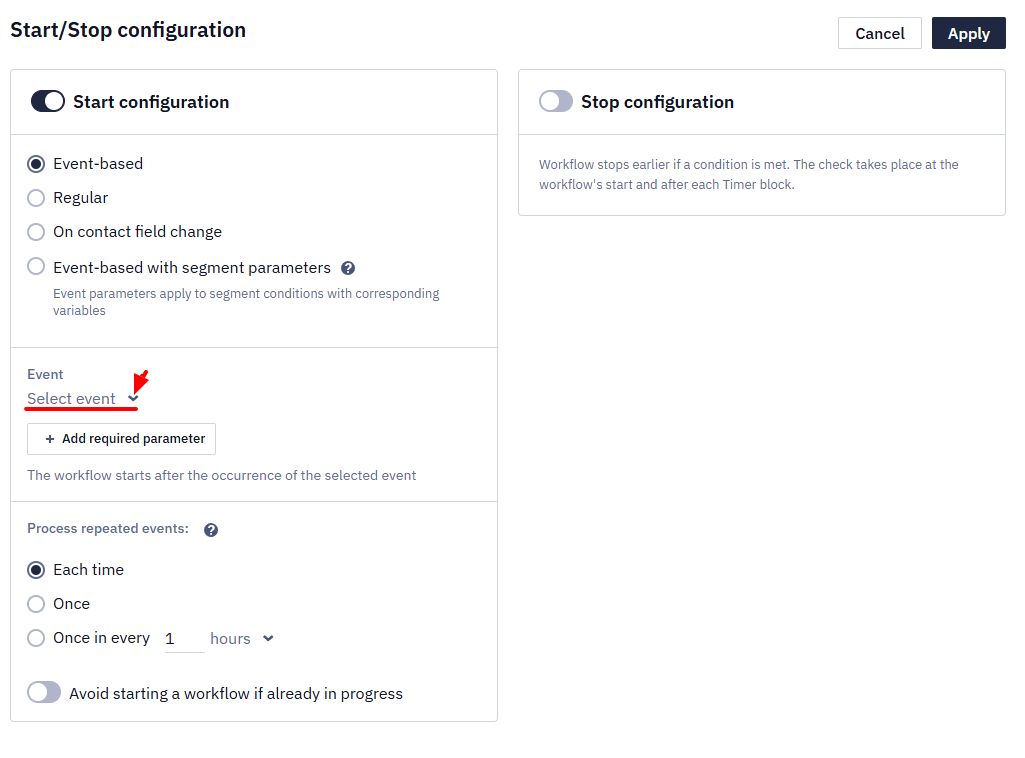
There are two options to launch a workflow with reminders: Event-based and Regular.
Event-based Workflow
Select Event-based in Start configuration, and then
- Select event which must launch the workflow
- Specify the frequency of processing unique events
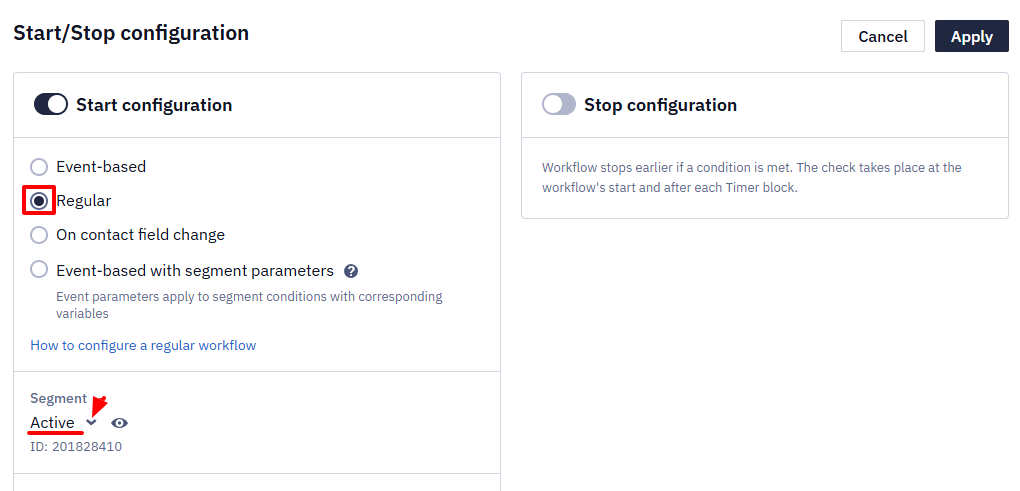
Regular Workflow
- Create a dynamic segment with users subscribed for reminders.
- Select Regular, and then
- In Segment, select the created segment
- Select the workflow’s Start date
- In Start schedule, select once a day
- Select allowed start days
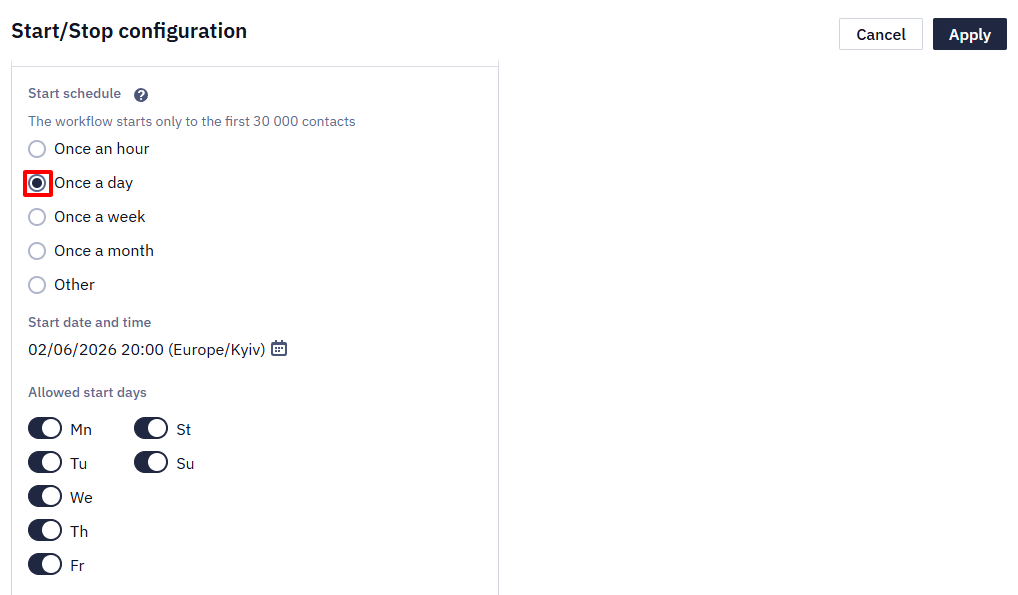
- Set the workflow’s Start time
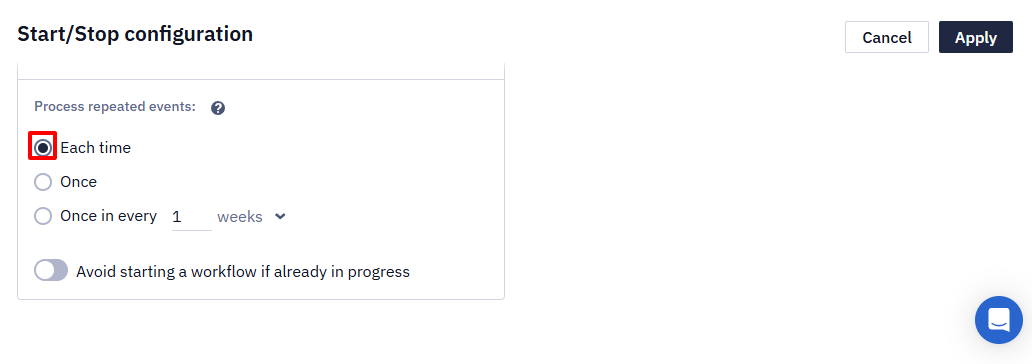
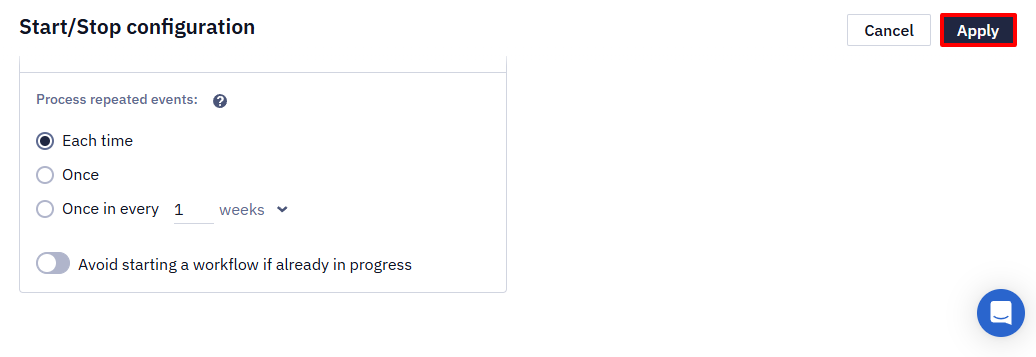
- In Process unique events, select Each time
Launching Workflow
- Click Apply in Start/Stop configuration.
- To start the workflow, click Activate on the right and confirm the action.
The system will wait for the designated time in the user's time zone and perform the action specified in the workflow after the Timer block.
NoteIf the field of a contact participating in the workflow has a missing or written in an incorrect format value, the message will not be sent
Updated 15 days ago