
RFM Analysis
Control your users' engagement and automate retention
RFM (Recency, Frequency, Monetary) is a customer segmentation method that helps predict customer behavior based on three metrics:
- Recency — the time since the last purchase or email open
- Frequency — the number of purchases or email opens.
- Monetary — the total amount the customer has spent.
RFM analysis is part of Contacts analytics and is presented as a report divided into two tabs:
- Campaigns
- Sales
Each cell in the table corresponds to a specific contact segment.
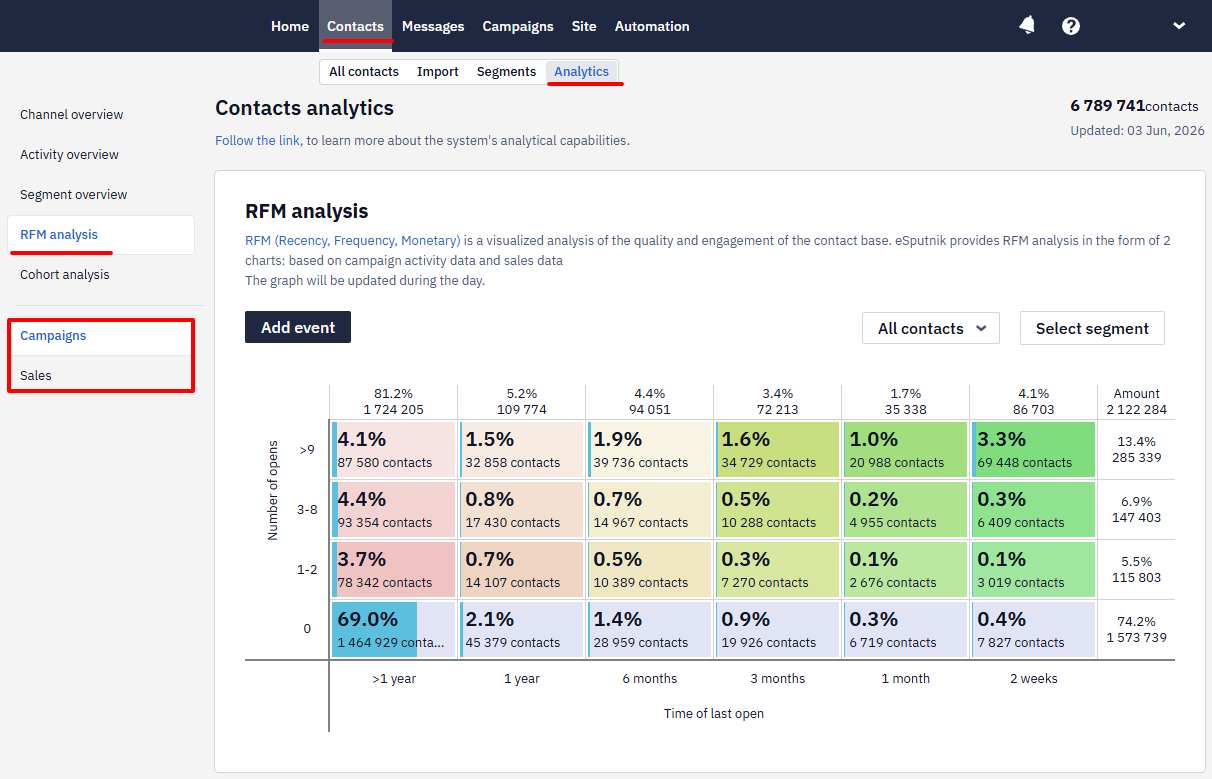
Campaigns
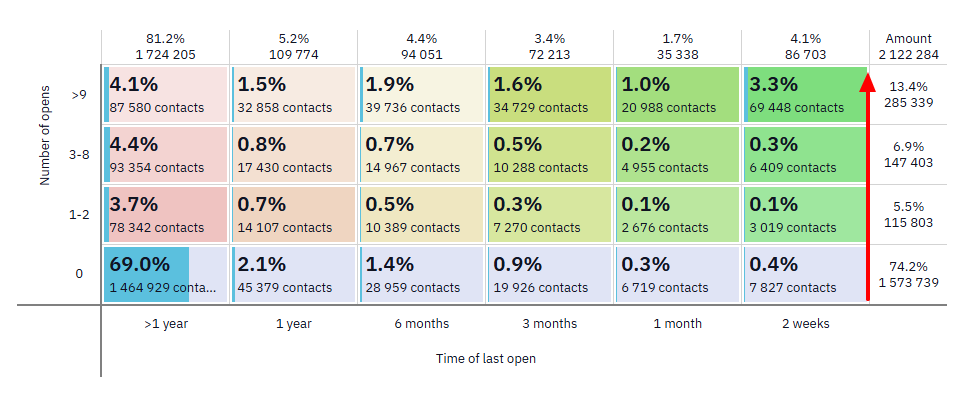
In this tab, segments are formed based on the number and recency of email opens. Data is collected starting from the first campaign launch — no additional setup is required.
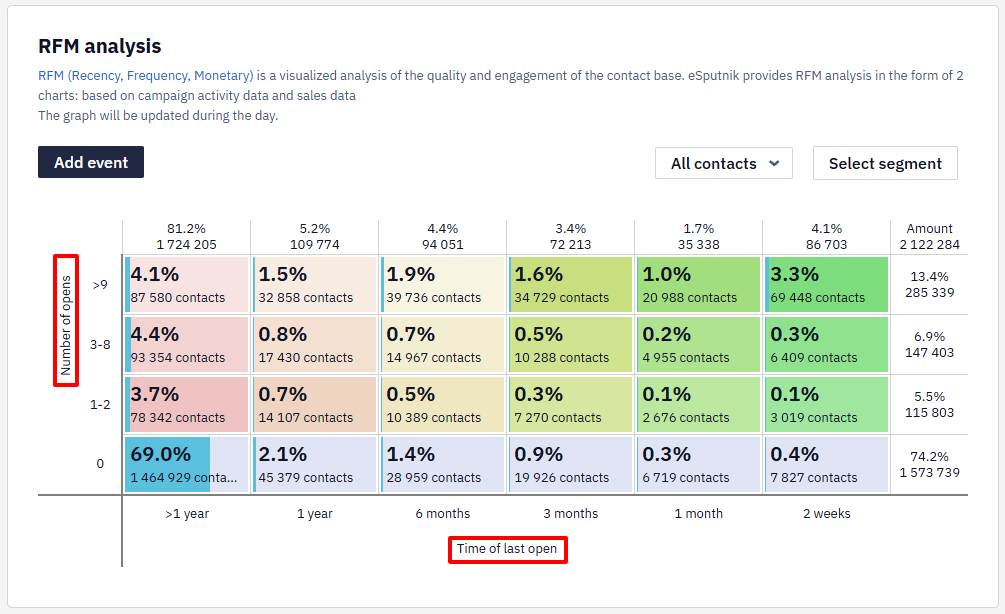
Calculations are made along two axes:
- R — time of the last open. By default, the range is set from two weeks (most active) to one year or more (the least engaged audience).
- F — number of opens. The values range from 0 to 9 and above.
Sales
In the Sales tab, segments are formed according to the number of sales and the amount of time (set up transferring sales data via API Reteno to see its RFM analysis).
Calculations are made along two axes:
- R — amount of time. By default, the range is set from 15 days to one year or more.
- F — number of sales. The values range from 0 to 11 and above.
The intervals along the F axis represent the number of sales counts. For example:
- 0: includes contacts who have made no purchases, meaning the number of purchases x ≥ 0 and x < 1.
- 1–2: those who made one purchase — x ≥ 1 and x < 2.
- 2–3: those who made two purchases — x ≥ 2 and x < 3.
And so on.

NoteYou can order a custom display of the sales graph:
- increase the period and number of sales on the graph,
- add or remove period columns and Number of sales fields,
- set display at any time intervals.
Leave a custom display request at [email protected].
The segments on the Campaigns and Sales charts are colored depending on the activity of the contacts:
- Gray — no reads/sales.
- Red — segments at risk of loss. The more saturated the color, the more passive the contacts in the segment.
- Green — loyal customers. The more saturated the color, the higher the loyalty of the segment.
The top row contains contacts that showed maximum activity. Contacts that can be considered lost are at the bottom left.
Data Filtering and Actions with Segments
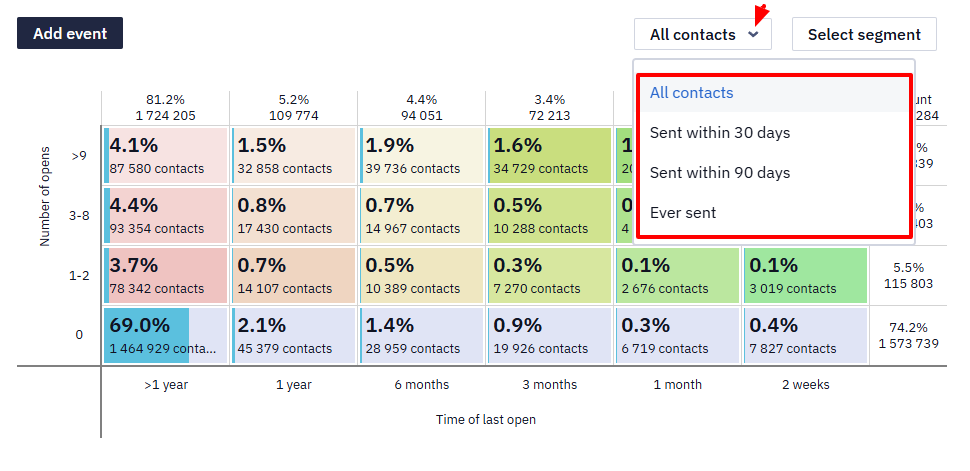
The filter by contact activity limits the selection of contacts based on how recently they received campaigns:
- All contacts — includes all contacts, regardless of whether they received campaigns or when.
- Sent within the last 30 days — filters only those contacts who were sent at least one campaign in the last 30 days.
- Sent within the last 90 days — similar, but for a 90-day period.
- Sent ever — includes only those contacts who have received campaigns at least once, regardless of the date of the last send.
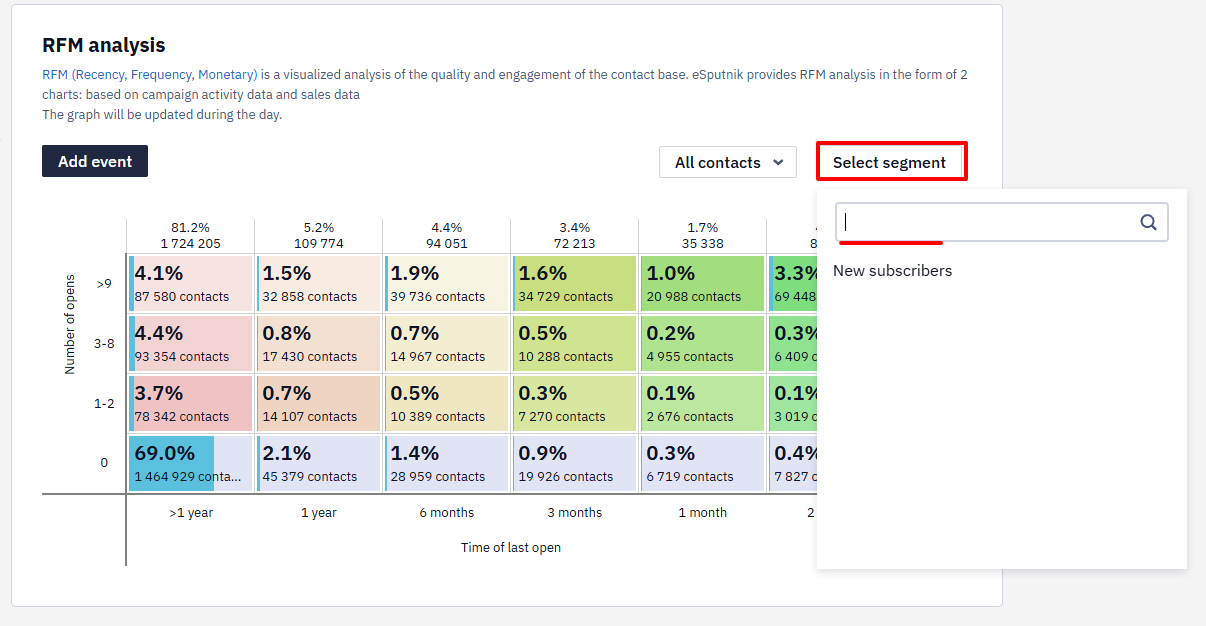
The filter by segment allows you to see RFM analysis of any contact list in your account.
Click the Select segment button and select it from the list.
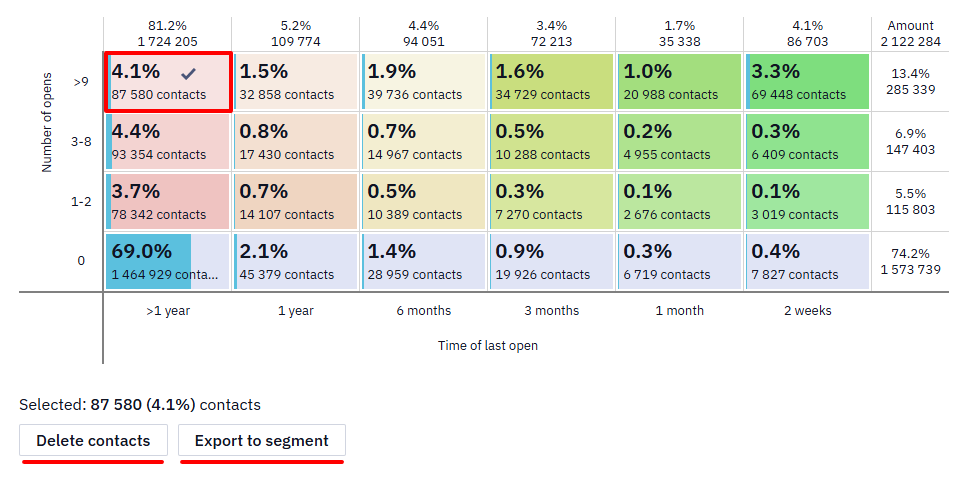
Click any cell to perform actions with the contacts:
- Delete contacts — all contacts in the selected cell will be removed from your database.
- Export to segment — creates a new static segment containing only the contacts that were in that cell at the time of export. The segment will appear in the general list of segments in your account.
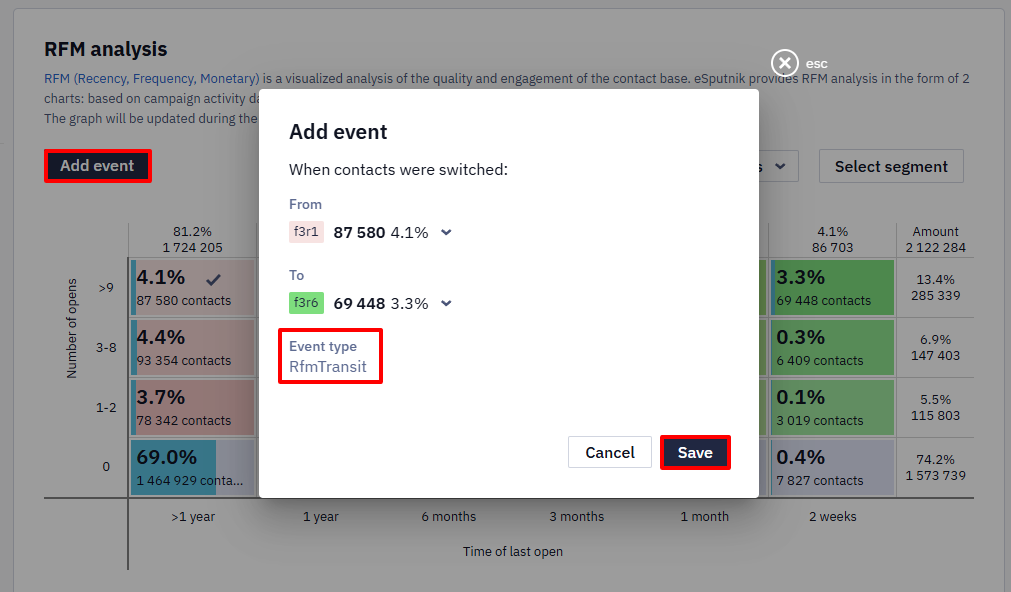
Adding Event
This option allows you to automate actions such as sending an email, launching a message series, updating data in the system, and more.
After clicking the Add event button, you can select an event that will automatically trigger when a contact moves from one cell to another (i.e., when their status changes).
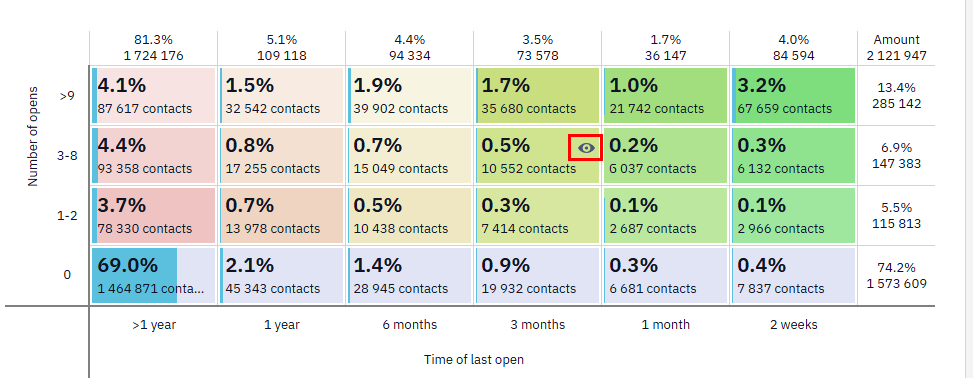
A cell with an attached event is marked with a corresponding icon.
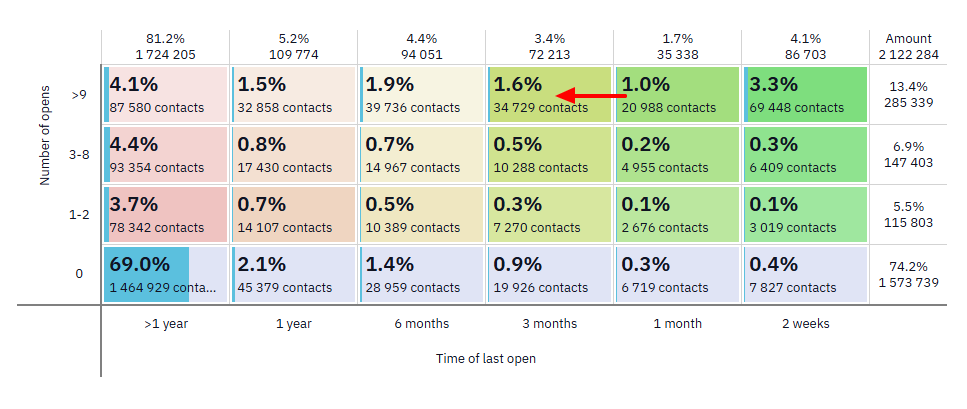
Setting Up Trigger Campaigns at Moving Between RFM Segments
Create automated workflows for each RFM segment.
For example, send an email with a special offer to customers moving into the risk zone — those who purchased 3 months ago to those who purchased 6 months ago.
The settings algorithm will be as follows:
- Add an event to the transition between segments as described above.
- Create a workflow.

- After saving the workflow, set the event you created as the start condition.
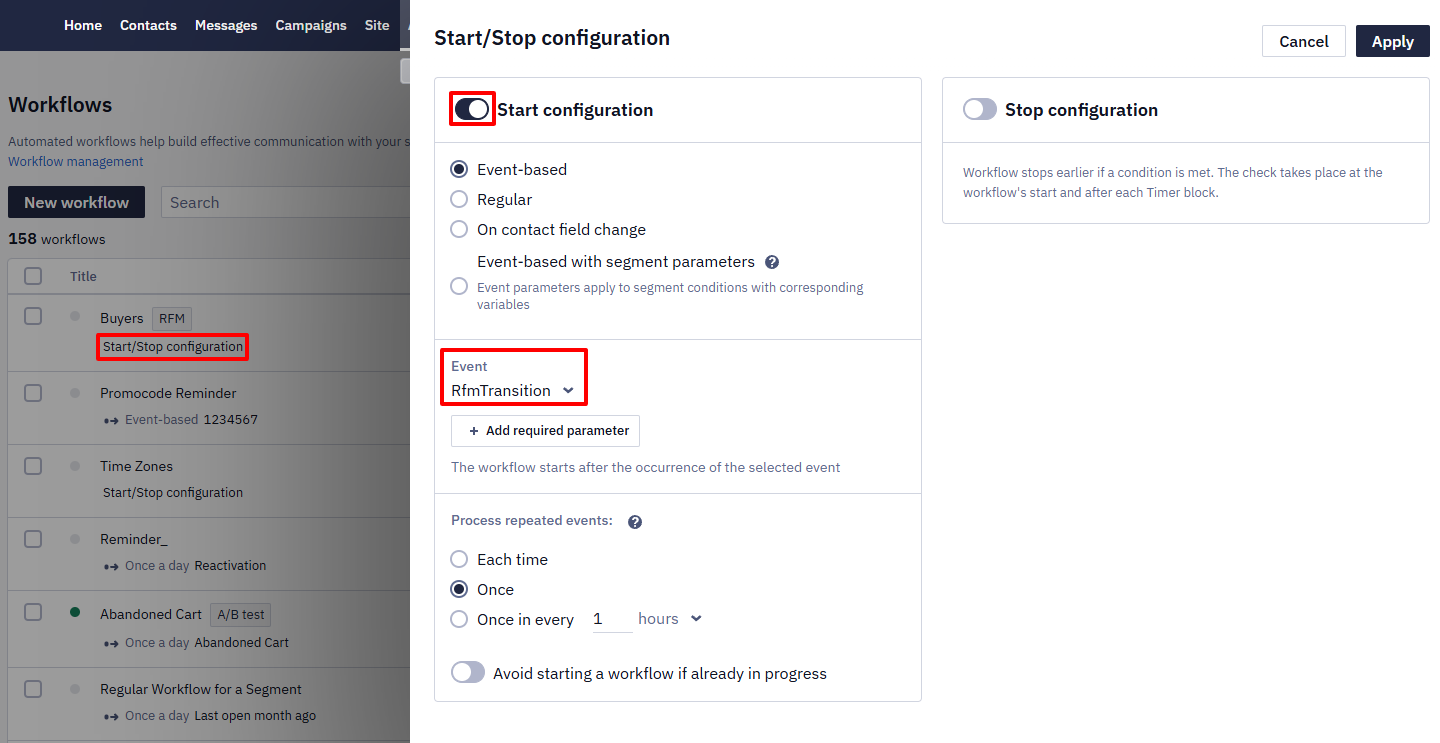
Every time a contact moves between the segments you specified, they will receive messages from the workflow. It can be an offer with a unique promo code, a special discount, a survey about the quality of service, etc.
You can use such workflows not only to reactivate customers, but also to accrue bonuses. In this case, pay attention to the transitions in the green cells. Attach workflows to them to notify the user about the number of bonuses in their account and how much they need to move to a new level.
Another workflow example is to notify the manager about the contact transition from the green to the red segment. The workflow will look like this:

In the parameters of the Email block, specify the message and email address of the manager who should receive it:
The Get contact block will substitute data instead of variables in the email template:
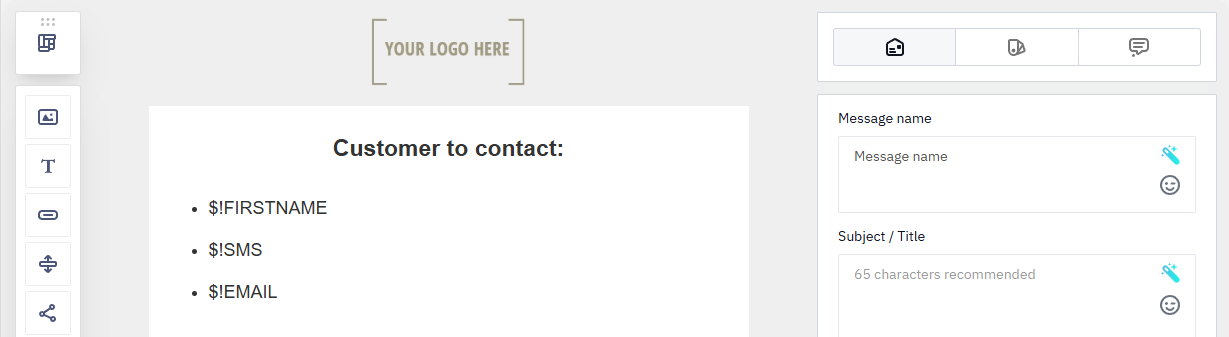
Use the velocity expression $!variable, where variable is the field with the value to pass to the manager. You can see the names of the variables in the Merge tags section of the message editor:
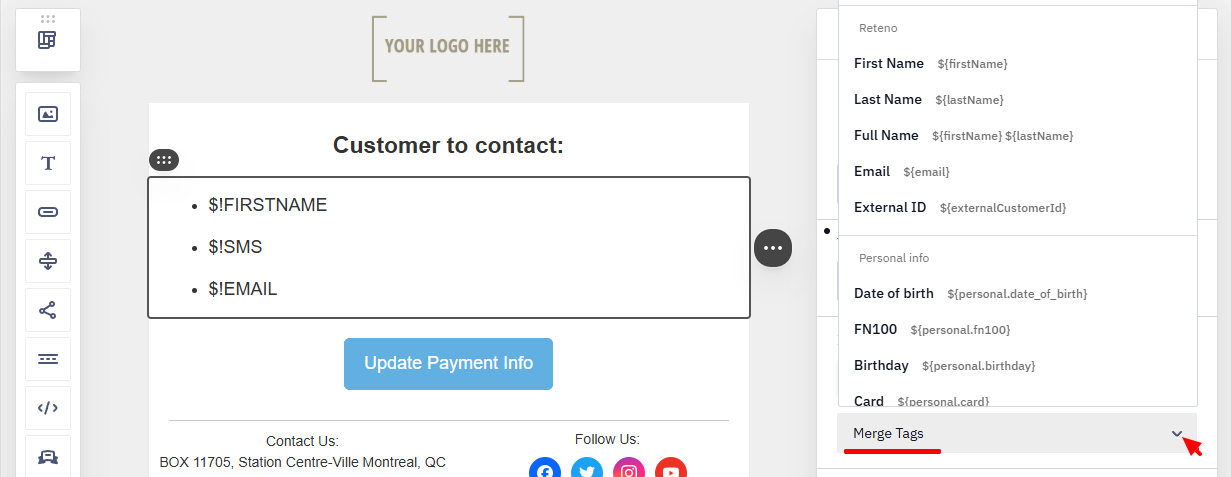
All additional fields that are in your account are collected here. Copy only the name without special symbols. E. g., convert ${firstName} to $!FIRSTNAME.
See more information about setting up workflows at the link.
Updated 3 days ago