
Adding Anchor Links to an Email
Anchor links allow recipients to navigate to specific sections of a message. They simplify navigation and are especially useful in long messages.
For example, you can add anchor links to a menu so recipients can quickly jump to specific product categories within the message.

ImportantAnchor links are not supported or may work inconsistently in some email clients, including:
- Gmail (iOS)
- Apple Mail (iOS)
- Outlook.com (Web)
- Outlook (Android)
- Outlook (MacOS)
In the message editor, anchor links can be added in two ways:
- At the element level (via element settings);
- At the HTML level (by editing the message code).
Adding an Anchor Link via Element Settings
Step 1. Create an anchor
- Select the element you want recipients to navigate to.
- In the element settings, enable Anchor Link.
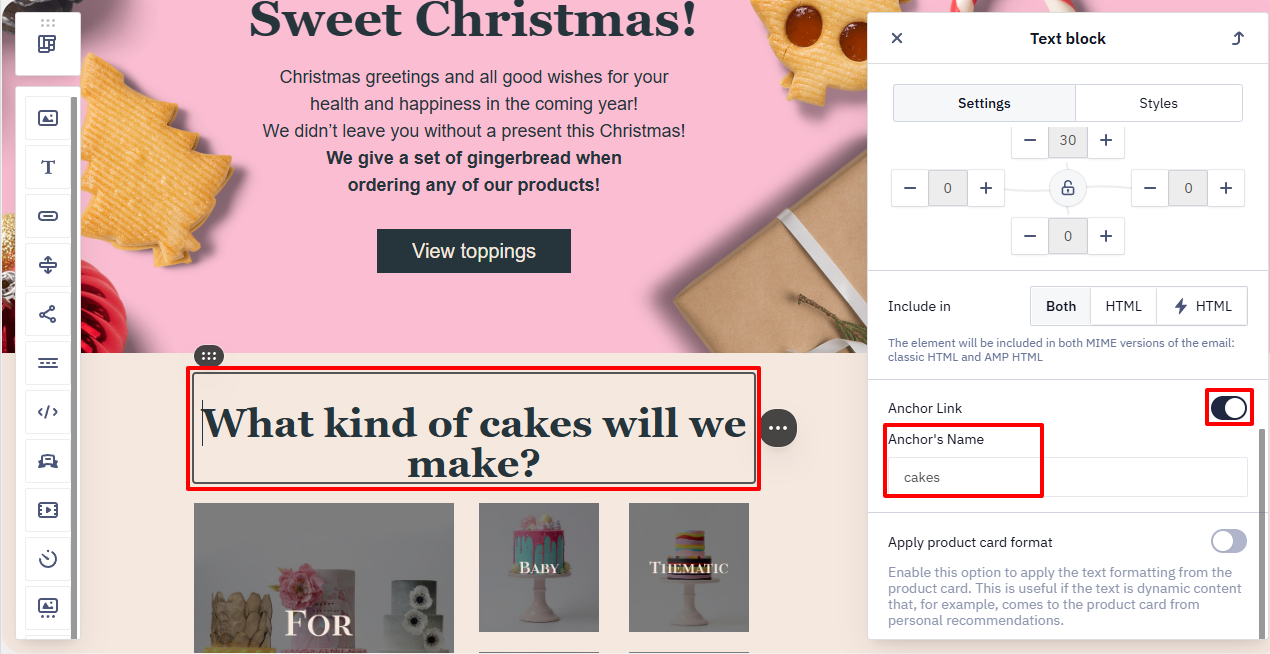
- Specify the anchor name (for example, cakes).
Step 2. Add a link to the anchor
-
Select the element from which the navigation should occur.
-
In the Link field, enter the anchor name with the hash symbol (for example, #cakes).
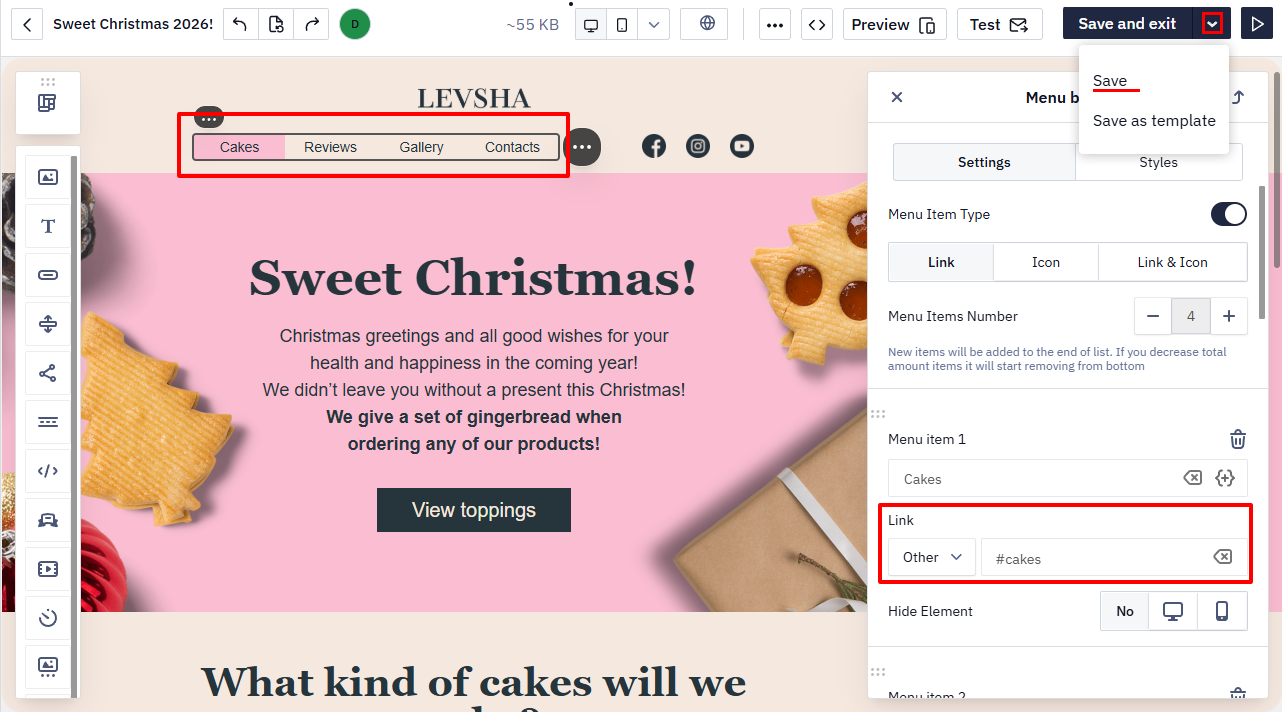
- Click Save.
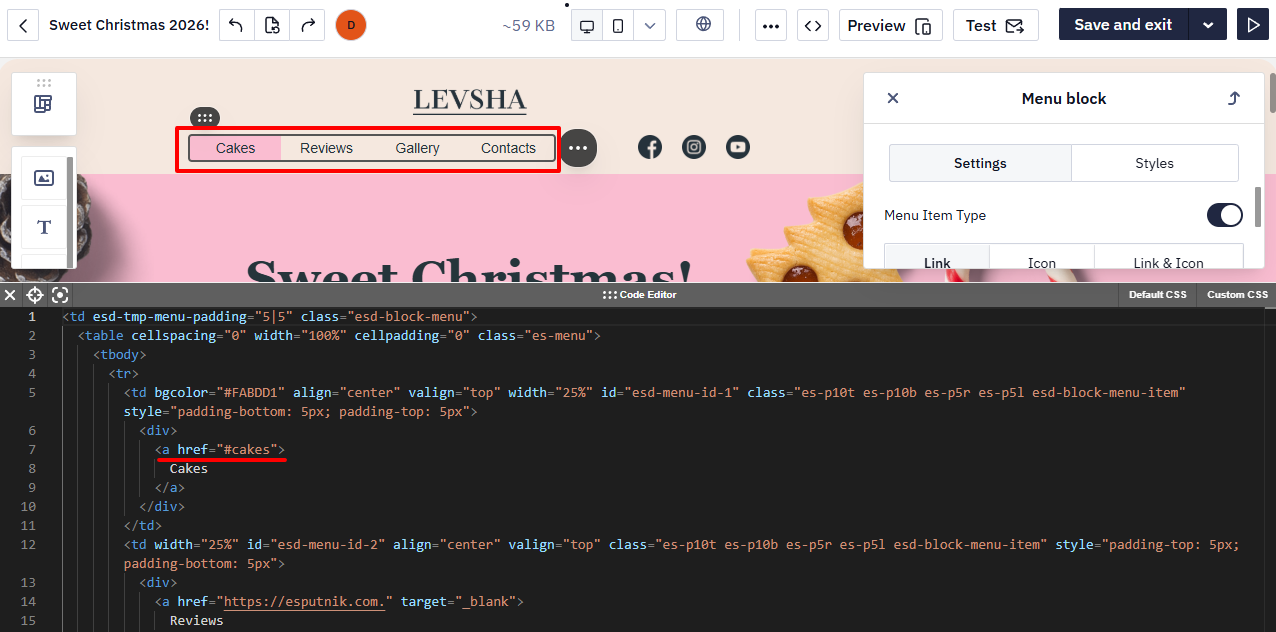
Adding an Anchor Link via HTML Code
Step 1. Add the link
-
Open the code editor.
-
Select the element from which the navigation should occur.
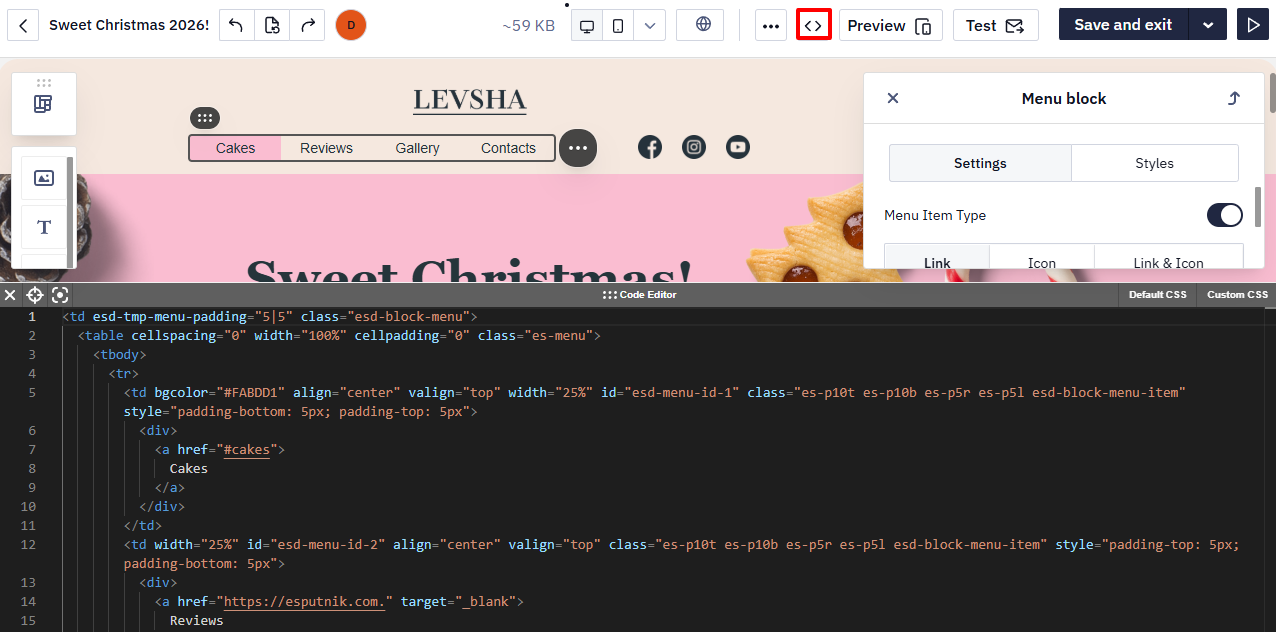
- Add a link tag with the
hrefattribute:<a href="#cakes">.
Step 2. Add the anchor
-
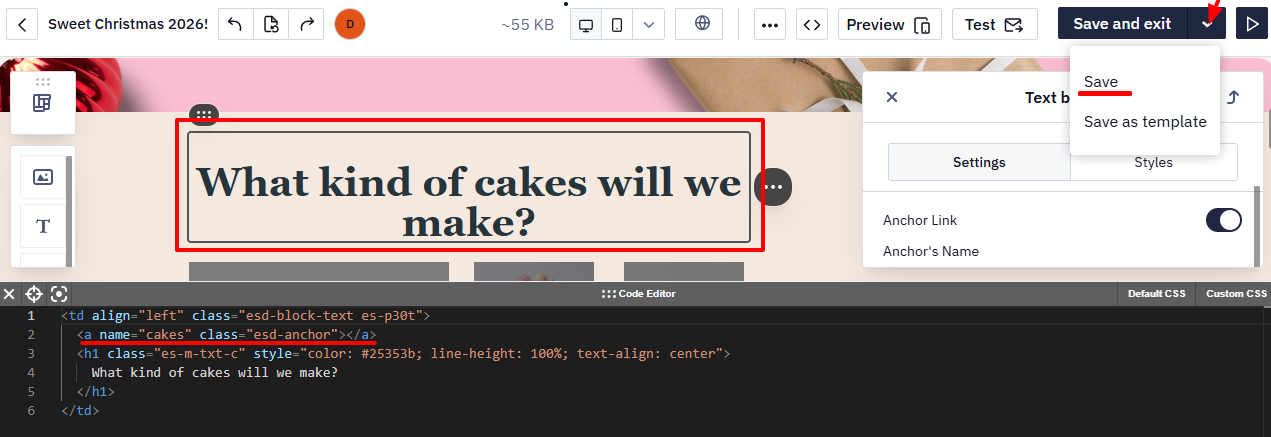
Select the element you want recipients to navigate to.
-
Add the anchor before the element:
<a name="cakes" class="esd-anchor"></a>.
- Click Save.
Testing Anchor Links
To verify that anchor links work correctly, send a test message to your own email address and test the added anchor links in supported email clients.
Updated about 1 month ago