
Connecting to HTTP Request as an External Data Source
Like other external data sources, HTTP request allows you to automate the creation of message content. This request uploads and sends contact data from Reteno to other systems, and vice versa, transfers data from third-party systems to Reteno. With its help, you can refer to your API, which will process the request and return personalization data to the message, for example, a personal promo code. The Velocity language is used to transfer data.
Creating Data Source
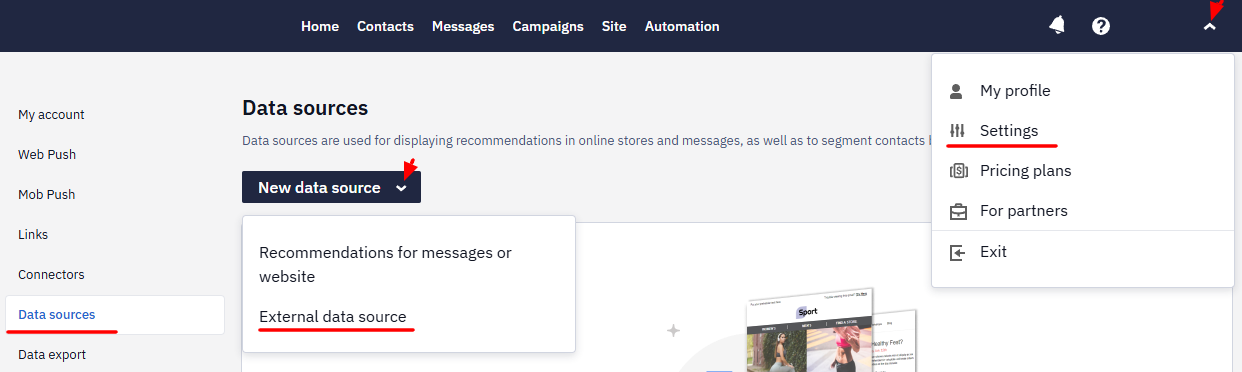
- In your account settings, open the Data Sources tab, click on the New data source button and select External data source.
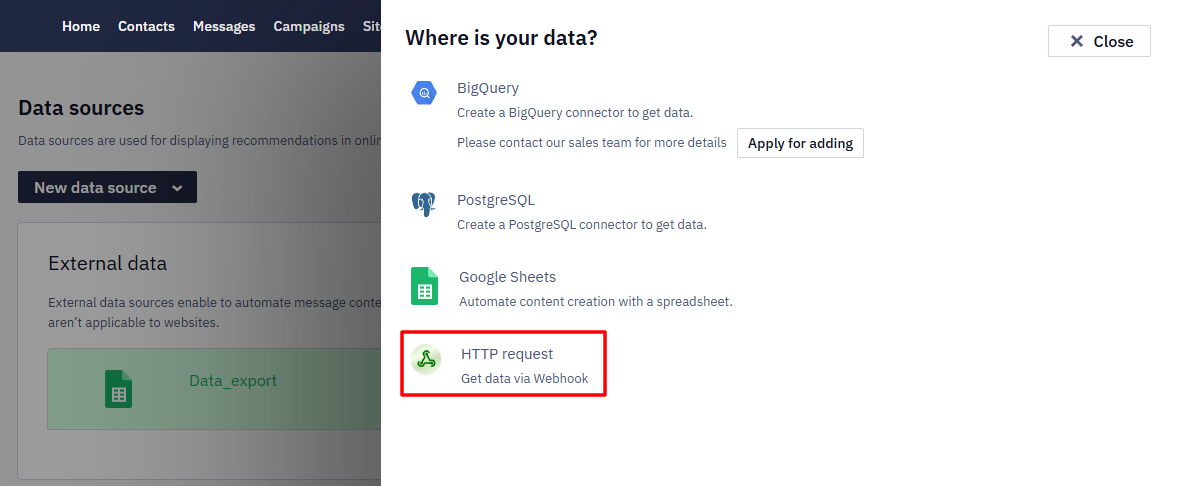
- In the pop-up window, select HTTP request.
Setting Up Connection
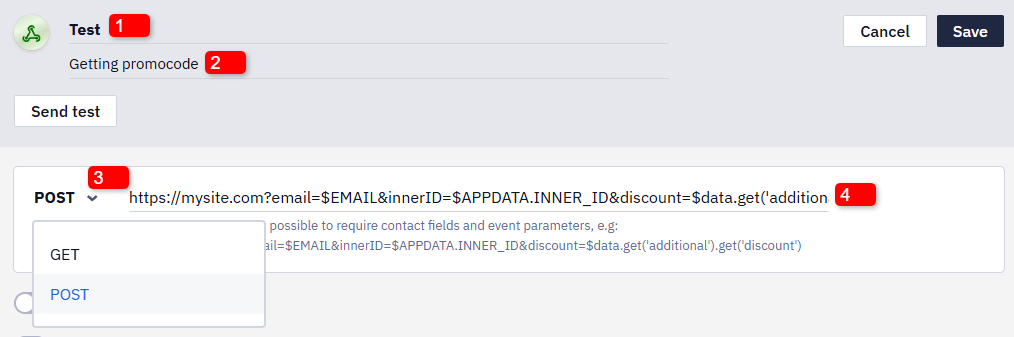
- Give an arbitrary name to the data source.
Important
- The name may contain only Latin letters (A–Z, a–z), digits (0–9), and the underscore
_.- The name cannot start with a digit.
- The use of spaces or special characters is not allowed.
- Add a description if necessary.
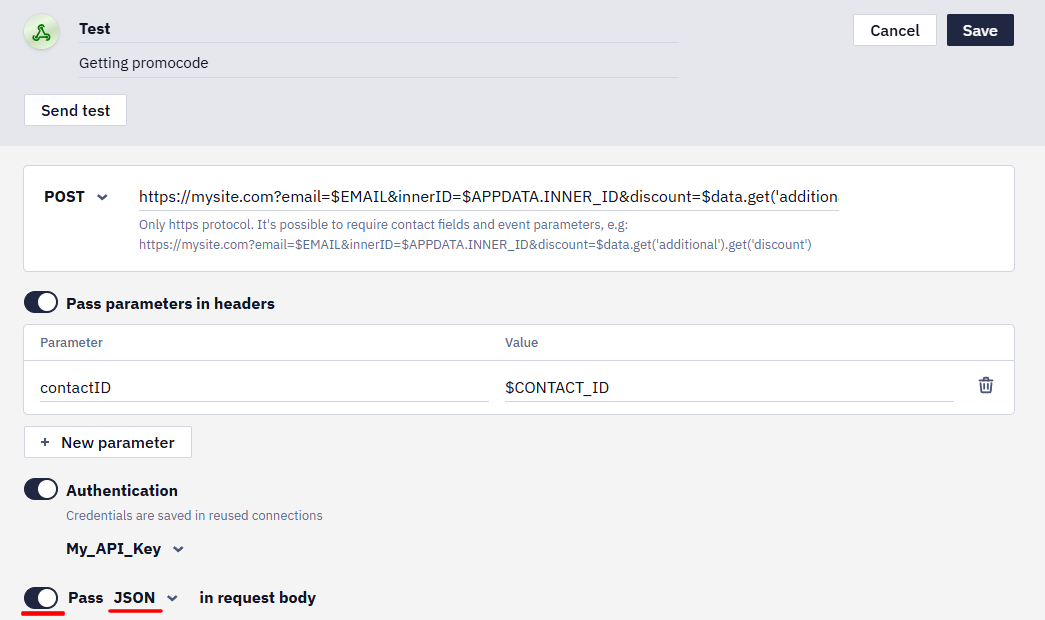
- Select the type of request:
GETorPOST. - Enter the URL to be requested (
HTTPSonly). You can refer to contact fields and event parameters.
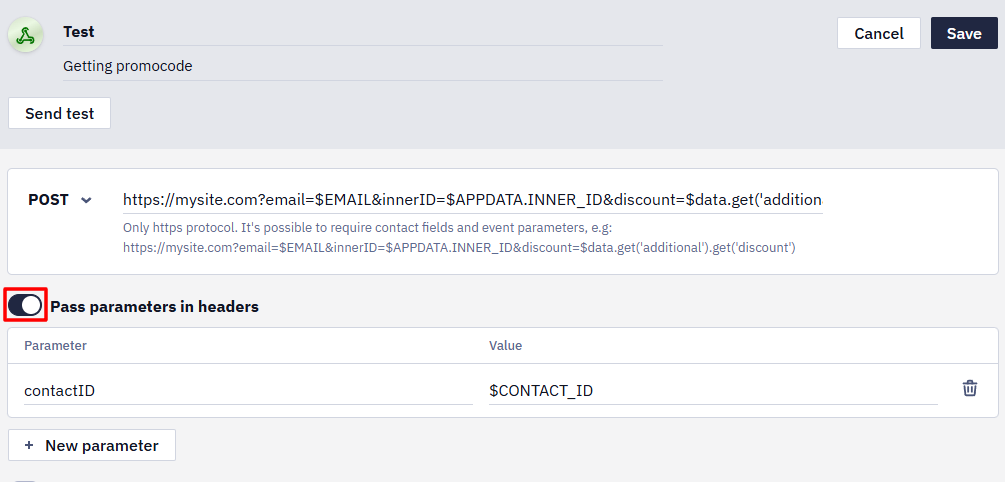
- If your application reads parameters from headers, activate the corresponding switcher. Then specify the required parameters and their values.
- To configure authentication, activate the corresponding switcher. There are four types of authentication available:
- Basic,
- Bearer token,
- API key (in headers or the query string),
- OAuth 2.0.
Specify the connector name. Select the authentication type. Enter your credentials (login and password/token/key). Click on the Done button.
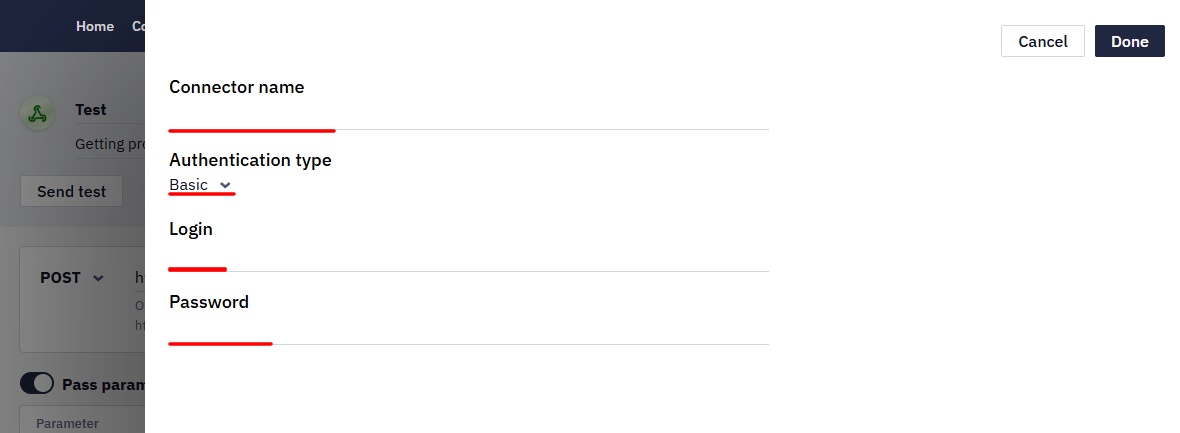
For the OAuth 2.0 type, the connector form also contains the Provider field. When Other provider is selected, the Grant type field appears; it determines how the connection is authorized:
- Authorization code — the standard flow with sign-in on the provider's side: after you click Connect, you are redirected to the provider's authorization page (the Authentication URL is used).
- Client credentials — no user sign-in involved: the access token is requested directly from the Token URL using the Client ID, Client Secret, and Scopes specified under Advanced configuration. This flow suits server-to-server integrations, for example with Microsoft Entra ID.
The received token is automatically added to the Authorization: Bearer header of the requests and refreshed shortly before it expires.
- If your application reads parameters from the request body, activate the corresponding switcher, enter the request body in the text area and specify the format:
JSON,XMLortext.
The data source only reaches addresses available from the internet. If the domain in the request points to an internal address — from the 10.x.x.x range, for example — the request is blocked and the error says the host isn't allowed. This is SSRF protection, not a failure. Use an endpoint reachable from outside; if you aren't sure about your address, contact support.
Testing Connection
Before saving the data source, click Send test to check the request.
Select an event from history or manually paste the event body for the test run. Test requests use the same Velocity context as production requests, so the system resolves dynamic values before sending the request.
You can test:
- contact fields using
$firstNameor${firstName}; - the contact's email address;
- additional contact fields;
- event parameters and keys.
Check the test request to make sure these values were resolved correctly. This helps you find invalid Velocity expressions or missing personalization data before using the HTTP data source in production.
For example, the following test event uses Velocity variables for the contact's email address and first name:
{
  "eventTypeKey": "productViewed",
  "keyValue": "9d0c163d-cc3b-4f9e-bb03-2f5d1111ef91",
  "params": {
    "customerId": "9d0c163d-cc3b-4f9e-bb03-2f5d4f1def91",
    "email": "${email}",
    "name": "${firstName}",
    "product": [
      {
        "isInStock": 1,
        "name": "Dasmal Decoria, 60x100 cm",
        "price": 9.9,
        "productId": "11111",
        "quantity": 1
      },
      {
        "isInStock": 1,
        "name": "Dasmal Decoria, 60x100 cm",
        "price": 9.9,
        "productId": "139902",
        "quantity": 1
      }
    ],
    "currencyCode": "USD"
  }
}
More on adding data to a message >
A campaign that pulls data from an HTTP source makes a separate request for every contact, so it sends more slowly than one without a source. How much slower depends on how quickly your endpoint responds.
Updated 30 days ago