
Storing Data from Widgets to Contact Fields
When creating subscription forms, you can add the following fields and send their data to mapped contact fields:
- Text input
- Text area
- Date
- Calendar
- Checkbox
- Single choice
- Dropdown
- Radio
This can enrich a contact profile with data gathered in a widget to improve message personalization.
These fields are available for all types of subscription forms:
- Inline
- Pop Up
- Floating box
- Floating bar
When a user enters data into the fields and subscribes using the widget, a new contact is created, or an existing contact is updated.
The information selected or entered into the widget fields is added to the corresponding contact fields.
Besides the data the user enters, the widget automatically stores additional information with each submission: site language, submission date and time, city, country, country code, device language, device class, operating system, environment, browser name, subscription URL, and IP address. These fields are available for mapping in the widget's integration settings.
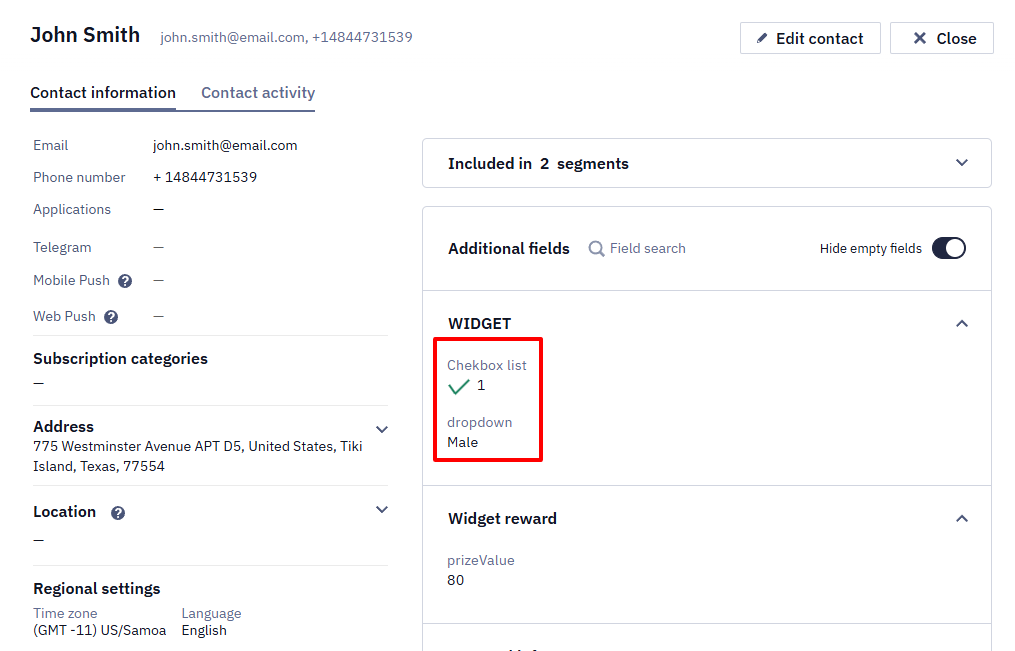
To learn more about creating widgets, read Setting up Widgets for your Site.
Mapping the field data to a contact field
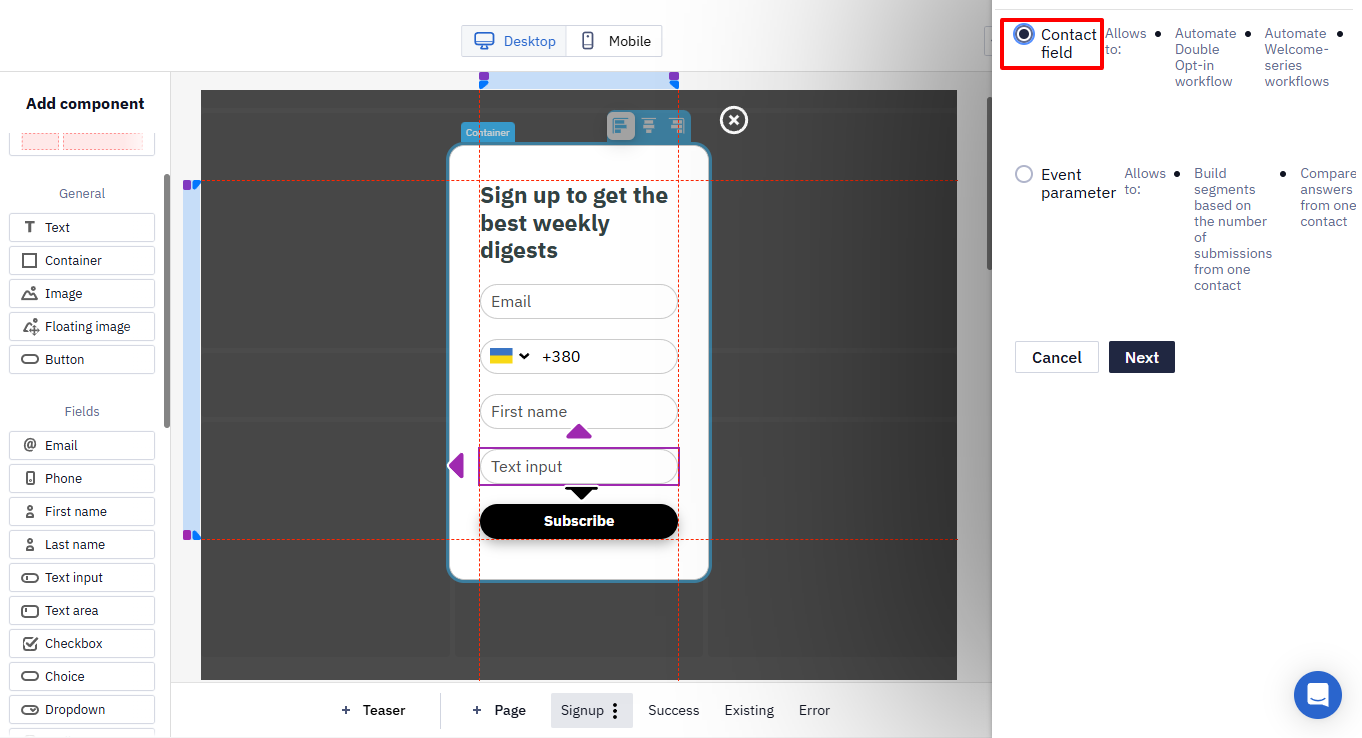
When you add one of the fields to your subscription form, the Process collected data as a sidebar opens, offering two options:
- Contact field: This option allows you to map the data entered into this field to a contact field that you created in your account.
- Event parameter: This option allows collected data processing as event parameters.
NoteReteno is your ESP/CRM, so mapped widget data does not need a separate export step to an external system — submitted values are written straight to the contact field or event parameter. To capture campaign context such as UTM tags (
utm_source,utm_campaign, etc.) or a click ID, add a text field to the widget, enable Prefill with the URL query parameter source, and map that field to a contact field or event parameter as described below.
To map the widget field to the contact field:
- Add one of the following fields to your subscription form.
- Text input
- Text area
- Date
- Calendar
- Checkbox
- Single choice
- Dropdown
- Radio
The Process collected data as the sidebar opens.
- Select the Contact field option and click Next.
- Select the contact field existing in your account that you want to map the data to.
You can add a new field, see Adding a new field to learn more.
The fields that are not included in a list are displayed at the top of the menu. To see fields in a list, expand the list by clicking the down arrow.
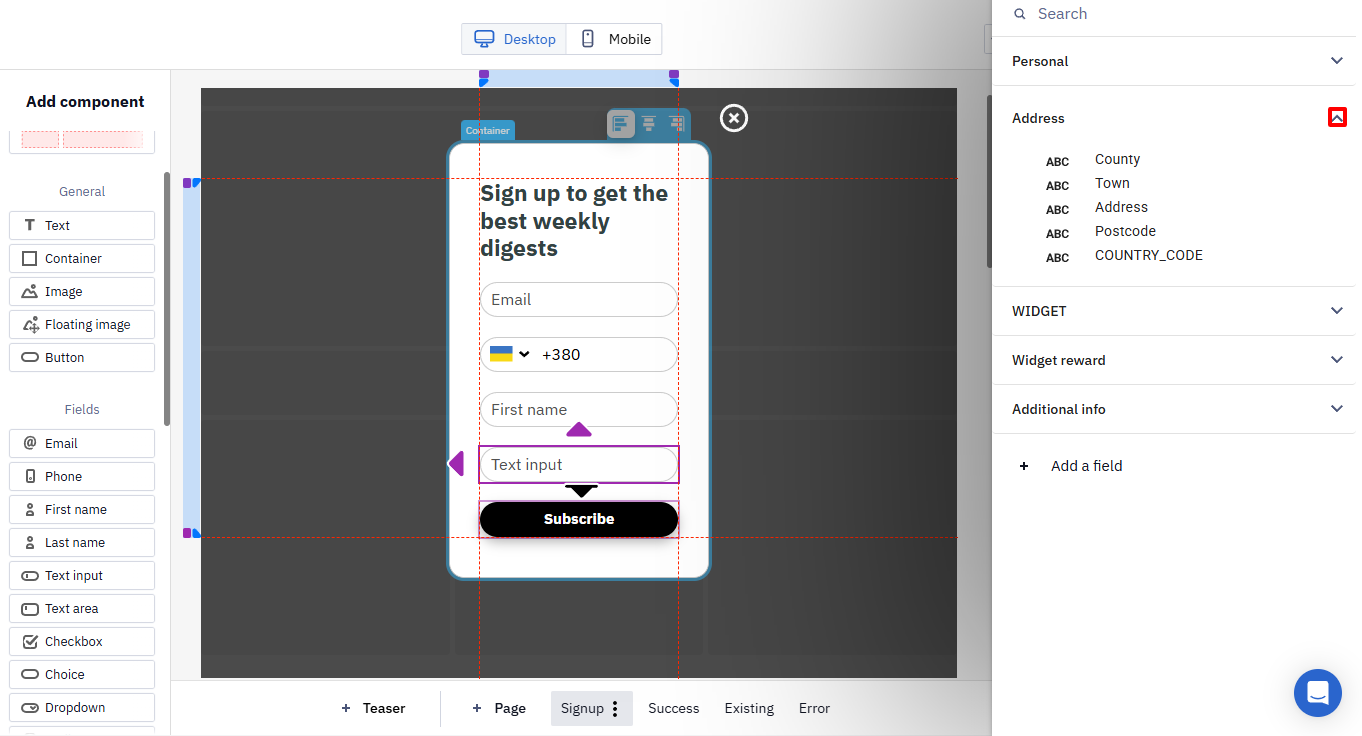
The field names displayed in gray cannot be added for the selected field type.
NoteCOUNTRY_CODE, along with City, Region, and Country, is a standard contact profile field. For website visitors, these Location fields are also auto-detected from the visitor's IP address and updated on the contact profile whenever the widget script records a View, Click, Subscribe, or Submit event — no manual field mapping is needed for this. Learn more in Setting Up Geotargeting.
You can map the widget fields to the following types of contact fields:
| Widget field | Contact field type |
|---|---|
| Text input | ● Text field ● Number ● Fractional number |
| Text area | ● Text area |
| Date | ● Date |
| Calendar | ● Date |
| Checkbox | ● Checkbox list |
| Single choice | ● Checkbox list |
| Dropdown | ● Dropdown list |
| Radio | ● Dropdown list |
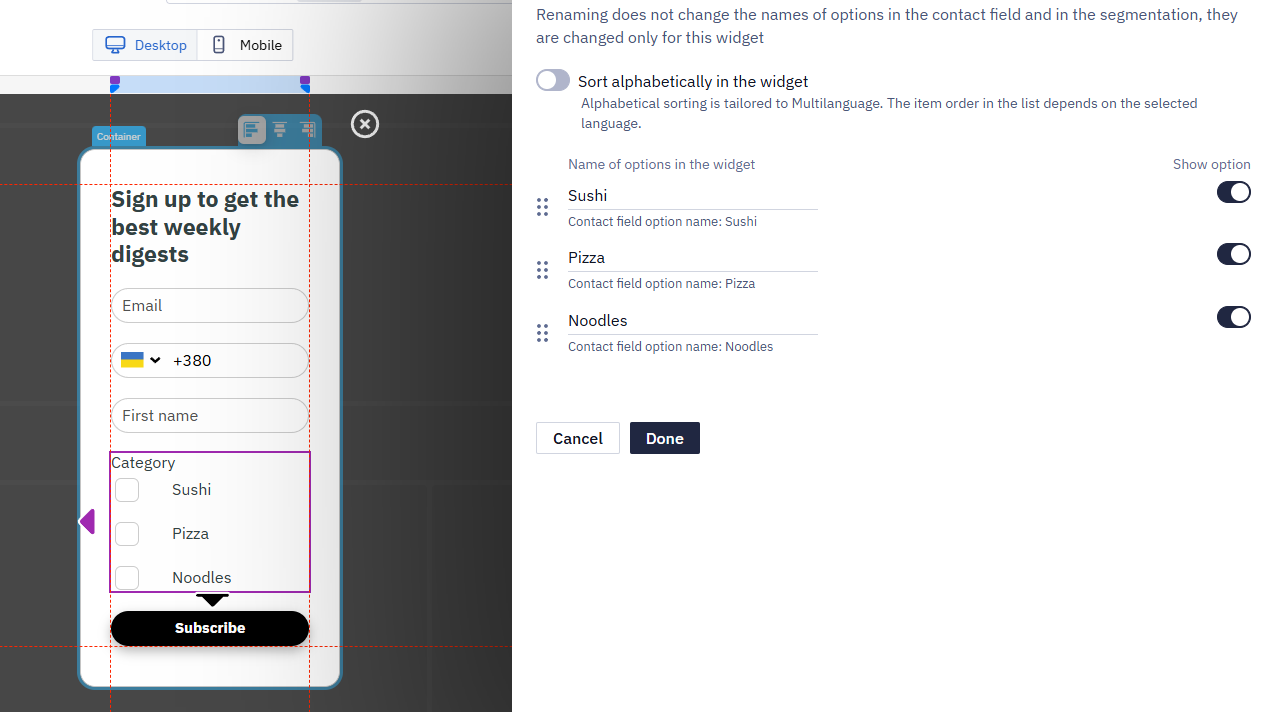
After selecting the contact field for the Checkbox, Single choice, Dropdown, or Radio fields, the Edit options window opens. Edit the options as described below, then click Done:
- Change the names of the options. Enter the option name in the Names of options in the widget column.
- Show or hide options. Enable or disable the slide button in the Show option column to show or hide the option in the widget.
- Change the option position. Use the six dots icon to drag and drop the option to another position.
NoteThe Checkbox, Dropdown, and Radio fields store the ID of the selected option, not its text. The stored IDs are resolved against the current version of the widget, not the version the visitor actually saw. If you edit or delete options after collecting responses, historical answers can show updated or empty values instead of the original choice. To keep historical answers readable, avoid editing or deleting options of a live widget — add new options instead.
Adding a new field
To add a new field in the Select contact field window:
- Click + Add a field at the bottom of the window.
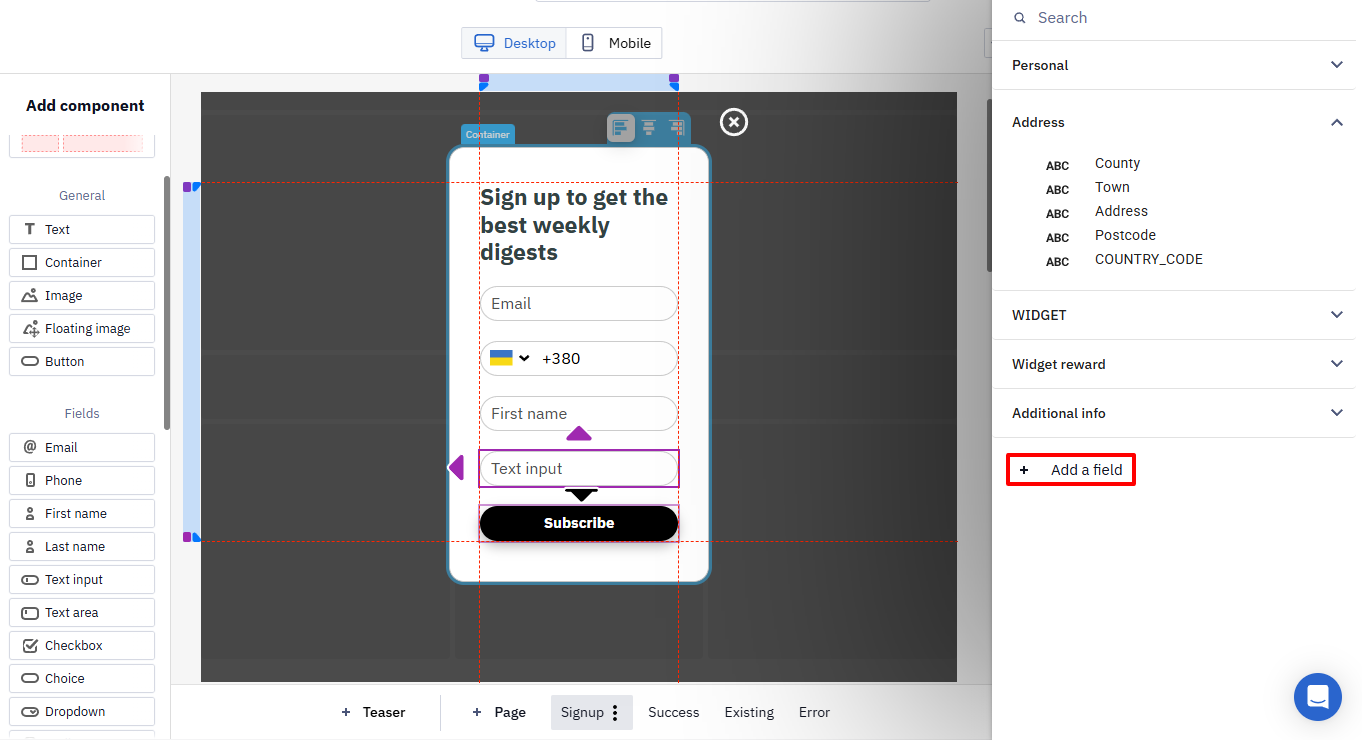
- In the Add a field window, select the radio button beside the existing list.
Or,
Select the radio button beside + Create a new list for this field and enter the list name to create a new list.
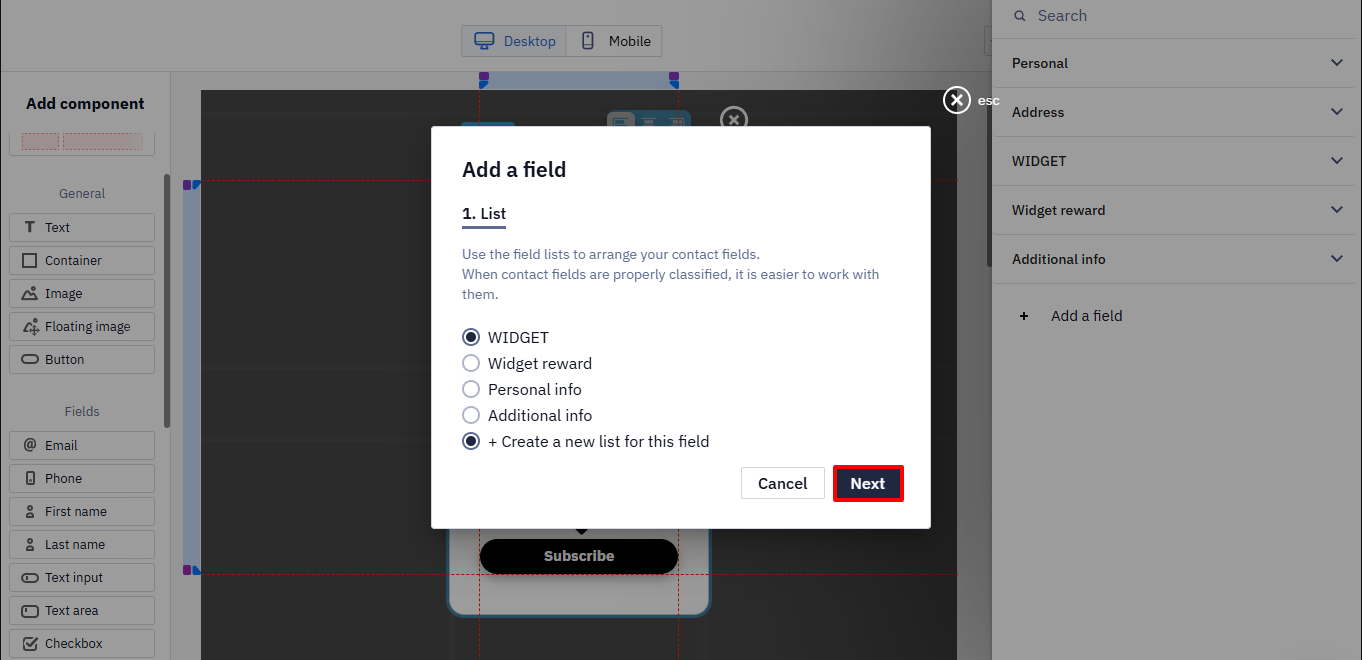
- Click Next.
- Enter the field name and select the field type from the Field type dropdown list.
NoteThe personalization key is created automatically based on the list name. Point to the interrogation (?) icon to learn more.
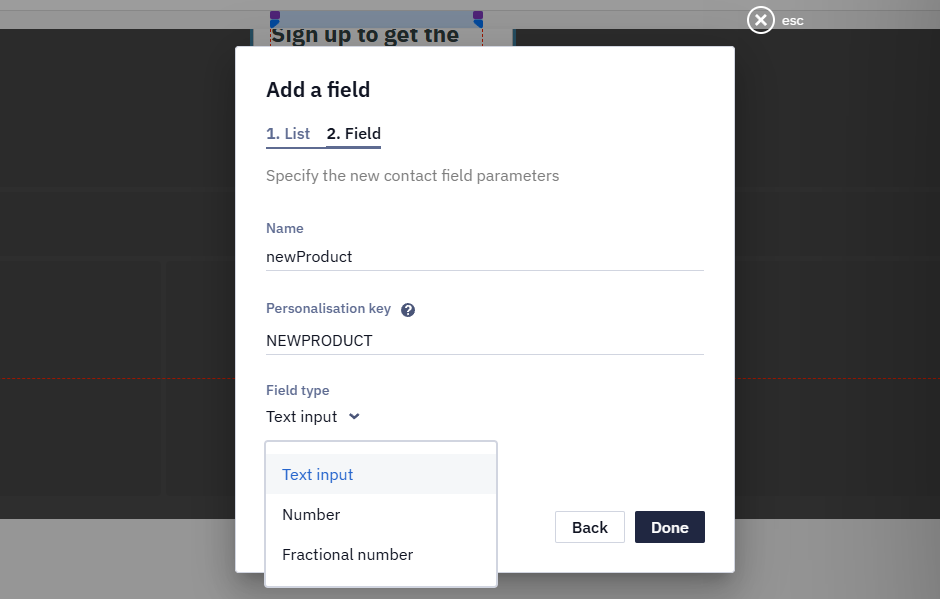
- Click Done.
Configuring the added fields
After adding a field to your widget, you can edit its configuration in the General tab.
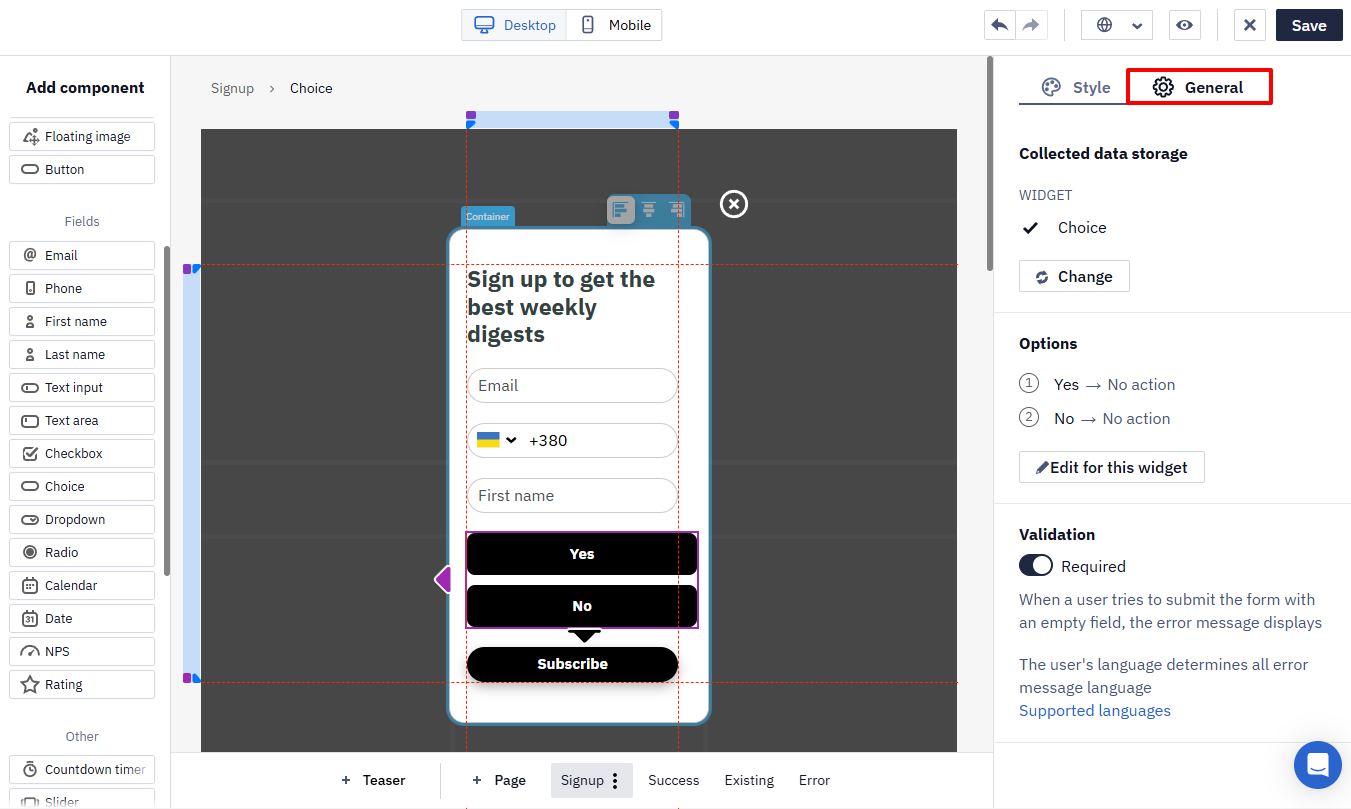
The sections available in the General tab depend on the widget type. The table below provides details about each section.
| Section | Description | Available for fields |
|---|---|---|
| Placeholder | The text entered into the Placeholder field is shown as a placeholder in the field added to the widget. | ● Text input ● Text area ● Dropdown |
| Collected data storage | This section displays the selected contact field. To choose another field, click the Change button and select another field. | ● Text input ● Text area ● Checkbox ● Dropdown ● Radio ● Calendar ● Date |
| Validation | Displays validation parameters. | ● Text input ● Text area ● Checkbox ● Dropdown ● Radio ● Calendar ● Date |
| Options | Shows the names of options in the selected field. Click the Edit for this widget button to edit options. | ● Calendar |
Storing Gamified Widget Data to a Contact Profile
When a contact interacts with a gamified widget, the system receives an event containing reward parameters (for example: promo code, gift type, discount value).
Example of an event with reward parameters:
{
  "eventType": "welcome",
  "email": "[email protected]",
  "parameters": {
    "firstName": "John",
    "promoCode": "LUCKY80",
    "prizeName": "80% Discount",
    "prizeValue": "80",
    "WEBSITE": "shop.com"
  }
}
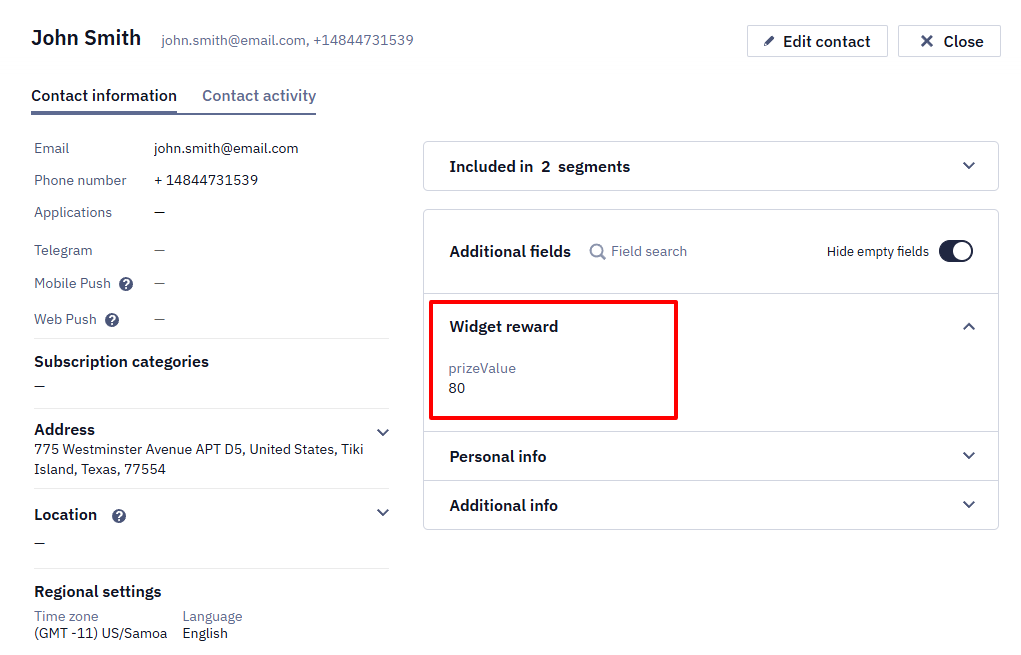
To display these values in the contact profile, save them into the corresponding additional fields.
- Create additional contact fields, for example:
- promoCode
- prizeValue
- prizeName
More about creating additional fields >
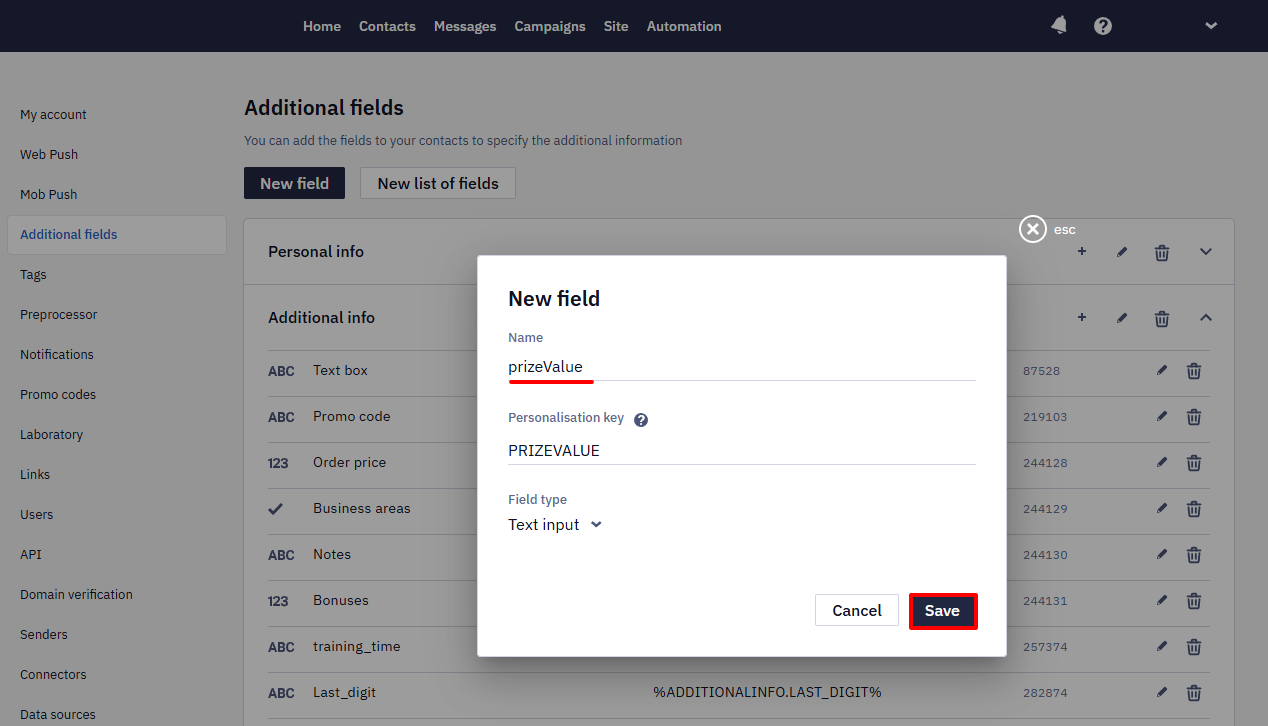
- In the workflow, after the Send obligatory (transactional) email block, add the Update custom fields block.
- In the block settings:
- select the field that should be updated;
- specify the Velocity variable from the event (for example:
${prizeValue}).
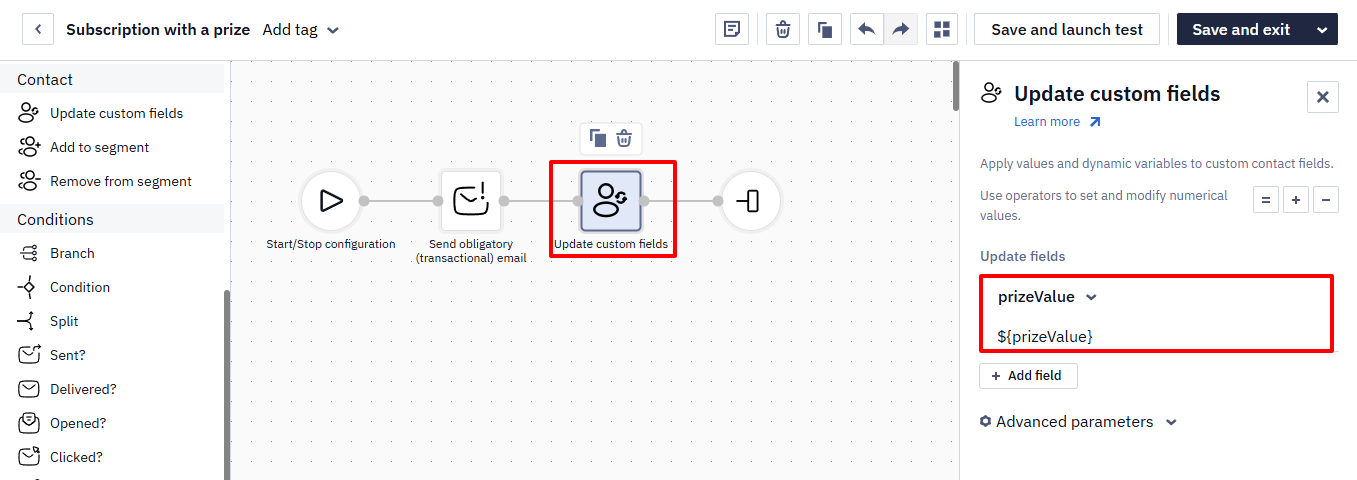
More about building and editing workflows >
Saved reward parameters can be used for:
- message personalization;
- building segments (for example: contacts with a specific type of reward).
Updated about 1 month ago