Integrating with Horoshop
Horoshop is a SaaS platform for creating online stores. You can independently, without involving developers, set up the transfer of contact and order data from a website based on Horoshop to Reteno.
NoteTo integrate with Reteno on the Horoshop platform, activate the Pro tariff plan in your Horoshop account. Additionally, set up data transmission through API.
Before connecting a new integration, complete the following steps:
If you have already completed these steps, proceed directly to connecting and setting up a new integration.
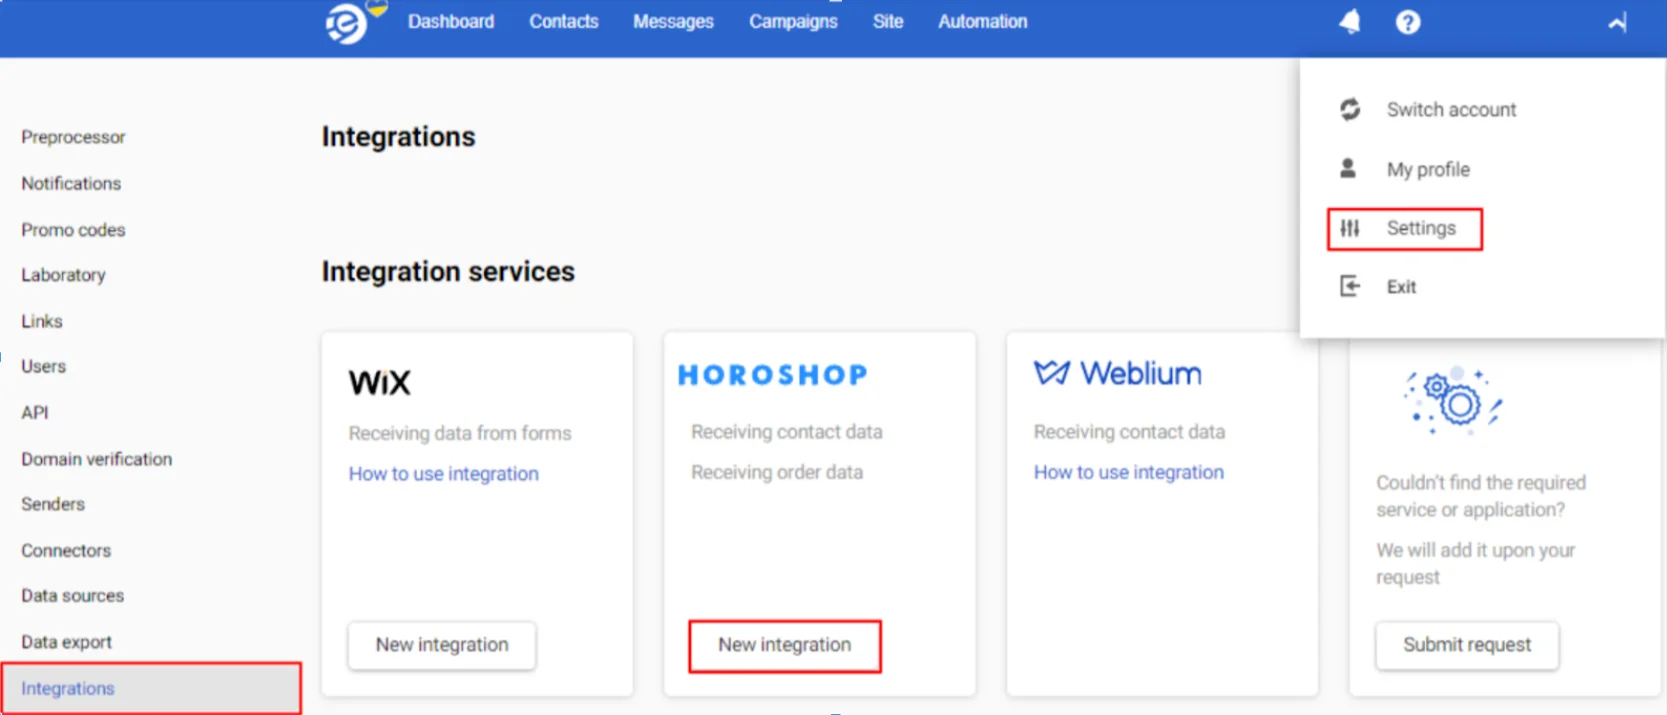
Connecting a New Integration in Your Reteno Account
- Go to the Reteno account settings → Integrations tab and click the New Integration button for the Horoshop service.
- Specify the new site's address and enter your Horoshop username and password.
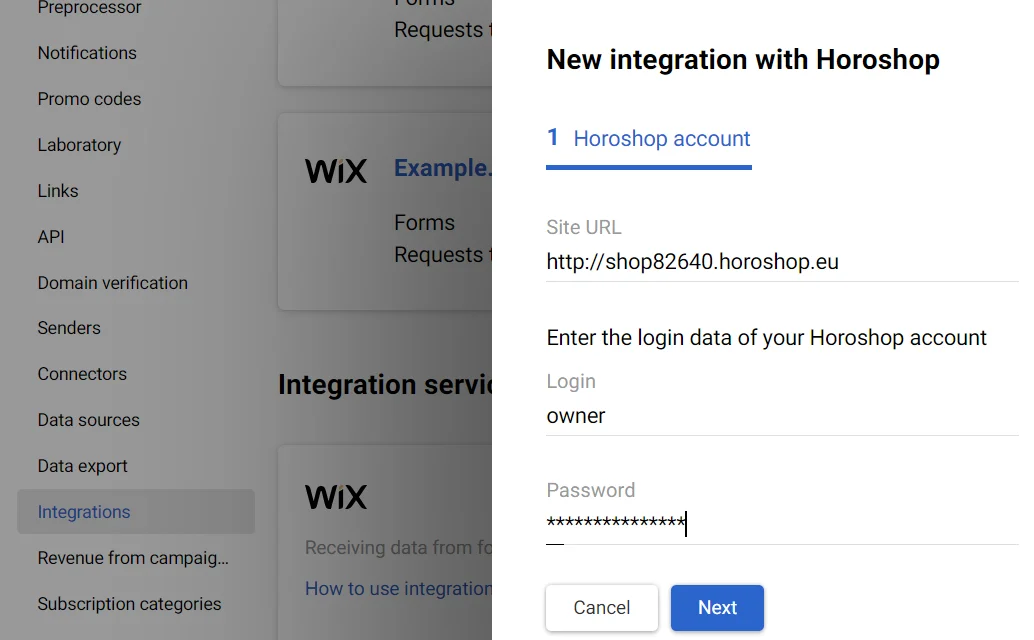
- Click Next and configure the integration parameters.
Setting Up Integration Parameters
Activate the switches next to the functions you are going to use:
Receive contacts
- Contacts are received after the visitor has registered on the site or has placed an order.
- Contact data can include different parameters depending on the action completed on the site.
- Parameters received by default: email, first name, surname.
Create contact with confirmed email address
- If contacts did not provide explicit confirmation when collecting data, you must collect contacts unconfirmed.
- You can send both bulk and triggered messages to confirmed contacts.
- You can send only triggered messages to unconfirmed contacts.
Receive orders
You can use order data in workflows and messages.
More on automating work with orders >
- Click the Done button.
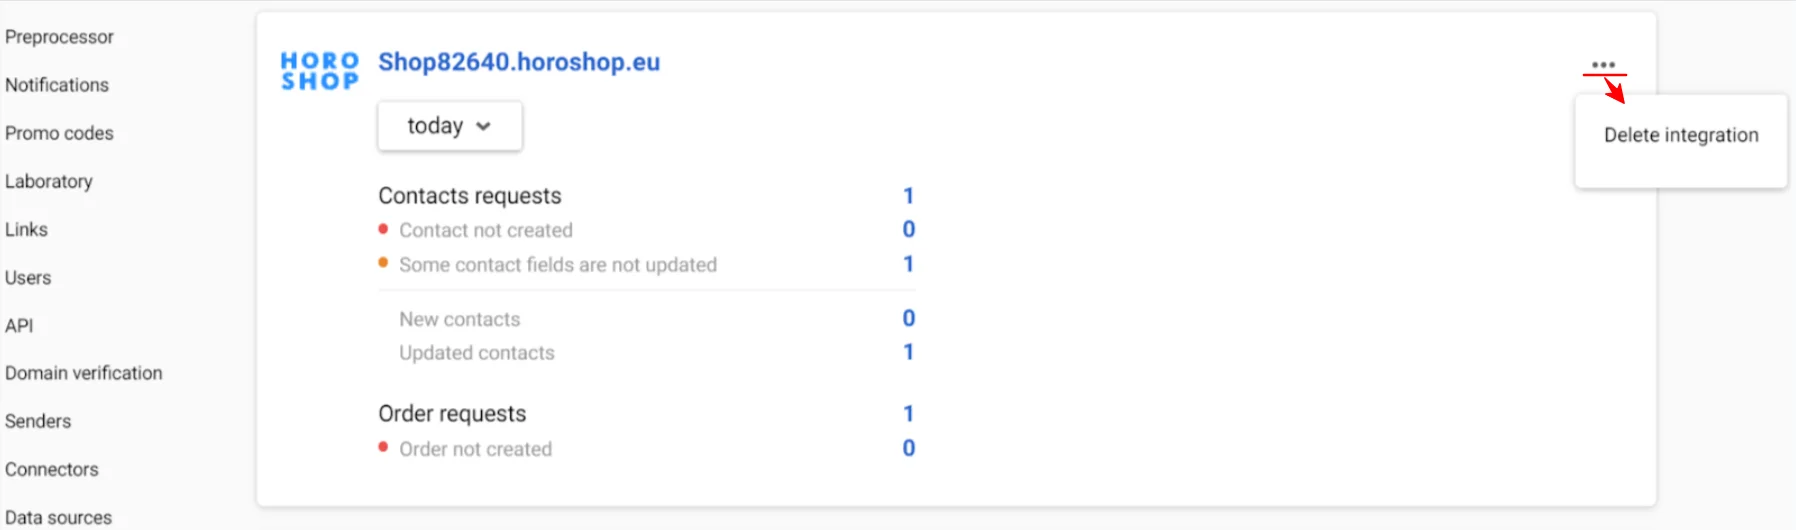
The service will appear in the list of integrations.
Click the three dots icon in the top right and confirm deletion to remove the integration.
Setting Up Web Tracking Events in Your Horoshop Account
Go to the Marketing → Marketing services in your Horoshop account and click Add.

Set up integration:
-
Enter a title.
-
Activate the Active checkbox.
-
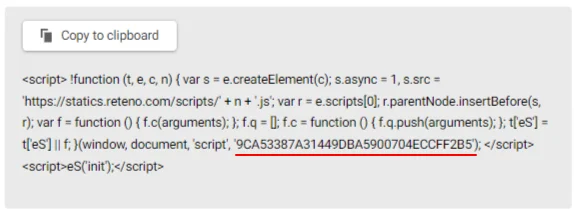
Insert the tenant value from the web tracking script in the System ID field. Our example is 9CA53387A31449DBA5900704ECCFF2B5.
- Paste the copied web tracking script in the Tracking code field.
- Specify the Before
</body>placement.

Save your settings.
The integration has been successfully configured and is ready to transfer data.
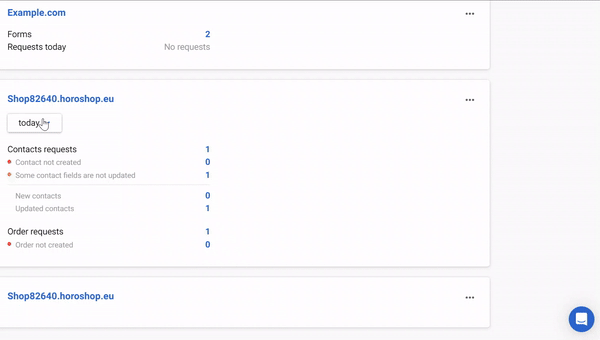
Request Statistics
You can view statistics on requests to create contacts and orders on the Integrations tab in Reteno.
- Go to Settings → Integrations.
- Select the statistics period and click the number next to the request. You will see detailed information about received contacts and orders: the source of the contact and the history of their activity, the composition and price of the order, address and delivery method, etc.