
Adding Custom Fonts
A web font is one of the ways to create an original style for your email. you can add a custom font from Google Fonts or another source in the email editor.
TipYou can also store your brand fonts in the Brand Kit together with logos, colors, and button styles.
Font Sets in Reteno
There are three font sets in Reteno:
- Standard fonts – supported by all email clients and devices.
- Non-standard fonts – displayed on most modern devices.
- Custom fonts – mainly used for banners custom fonts switch to standard ones when sending email.
Custom fonts allow you to create individual email designs.
Email clients that support custom fonts:
- iOS Mail and Apple Mail;
- Outlook 2016 and Outlook 2011 for Mac;
- Android App and Android Mail 2.3, 4.2, 4.4;
- Lotus Notes 8.
Adding Your Font to Reteno
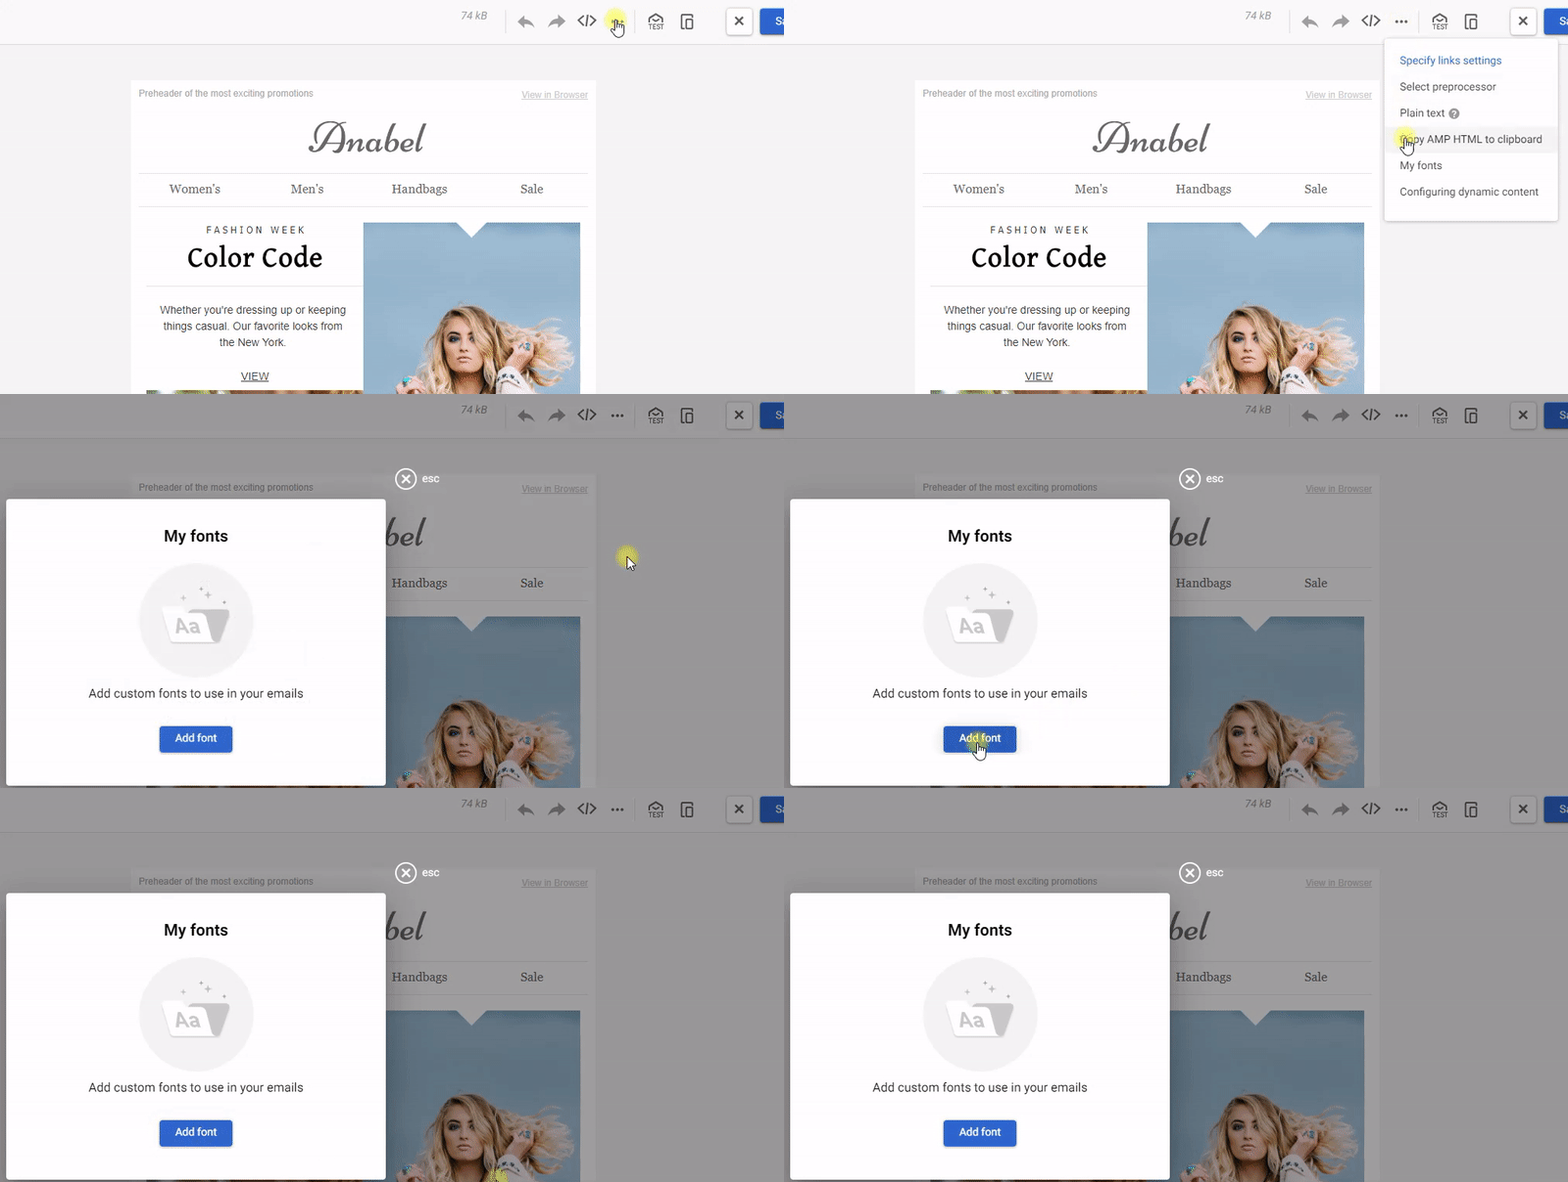
- Open an email or create a new one.
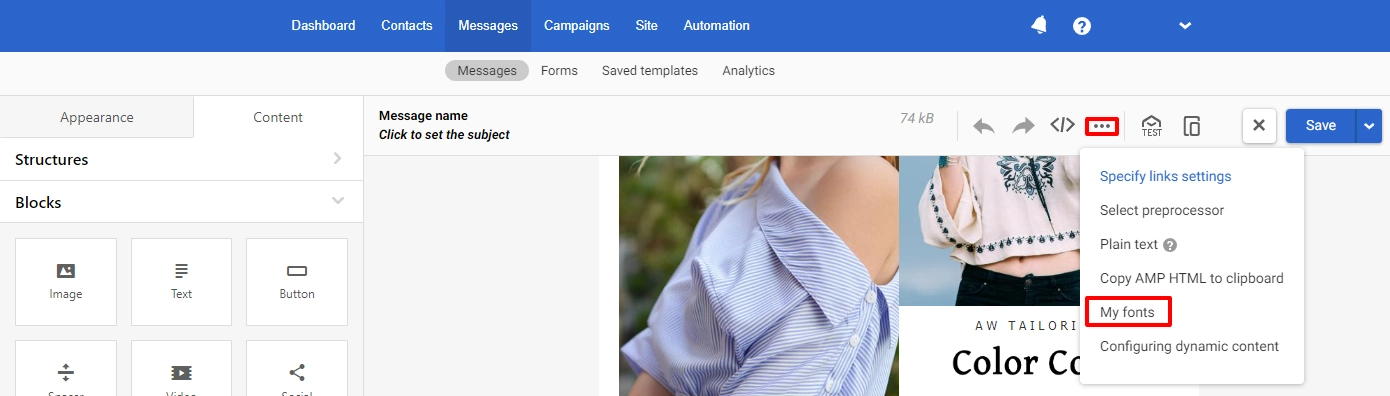
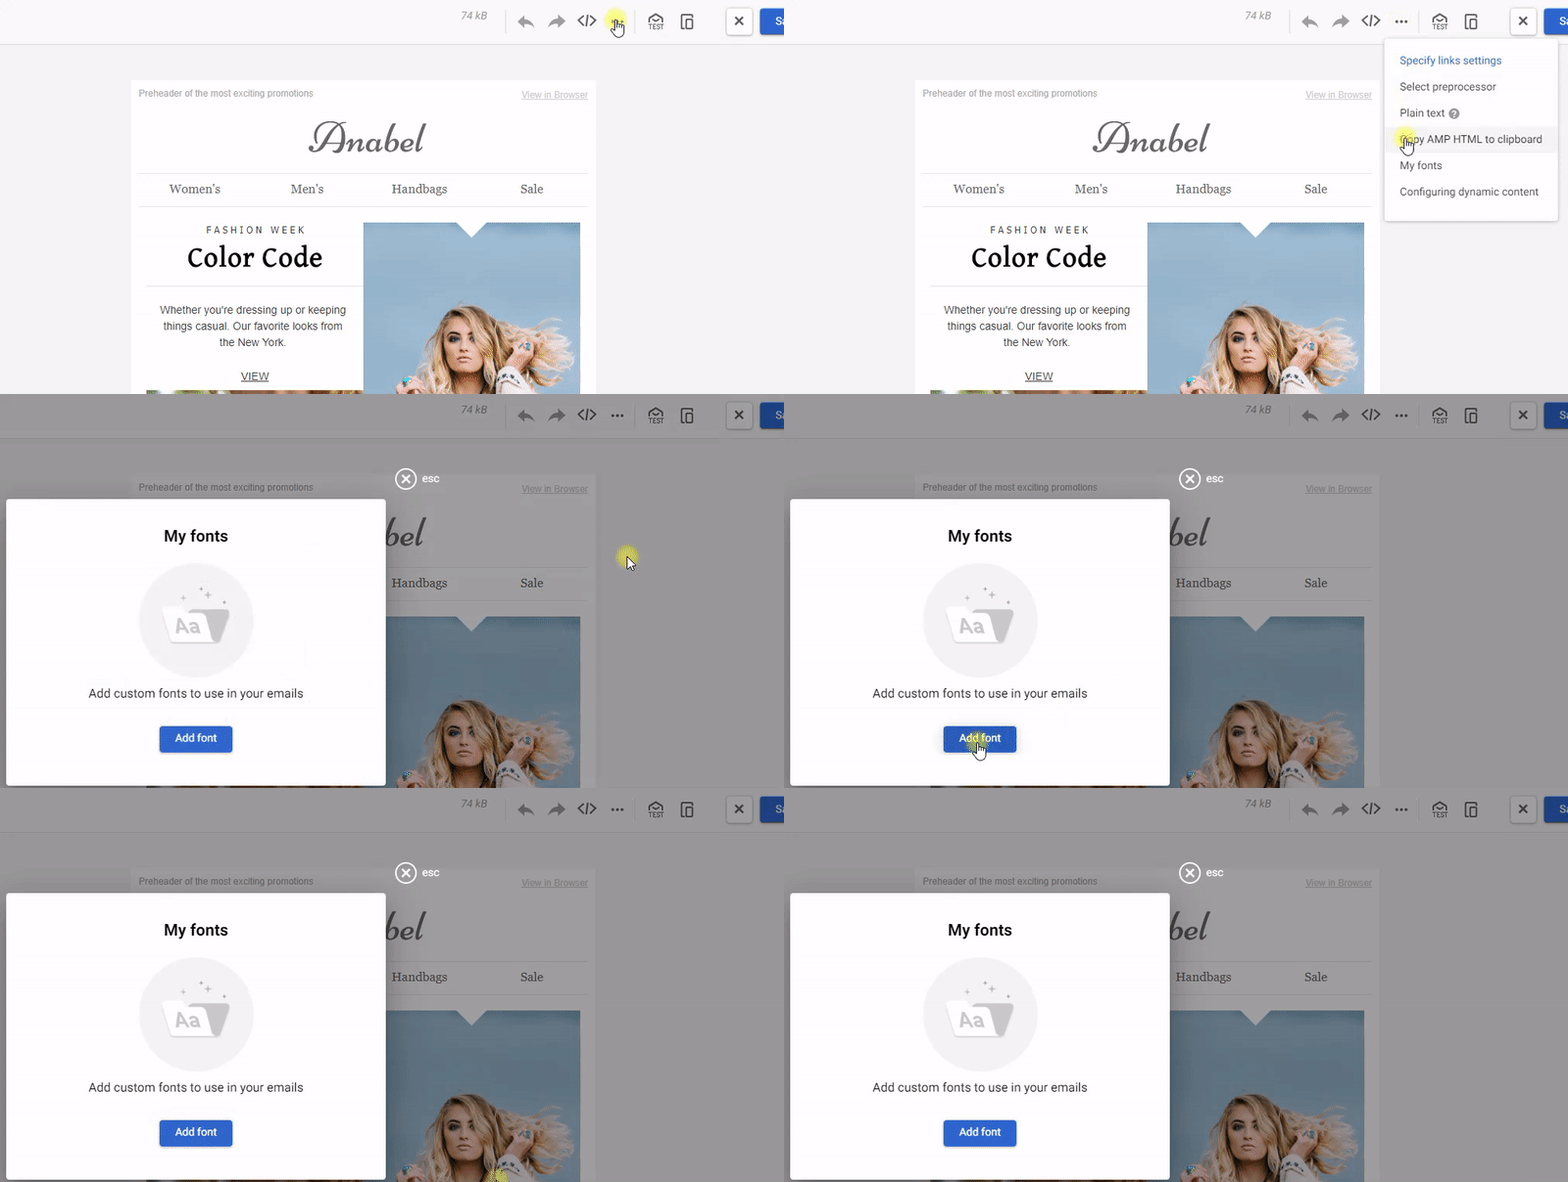
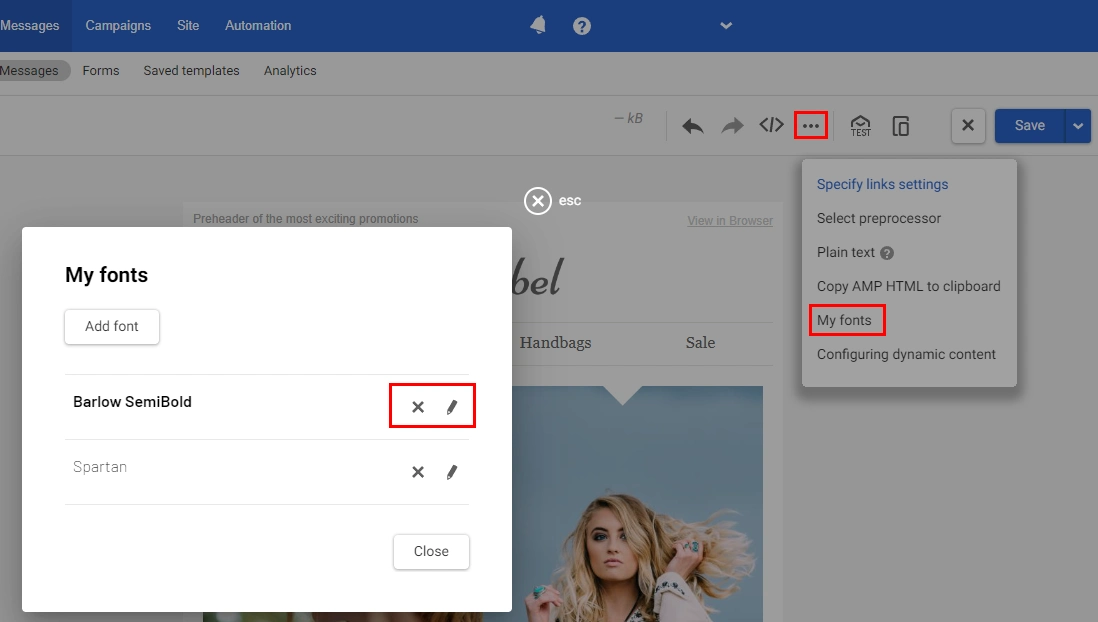
- On the top panel of the editor, click the three dots icon and select My fonts.
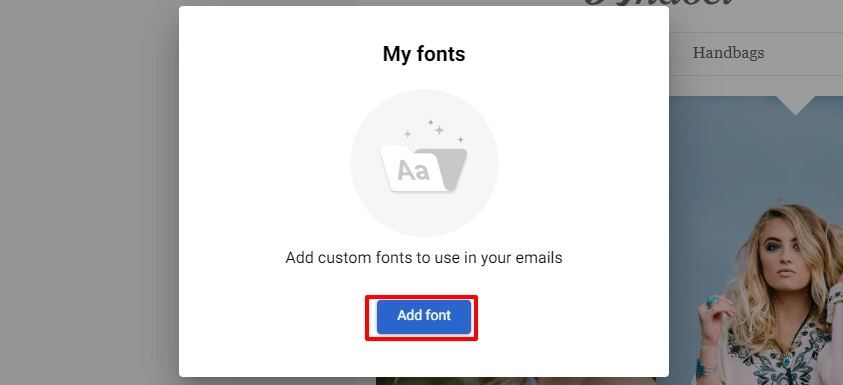
- Click the Add font button.
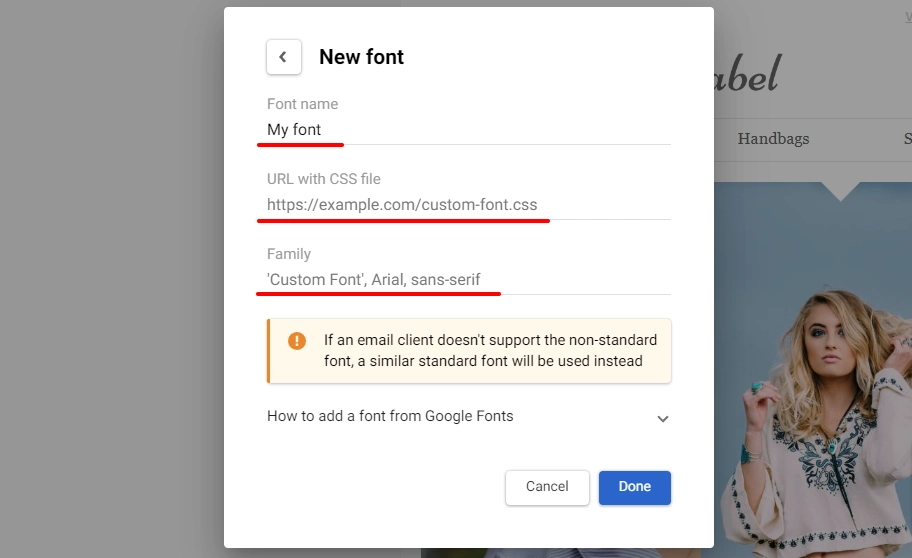
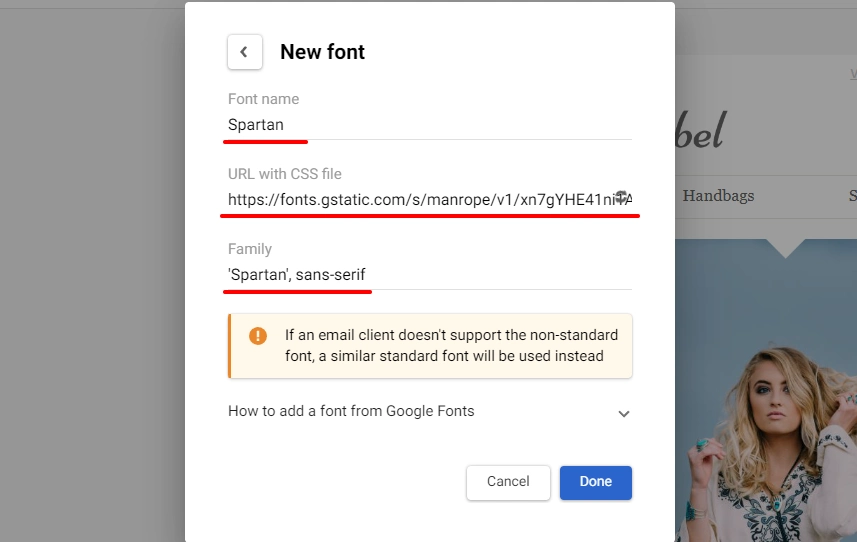
- In the New font window, enter the font parameters:
- Font name
- URL with CSS file
- Family
All fields must be filled.
You can get font parameters in one of the following ways:
- using the Google Fonts library (or another font library),
- creating your font.
- Click Done.
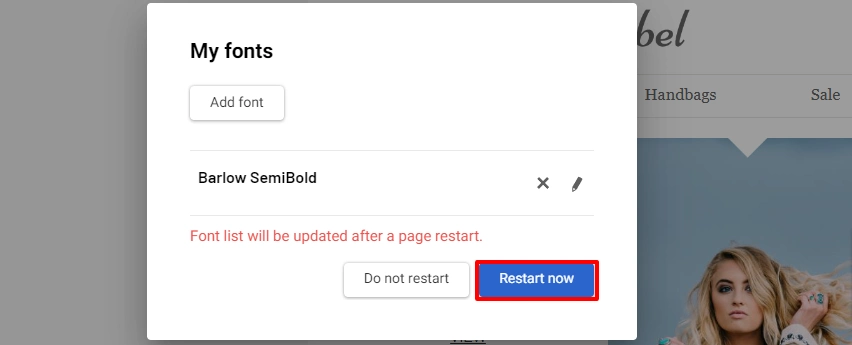
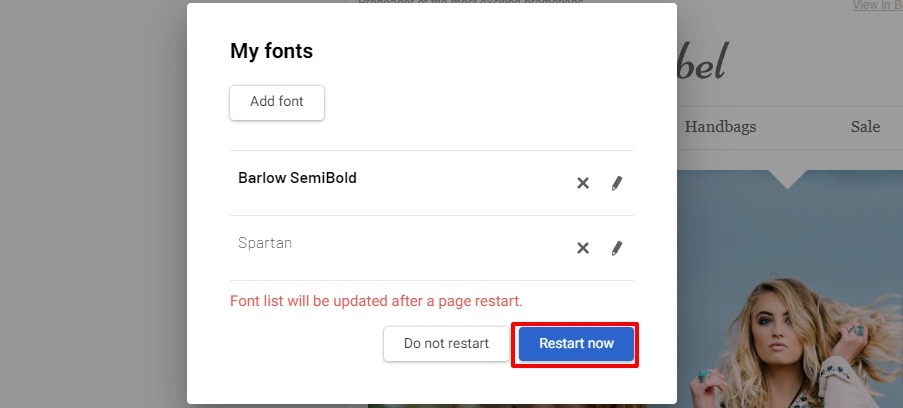
- Confirm page restart.
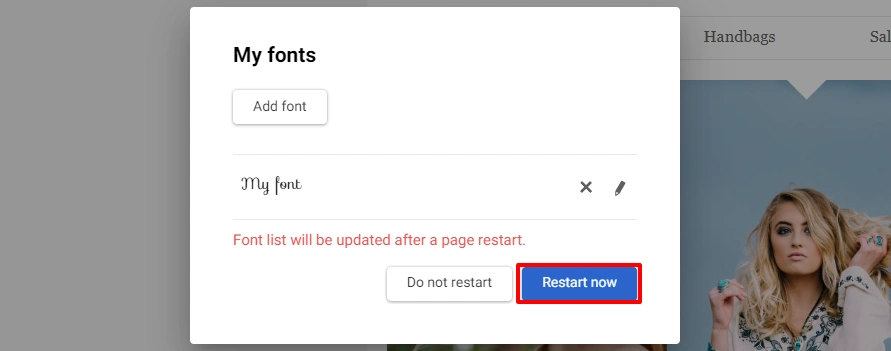
After restarting the page, the added font will appear in the general font list.
You can select Do not restart if changes to the message have not been saved. Next, save the message and open it again – the font will become available.
Adding a Font from Google Fonts
- Go to fonts.google.com
If you know the font's name, use the search or filter fonts by category, language, and properties (number of styles, thickness, angle, width, etc.). Also, you can sort fonts by trending, popularity, novelty, or name.
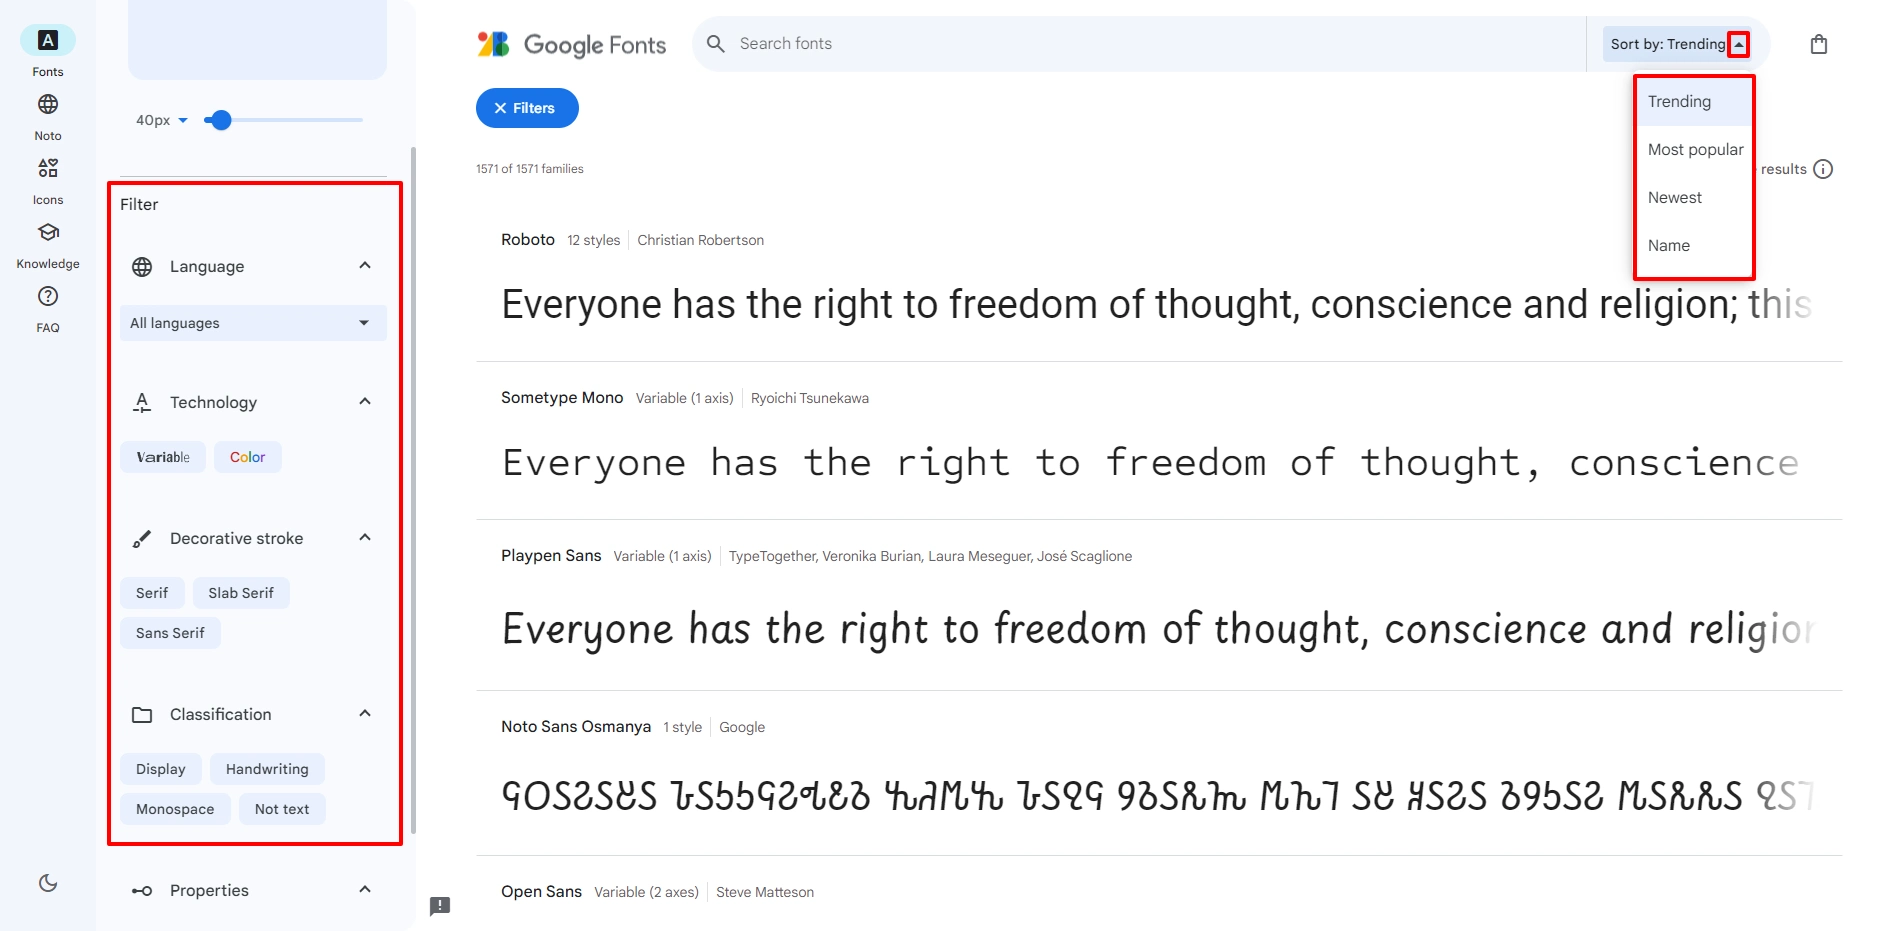
ImportantSelect only one font style because several styles will not load simultaneously. For 2 or more styles, add each new one separately after the previous one has been successfully added; for example, first add regular, then medium, bold, etc. They will be added to the editor as different fonts.
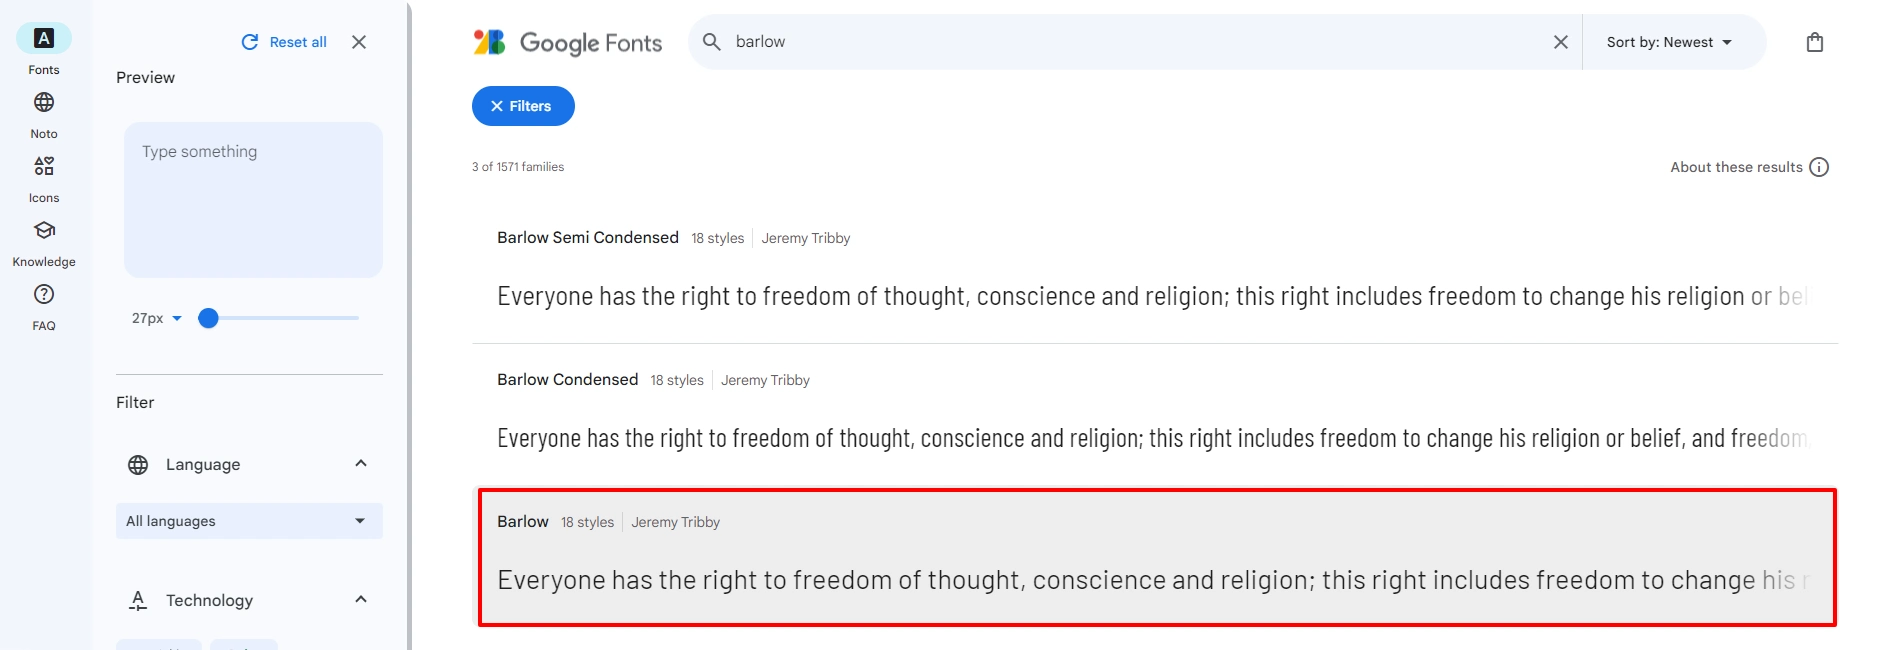
For example, let's add the Barlow with the SemiBold 600 style.
- Click the font field.
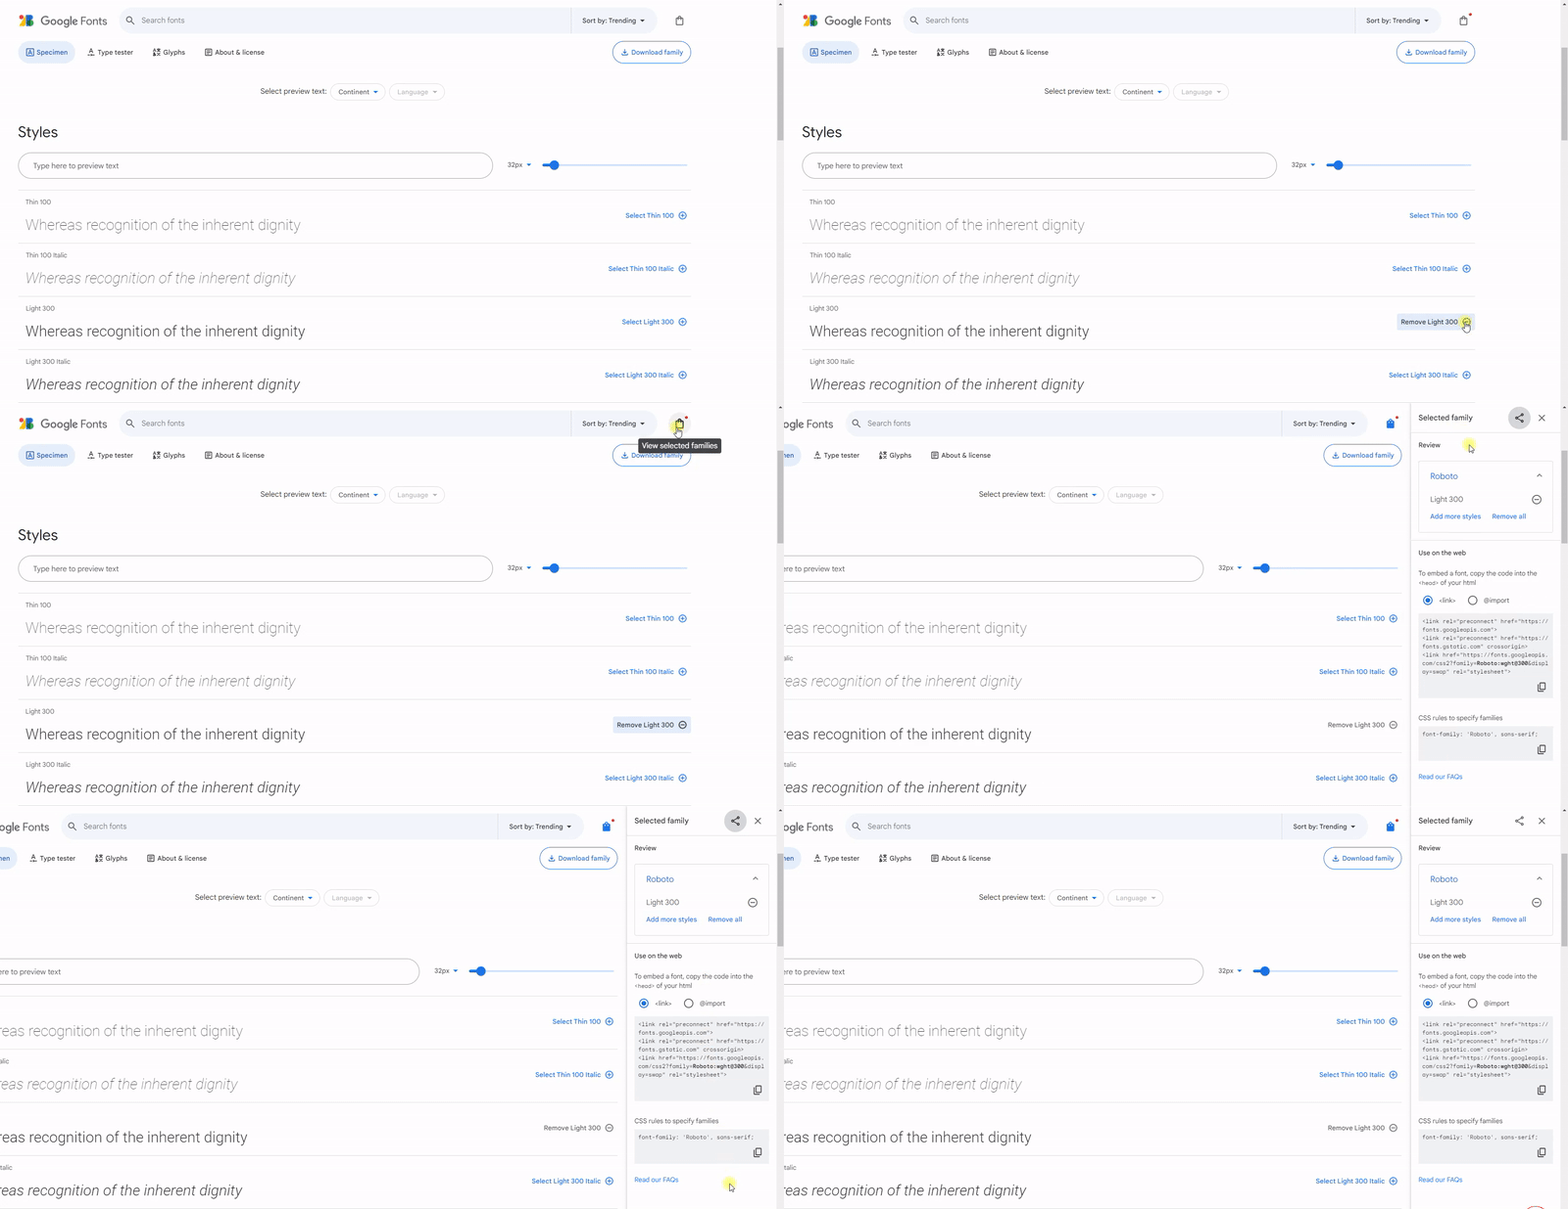
- Click on SemiBold 600 + and click the trash icon to select a font style and display the block with options.
- In the email editor, go to the My fonts tab and click the Add font button.
- Add the Font name in the New font window.
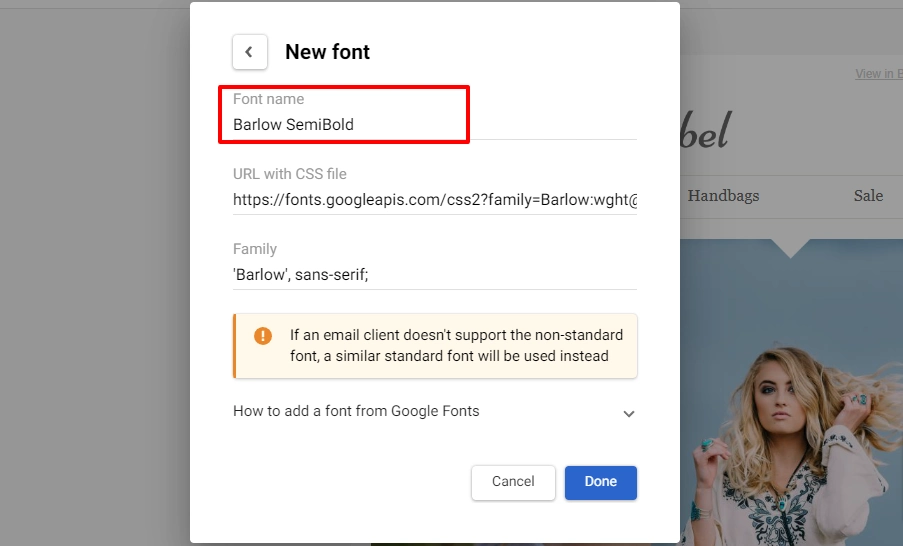
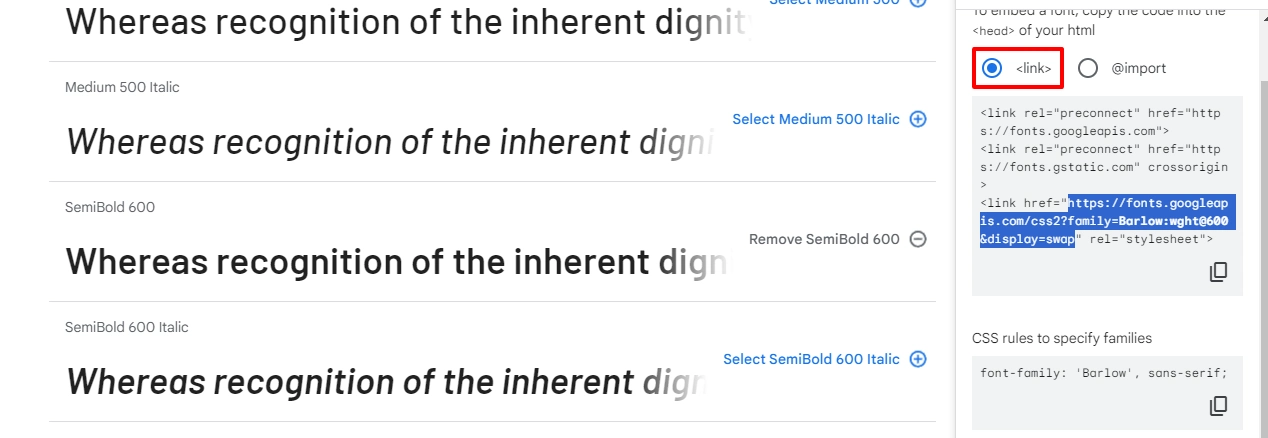
- In the
<link>tab copy the href attribute content as follows:
https://fonts.googleapis.com/css2?family=Barlow:wght@600&display=swap
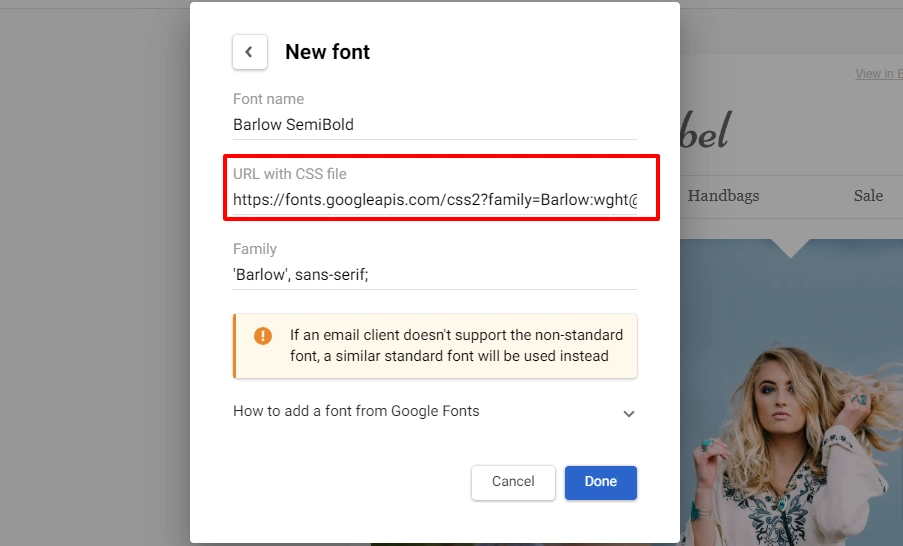
- Insert the copied link in the URL with CSS file field.
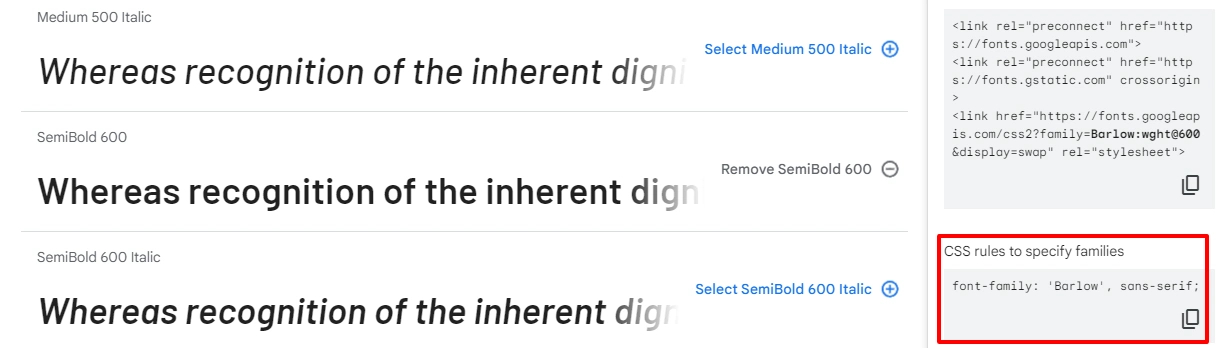
- Copy the family name from the CSS rules to specify families section in one of the formats::
- Barlow
- 'Barlow'
- 'Barlow', sans-serif
- 'Barlow', sans-serif;
- Insert the family name in the Family field and click Done.
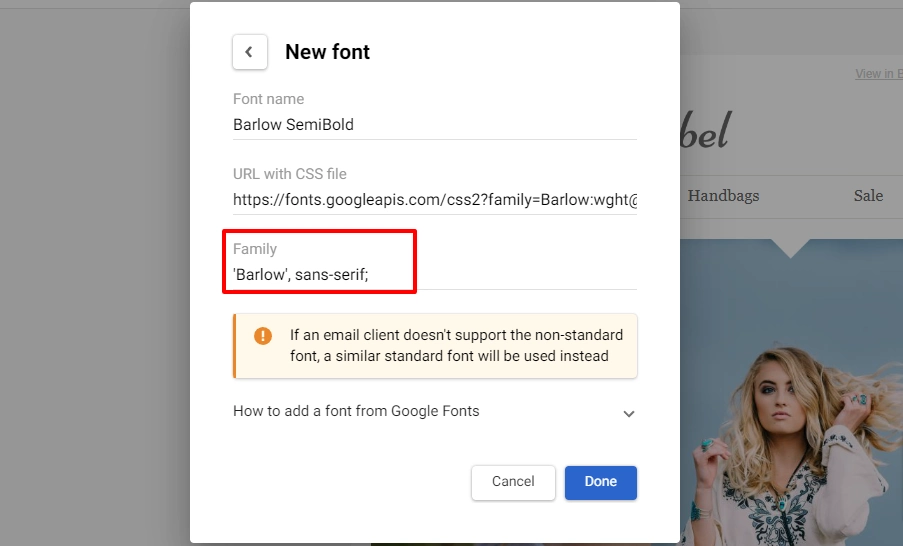
ImportantThe value for Family must be copied directly from the fonts’ library. The font with a random name will be invalid.
- Click Restart now and confirm the page restarting.
Adding Your Own Font
Let's look at the Font Squirrel resource as an example.
To upload your font, you need to add the link to your server CSS file in the URL with CSS file field
- Go to fontsquirrel
- Prepare and upload the TTF format font file and click Upload fonts.
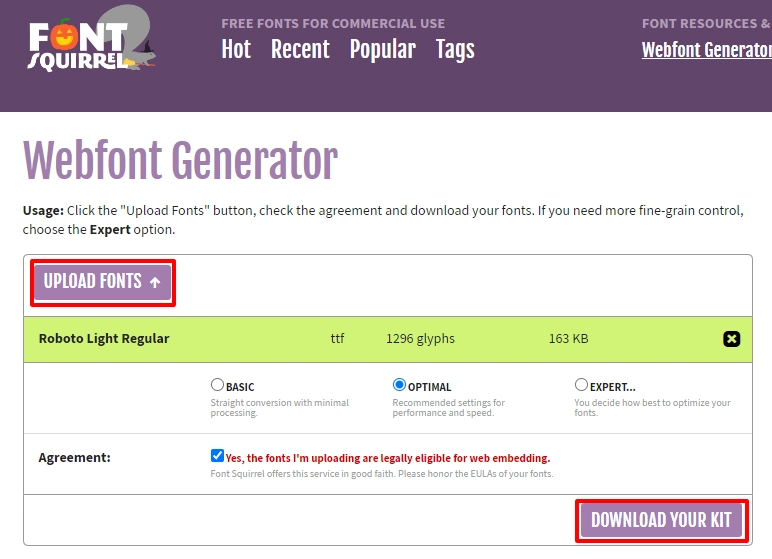
- Click Download your kit and download the generated archive with stylesheet.css file.
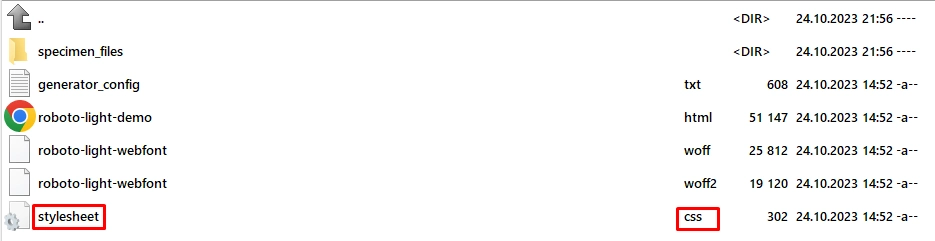
- Add src to the file
stylesheet.cssto your server with the necessary font in the formatwoff2(the script in this format would be in the kit), for example
@font-face {
   font-family: 'Spartan';
   font-style: normal;
   font-weight: 200;
   font-display: swap;
   src: url(<https://fonts.gstatic.com/s/manrope/v1/xn7gYHE41ni1AdIRggOxSuXd.woff2>) format('woff2');
unicode-range: U+0400-045F, U+0490-0491, U+04B0-04B1, U+2116;- Upload the
stylesheet.cssfile to the server. - In the email editor, go to the My fonts tab and click the Add font button.
- In the New font window, add the font name, URL with CSS file, family, and click Done.
- Confirm page restart.
Using the Added Font
You can use all fonts in email messages after adding them.
- Go to message and select the text.
- Click the Font tab and select the required one.
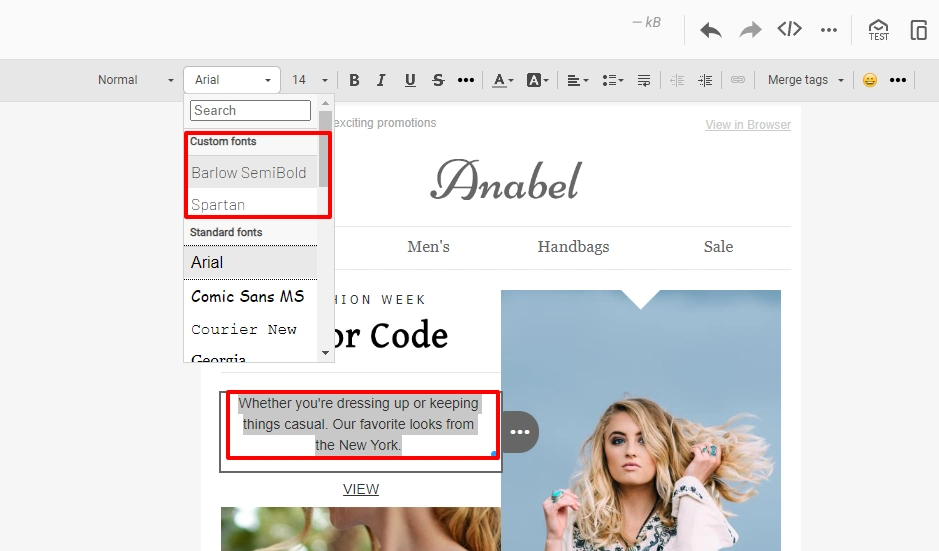
- A font will be applied to the selected text.
Editing/Deleting the Font
- Go to My fonts in the email editor.
- Click the pencil icon to edit or the cross icon to delete the font.
Important Notes
- If the font isn’t displayed in the email, check if it's available on the device you're viewing the email on. If it is not there, the text will be displayed in a standard font.
- Some fonts are only supported for languages that use the Latin alphabet and can’t be used for languages that use the Cyrillic alphabet.
- It is better not to use custom fonts for the main text but to place them on images; for example, add a banner to the text.
- The email subject line and preheader will be displayed in a standard font determined by the email client.
- When using a custom font, think about how it would look in email clients that don't support it. The text with the standard font may get bigger which may distort the layout. Test the email, configure an alternative font family, size and spacing for a correct display.
Updated about 4 hours ago